background image

10

11

N

AMES OF PARTS

* This camera is a sophisticated optical instrument. Care should be taken to keep

these surfaces clean. Please read the care and storage instructions in the back of
this manual (p. 122).

Camera body

Data panel (p. 13)

Shutter-release button

Lens*

The USB port, AV-out terminal, and DC termi-
nal are located behind the terminal cover.

Self-timer/
Remote-control 
lamp (p. 42)

Flash (p. 32)

Digital-subject-program button (p. 29)

Strap eyelet (p. 15)

Viewfinder* (p. 12)

LCD monitor*

Menu button 

Flash mode/Information button (p. 32, 34)

Power/Access
lamp (p. 22)

QV/ Delete button (p. 35)

The tripod socket is located on
the bottom of the body.

Speaker

Microphone

Remote-control 

receiver

Mode dial (main switch)

Viewfinder window*

Battery-chamber door (p. 14)

Exposure-compensation button (p. 51)

Controller 

Display button (p. 31, 36)

Card-slot door (p. 18)

Summary of Contents for DiMAGE F300

Page 1: ...INSTRUCTION MANUAL E...

Page 2: ...e the eye with plenty of fresh water and contact a doctor If fluid from the batteries makes contact with your skin or clothing wash the area thoroughly with water Tape over lithium battery contacts to...

Page 3: ...heat or smoke discontinue use Immediately remove the batteries taking care not to burn yourself as the batteries become hot with use The continued use of a damaged product or part may cause injuries...

Page 4: ...ewing and deleting images 35 Display button playback mode 36 Display button Quick View 36 Enlarged playback 37 Auto recording mode advanced operation 38 Navigating the auto recording mode menu 38 Digi...

Page 5: ...ring an index print 91 Copy and E mail Copy 92 Viewing images on a television 94 Setup mode controlling the camera s operation 95 Navigating the setup menu 96 LCD monitor brightness 98 Formatting memo...

Page 6: ...cated behind the terminal cover Self timer Remote control lamp p 42 Flash p 32 Digital subject program button p 29 Strap eyelet p 15 Viewfinder p 12 LCD monitor Menu button Flash mode Information butt...

Page 7: ...indicator p 70 77 87 Exposure mode indicators p 58 Because the optical viewfinder and the lens are slightly separated the image seen through one is not exactly the same as the other this is called pa...

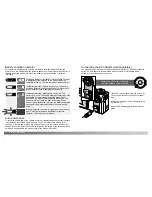
Page 8: ...hem with a battery charger suitable for complex electronic equipment Consult your vendor about an appropriate charger Installing AA batteries Install the AA batteries as shown in the diagram make sure...

Page 9: ...uring periods of heavy use Always turn off the camera before changing between power supplies Connecting the AC adapter sold separately Auto power save To conserve battery power the camera will turn of...

Page 10: ...ll automatically be displayed on the monitor and three dashes will be displayed on the data panel frame counter Open the card slot door 1 from the fingernail notch at the bottom of the camera Insert t...

Page 11: ...he menu language may also have to be set To change the language see the camera notes on the following page Turn the mode dial on the top of the camera to the setup position The camera will turn on and...

Page 12: ...g vertical pictures hold the camera so that the flash is above the lens with the grip to the top Take care not to cover the lens with your fingers or the strap Handling the camera This section covers...

Page 13: ...auto recording mode uses advanced technology to make photography as effortless as possible Automatic Digital Subject Program Selection optimizes exposure color and image processing settings for each...

Page 14: ...ing If the subject lock is lost the monitor icon will change from white to red but the focus lamp will continue to glow steadily For more about Subject Tracking AF see page 64 When the AF system canno...

Page 15: ...ect programs cannot be used in the multi function recording mode For information on individual subject programs see page 30 Digital subject program button 1 Press the shutter release button partway do...

Page 16: ...optimized to produce sharp colorful landscapes With bright outdoor scenery Automatic Digital Subject Program Selection activates this mode with distant subjects a wide angle lens setting The flash wi...

Page 17: ...odes The orange flash lamp next to the viewfinder indicates the status of the flash When the lamp blinks quickly the flash is charging and the shutter will not release The lamp glows steadily when the...

Reviews: