


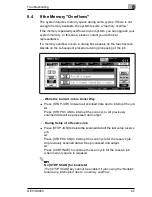


8
Troubleshooting
8-4
Di551/Di650
If there are any other technical problems:
G
switch the system off,
G
remove the power plug from the outlet and
G
contact the technical representative.
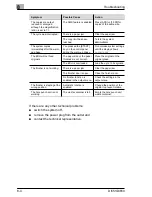
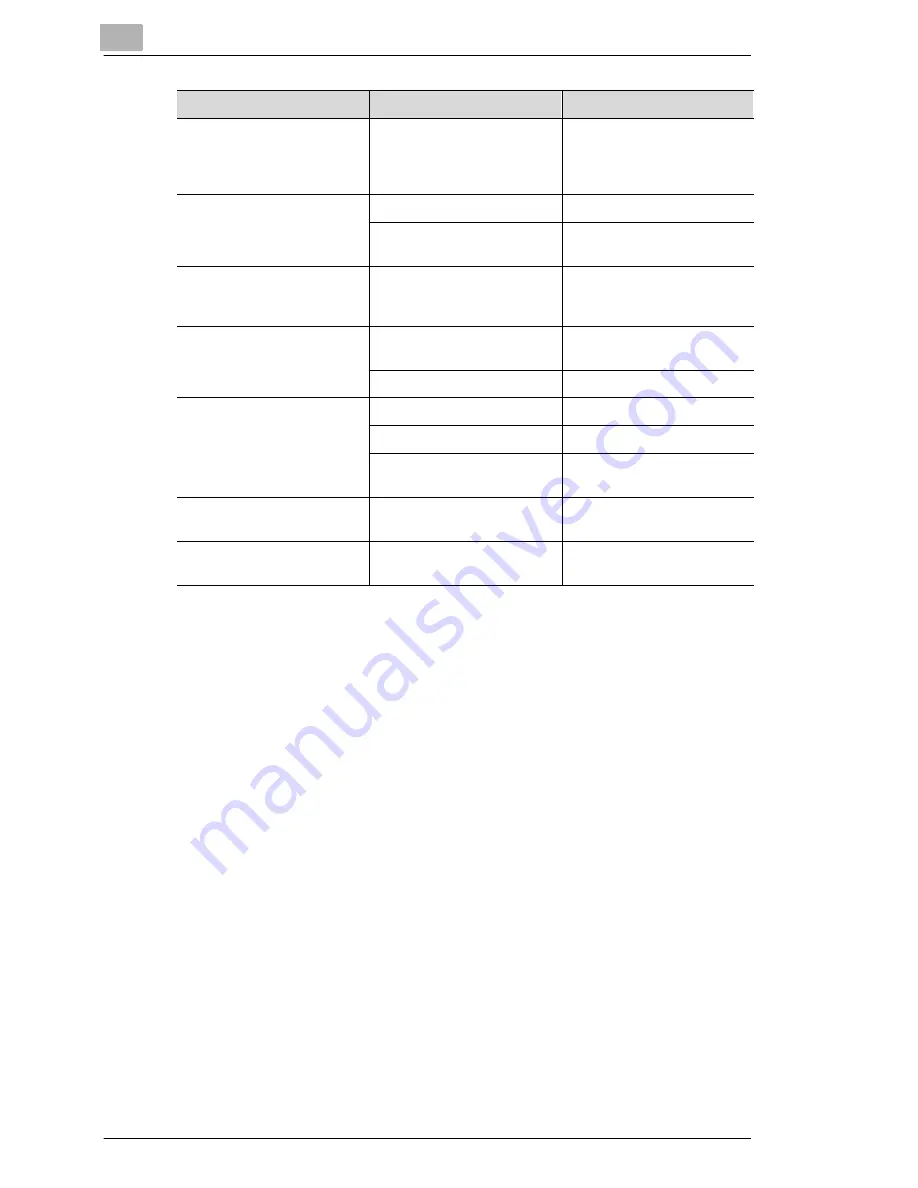
The copies are output
reduced or enlarged
although the magnification
ration is set to 1:1.
The AMS feature is enabled.
Press [APS] or [1.000] for
copies of the same size.
The cycle was interrupted.
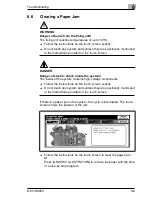
There is a paper jam.
Clear the paper jam.
The copy limit has been
reached.
Talk to the system
administrator.
The system copies
immediately after the warm-
up phase.
You pressed the [START]
key on the control panel
during the warm-up phase.
Do not make system settings
until the display shows
copier ready
.
The EDH will not feed
originals.
The paper size or the paper
thickness is not correct.
Place the original on the
original glass.
The EDH is overloaded.
Load the up to 100 originals.
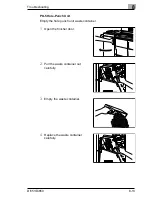
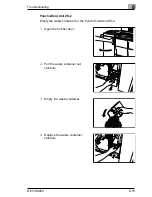
The finisher is not working.
There is a paper jam.
Clear the paper jam.
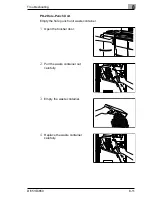
The finisher door is open.
Close the finisher door.
No finisher function is
enabled in the output menu.
Check the settings in the
output menu.
The finisher is stapling at the
wrong position.
Automatic rotation is
enabled.
Change the position of the
original to prevent rotation.
The hole punch unit is not
working.
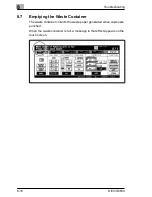
The waste container is full.
Empty the hole punch unit
waste container.
Symptom
Possible Cause
Action
Summary of Contents for Di551
Page 1: ...The essentials of imaging www minoltaeurope com User Manual Di551 Di650 ...
Page 2: ......
Page 8: ...IVZ 6 Di551 Di650 ...
Page 22: ...1 Introduction 1 14 Di551 Di650 ...
Page 82: ...2 Getting to Know Your System 2 60 Di551 Di650 ...
Page 98: ...3 Initial Steps 3 16 Di551 Di650 ...
Page 122: ...4 Basic Functions 4 24 Di551 Di650 ...
Page 124: ...5 Applications CD 5 2 Di551 Di650 ...
Page 126: ...6 Network Functions CD 6 2 Di551 Di650 ...
Page 128: ...7 Settings in Key Operator Mode CD 7 2 Di551 Di650 ...
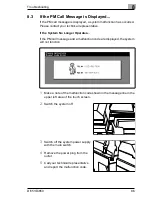
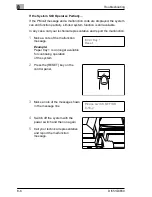
Page 140: ...8 Troubleshooting 8 12 Di551 Di650 5 Close the finisher door ...
Page 142: ...8 Troubleshooting 8 14 Di551 Di650 5 Close the finisher door ...
Page 144: ...8 Troubleshooting 8 16 Di551 Di650 5 Close the finisher door ...
Page 170: ...9 Appendix 9 26 Di551 Di650 ...