7
Basic Operations
Setting the Screen
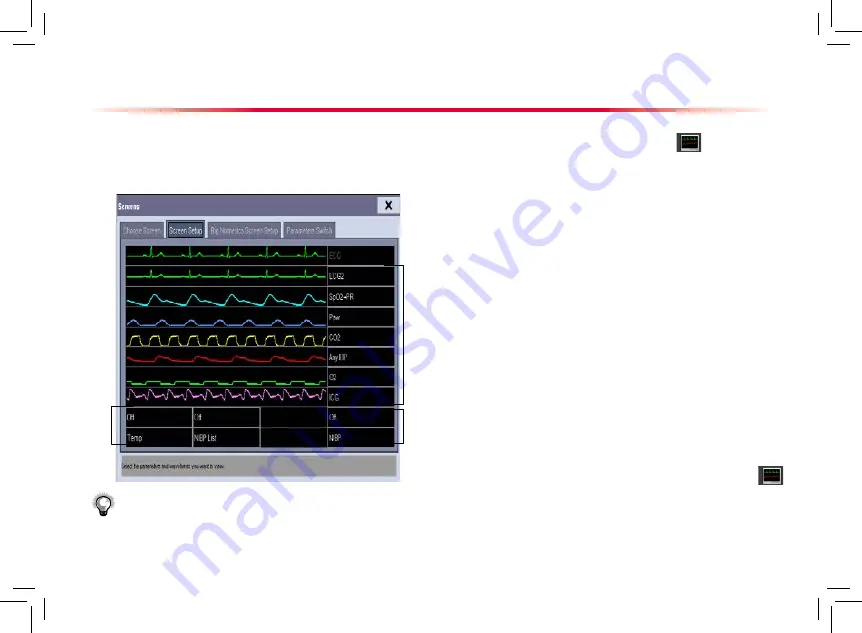
You can enter the [
Screen Setup
] window as shown below by selecting the [
Screen Setup
] button
in the prompt
message area. In this window, you can allocate the positions of the parameters and waveforms. The parameters or waveforms
whose positions are not allocated will not be displayed.
Area A
Area B
Area C
The ECG parameter and the first ECG waveform always display in
the first row. The configurable areas can be classified as Area A,
Area B, and Area C.
In Area A, you can choose to display the parameters (having
waveforms) and their waveforms. Each parameter and the
associated waveform are displayed in the same row.
In Area B, you can choose to display the parameters and their
waveforms. When there is no parameter displayed in area C, both
the parameters and their waveforms will be displayed in area B.
Otherwise, only the parameters will be displayed.
In Area C, you can choose to display Timer and all the parameters
whose associated waveforms will not be displayed.
The screen can automatically adjust to ensure the best view based
on your screen setup.
If no corresponding parameter or waveform is displayed after the
module is inserted, you should perform the following inspections:
Check the connection between the module and lead, cable,
sensor, or external device.
Check whether there are the [
The display setup for XX is
disabled
] message and the flashing [
Screen Setup
] button
in the prompt message area. If yes, select this button to enter the
[
Screen Setup
] window for the desired display configuration.
Check that the parameter is switched on in the [
Parameters
Switch
] window.
Note
:
The parameters whose positions are not allocated in the [
Screen
Setup
] window will not be displayed. However, the monitor can
still give alarms of these parameters.


