background image

www.midtronicseurope.com


EBT-965P

3

Contents

1: Introduction 

5

Personal Precautions 

5

Symbols Conventions 

5

Description 5
Consent to Collection and Use of Data: 

5

Controls & Connections 

6

Main Menu 

6

Initial Power Up 

7

Inspecting the Battery 

7

Testing Out-of-Vehicle 

7

Testing In-Vehicle 

8

Connecting To A Battery 

8

Setting User Preferences 

8

2 – Car 

9

Battery Test 

9

Battery Test Results 

10

System Test 

11

3 – New Battery Test 

12

Battery Test 

12

4 – History 

14

5 – Messages 

15

Accessing Messages 

15

Message Types 

15

6 – Settings 

16

Tool 16

Display 16
Date & Time 

16

Print Format 

16

Email Format 

16

Work Order 

17

System Test 

17

Version 17
Check For Updates 

17

Shop Settings 

17

Admin 17
Shop Info 

18

Users 18

Network 19

WiFi 19

7 – Maintenance & Troubleshooting 

20

Tester Cables 

20

Cleaning Clamps 

20

Handling Test Cables 

20

Storing Test Cables 

20

Testing The Cable Set 

20

Summary of Contents for EBT-965P

Page 1: ...www midtronicseurope com EBT 965P 1 For testing 12 volt automotive batteries User Manual EBT 965P Battery System Analyzer DEC 2019 167 000878EN B ...

Page 2: ...blank page behind cover ...

Page 3: ...Preferences 8 2 Car 9 Battery Test 9 Battery Test Results 10 System Test 11 3 New Battery Test 12 Battery Test 12 4 History 14 5 Messages 15 Accessing Messages 15 Message Types 15 6 Settings 16 Tool 16 Display 16 Date Time 16 Print Format 16 Email Format 16 Work Order 17 System Test 17 Version 17 Check For Updates 17 Shop Settings 17 Admin 17 Shop Info 18 Users 18 Network 19 WiFi 19 7 Maintenance ...

Page 4: ...r Roll 22 Printer Problems 23 The internal printer will not print 23 Display Problems 23 The display does not turn on 23 The display flickers or is dim 23 Internal Batteries 23 Replacing The Internal Batteries 24 Appendix Recommended Test Procedure 25 Appendix B Test Results Decision Tables 26 Battery Test Results 26 Starter Test Results 27 Diode Test Results 28 ...

Page 5: ...e analyzer cords and cables away from moving engine parts 9 Remove any jewelry or watches before you start servicing the battery 9 Use caution when working with metallic tools to prevent sparks or short circuits 9 Never lean over a battery when testing charging or jump starting Symbols Conventions Description Symbol Description The safety symbol indicates instructions for avoiding hazardous condit...

Page 6: ...Fi signal strength Bluetooth connectivity status Controller internal battery status Main Menu Selection Area When displayed the Screen Arrows show which ARROW key on the keypad to press to display other icons or screens When displayed under a list of options the Screen Arrows show which keypad arrow to press to highlight a character or item in a list Additional Screens The dots at the bottom or si...

Page 7: ... to boot up while testing the integrity of the internal software Test Preparation Inspecting the Battery Before starting the test visually inspect the battery for Cracked buckled or leaking case If you see any of these defects replace the battery Corroded loose or damaged cables and connections Repair or replace them as needed Corrosion on the battery terminals and dirt or acid on the case top Cle...

Page 8: ... an out of vehicle test At the start of the test make sure all vehicle accessory loads are off the key is not in the ignition and the doors are closed Connecting To A Battery Do not connect the tester to a voltage source greater than 30 Vdc Connect the clamps to the tester the red clamp to the positive terminal and the black clamp to the negative terminal If the clamps are reversed when connected ...

Page 9: ...ange to P N which leads to the part number list Rating Description Range EN European Norms The battery is required to meet a voltage of 7 5V after 10 seconds 100 to 3000 SAE Society of Automotive Engineers norm The test specifies that the battery at a temperature of 18 C will deliver a current equal to the Cold Cranking Amps for 30 seconds with the voltage staying above 7 2 volts 100 to 3000 DIN D...

Page 10: ...the Main Menu Email 6 Printer Icons are color coded to indicate status Battery Test Starter Test Alternator Test Green Green All test parameters were completed and have passed Red Red The battery has failed the test Yellow Yellow Some test parameters may require further testing Gray Gray Insufficent data to perform the test Refer to Appendix B Decision Tables for a complete explaination of the pos...

Page 11: ...e System Test 1 Start the vehicle s engine and let it idle 2 Ensure all accessories High Beam headlights ventilation blower etc are off and select Next The analyzer tests the alternator output 3 When prompted rev and hold the engine to between 2000 to 3000 rpm The analyzer tests the alternator output again 4 When prompted Idle the engine and and select Next 5 Turn on the high beam headlights and v...

Page 12: ... will change to P N which leads to the part number list Rating Description Range EN European Norms The battery is required to meet a voltage of 7 5V after 10 seconds 100 to 3000 SAE Society of Automotive Engineers norm The test specifies that the battery at a temperature of 18 C will deliver a current equal to the Cold Cranking Amps for 30 seconds with the voltage staying above 7 2 volts 100 to 30...

Page 13: ...lts Test Results Battery Good Battery Rated 575 CCA Voltage 12 72 V Measured 599 CCA Temperature 24C Type Flooded Send Results Done Test Results Battery Test To print or send the test results to a configured printer select Send Results To return to the Home Screen select Done Refer to Appendix B Decision Tables for a complete explaination of the possible test results ...

Page 14: ... Vehicle 12 07 2017 3 16 PM 1 10 For Out Of Vehicle tests see Appendix B Test Results Decision Tables for full screen descriptions 2 Select a vehicle record to view the results or select Search Options to search for records by test result decision 3 For In Vehicle tests the Summary screen is displayed Test Results Summary Good Battery Cranking Normal Charging Normal Send Results Done Test Results ...

Page 15: ...messages The number does not include non critical Notifications Unread Critical Messages Read Critical Messages 1 Tap Messages on the Main Menu screen Messages 93 Critical 1 2 Authentication failed Check login credentials An update is available Apply update now Notifications 2 1 record was sent successfully at 3 20 PM 10 7 2016 2 emails were sent successfully at 10 46 AM 10 8 2016 2 Tap to read a ...

Page 16: ...eriods separators Date Time Use to return to the Display menu Date Format Select Month Day Year MM DD YYYY or Day Month Year DD MM YYYY Date Use or to advance the month day and year Use or to advance left or right and move to Cancel or Next Select Next to save the date or Cancel to exit without saving June 18 2018 CANCEL NEXT Time Format Select 12 or 24 Hour Format Time Use or to advance the hours...

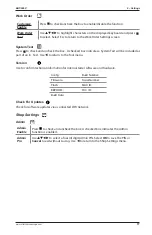
Page 17: ...e included as part of an In Test Use to return to the Tool menu Version Use to confirm technical information for internal tester software and hardware Config Build Number Firmware Serial Number Flash MAC ID EEPROM FCC ID Build Date Check For Updates Check for software updates via a connected WiFi network Shop Settings Admin Admin Enable Press to check and uncheck the box A checked box indicates th...

Page 18: ...the box A checked box indicates the Enable Users function is enabled Add User Limit 10 With the displayed alphanumeric keyboard use to highlight the desired alphanumeric character Press to select that character Select to access the lower case and symbol character maps Select 123 to access alternative characters Once all of the alphanumeric characters have been entered select Save or Esc to exit wi...

Page 19: ...list of detected WiFi networks is then displayed on the tester screen Press to return to the CVG3 Setup screen Manual Manually enter Security SSID Password Encryption and WEP Keys Press to return to the CVG3 Setup screen IP Setup Manually enter IP Type IP Address Gateway and Subnet Mask Press to return to the CVG3 Setup screen ...

Page 20: ...t cables Because the test cables are the tires of the analyzer they have a certain life expectancy and will wear out eventually However the abuse examples cited above are not covered under warranty To ensure the best performance and longest life of the test cables attach and remove them with care and carry the analyzer and cables together If an inspection or a change in test results indicate that ...

Page 21: ...ACK clamp TEETH Contacts for Small Clamp Contact point for testing at NO TEETH Contact point for testing at TEETH Connecting The Battery Test Cable To prevent damage to the analyzer s circuitry do not connect the analyzer to a voltage source greater than 30 Vdc To connect the battery test cable to the analyzer align the arrow on the cable connector with the arrows on the analyzer s housing Hold th...

Page 22: ... roll of thermal printing paper installed in the paper compartment The roll size is 2 wide by 17 8 in diameter Replacement rolls are available at most office supply stores The analyzer uses only thermal printing paper NOTE Due to production variances some paper roll diameters may be too large Please remove paper from roll to recommended 17 8 diameter DO NOT force cover to close if roll is too larg...

Page 23: ...ections to the battery The vehicle battery may be too low to power the printer Connect to a battery with at least 11 5 volts Verify that the paper is properly installed Verify that the paper sensor is clean and undamaged Display Problems The display does not turn on Check the connection to the battery The analyzer s internal batteries may need to be replaced The display flickers or is dim The cont...

Page 24: ... a Phillips screwdriver to remove the screw securing the door to the battery compartment Battery Cover Screw 3 Lift the door at the tab and place it aside 4 Remove the discharged batteries 5 Insert new batteries as shown Make sure the positive and negative terminals are positioned correctly 6 Reposition the door on the battery compartment 7 Reinsert and tighten the screw ...

Page 25: ...dditional process initial battery analysis can take up to 60 seconds to complete IMPORTANT Always begin each test by connecting the tester clamps to the battery being tested The testing process begins as soon as the clamps are connected The EBT 965P provides a battery decision along with additional detailed information on battery cranking and reserve health Press to return to the previous screen s...

Page 26: ...ll compromise the battery s ability to provide power to the vehicle and hold a charge over time The reserve health of the battery is low Low reserve health of the battery could impact the ability of the battery to provide power for the electronics systems in the vehicle The battery should be replaced Good Recharge The battery shows good cranking performance but low charge and low reserve health pe...

Page 27: ...erformance Replace the battery to prevent a no start situation in your vehicle Warning The battery shows low cranking performance Replace the battery to prevent a no start situation in your vehicle No Test No Test No Test Conditions have prevented a test of the battery reserve health Ensure that there are no loads on the battery before attempting any retest Cycling Required Battery needs to be cyc...

Page 28: ... battery Check belts to ensure the alternator is rotating with the engine running Check alternator connections to and from the battery If loose or heavily corroded clean or replace the cable and retest HIGH OUTPUT Alternator voltage to the battery exceeds normal limits of a functioning regulator Check for loose and normal ground connections If no connection problems are found replace the regulator...

Page 29: ...www midtronicseurope com Appendix B Test Results Decision Tables EBT 965P 29 Decision Action OPEN PHASE Replace the alternator OPEN DIODE SHORTED DIODE ...

Page 30: ...otected by one or more U S and foreign patents For specific patent information contact Midtronics Inc at 1 630 323 2800 Midtronics products are warranted to be free of defects in materials and workmanship for a period of two 2 year from date of purchase Exide and the manufacturer will at our option repair the unit or replace the unit with a remanufactured tester This limited warranty applies only ...

Reviews: