background image

MNBE-8D2x2 Instructions (continued) 


6 | 

P a g e                                                                                                                       1 0 - 2 4 5 - 1       R E V :   A


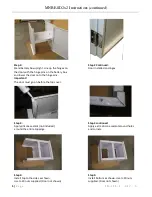
Step 7: 

Apply silicone sealant to top edge and 
Install back cover, secure from the inside 
with ¼ Screws provided. 
 

Step 8: 

Install ground wire from the shelf to the 
door with #10 nuts provided. 

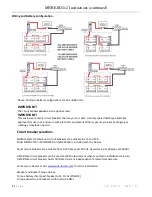
Assembled, complete and ready for batteries. 
When adding breakers use 10-32 X 3/8 screws with 
lockwashers for the battery disconnect breaker. 
Use 6-32 X 5/16 screws with lockwashers for the C-Series 
panel mount breakers. Use of longer screws may result in 
damage to the breaker. 

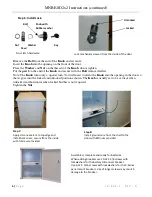
Unlocked 

Locked 

Remove the 

Bolt

 from the end of the 

Knob

 and set aside. 

Insert the 

Knob

 into the opening on the front of the door. 

Place the 

Washer

 and 

Nut

 on the threads of the 

Knob

, do not tighten. 

Put the 

pawl

 on the end of the 

Knob

 and secure with the 

Bolt

 removed earlier. 

Note: The 

Knob

 turns only a quarter turn. You will need to orient the 

Knob

 into the opening in the door so 

that it goes into the locked and unlocked positions shown. The 

Knob

 is usually set to be vertical when 

unlocked and horizontal when locked but this is not required. 
Tighten the 

Nut


Knob with 
Rubber washer 
 

Door latch hardware 
 

Nut 
 

Washer 

Key 
 

Bolt 

Pawl 

Lock mechanism viewed from the inside of the door. 
 

Step 6: Install Lock. 


Summary of Contents for MNBE-8D2x2

Page 1: ...a single 175 or 250 amp battery breaker and up to 4 MNDC panel mount breakers 1 to 100 amps available Breakers not included Ships un assembled MNBE 8D2x2 Deluxe Battery Enclosure with locking door an...

Page 2: ...manufacturer of any additional equipment used in the vicinity of the batteries Before installing the battery enclosure read all instructions and cautionary markings in or on any connected electrical...

Page 3: ...le couver Pour toute r paration ou service d entretien consulter un agent sp cialis Il y a peut tre plusieurs sources d alimentation dans cette system D brancher toutes les interrupteurs avant toute d...

Page 4: ...unpack the painted pieces onto carpet or other soft surface to avoid scratching Assembling the MNBE 8D2x2 and MNBE 8D2x2 Deluxe Assembly of the MNBE 8D2x2 and MNBE8D2x2 Deluxe is essentially identica...

Page 5: ...top edge Step 3 continued Apply extra silicone sealant around holes and corners Step 4 Install top to the sides as shown Use 20 nuts supplied Door not shown Step 2 Stand battery box upright Line up th...

Page 6: ...o the breaker Unlocked Locked Remove the Bolt from the end of the Knob and set aside Insert the Knob into the opening on the front of the door Place the Washer and Nut on the threads of the Knob do no...

Page 7: ...akers hold 100 rated current independent of ambient temperature Contact your dealer or visit www midnitesolar com for more information Breaker and Busbar Torque Values Torque battery disconnect breake...

Page 8: ...MNBE 8D2x2 Instructions continued 8 P a g e 1 0 2 4 5 1 R E V A...

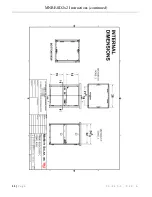
Page 9: ...MNBE 8D2x2 Instructions continued 9 P a g e 1 0 2 4 5 1 R E V A...

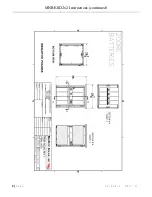
Page 10: ...MNBE 8D2x2 Instructions continued 10 P a g e 1 0 2 4 5 1 R E V A...

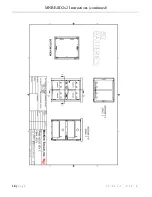
Page 11: ...MNBE 8D2x2 Instructions continued 11 P a g e 1 0 2 4 5 1 R E V A...

Page 12: ...NE Arlington WA 98223 360 403 7207 Purchasers must prepay all delivery costs or shipping charges to return any defective MidNite Solar product under this warranty policy Except for the warranty that...

Reviews: