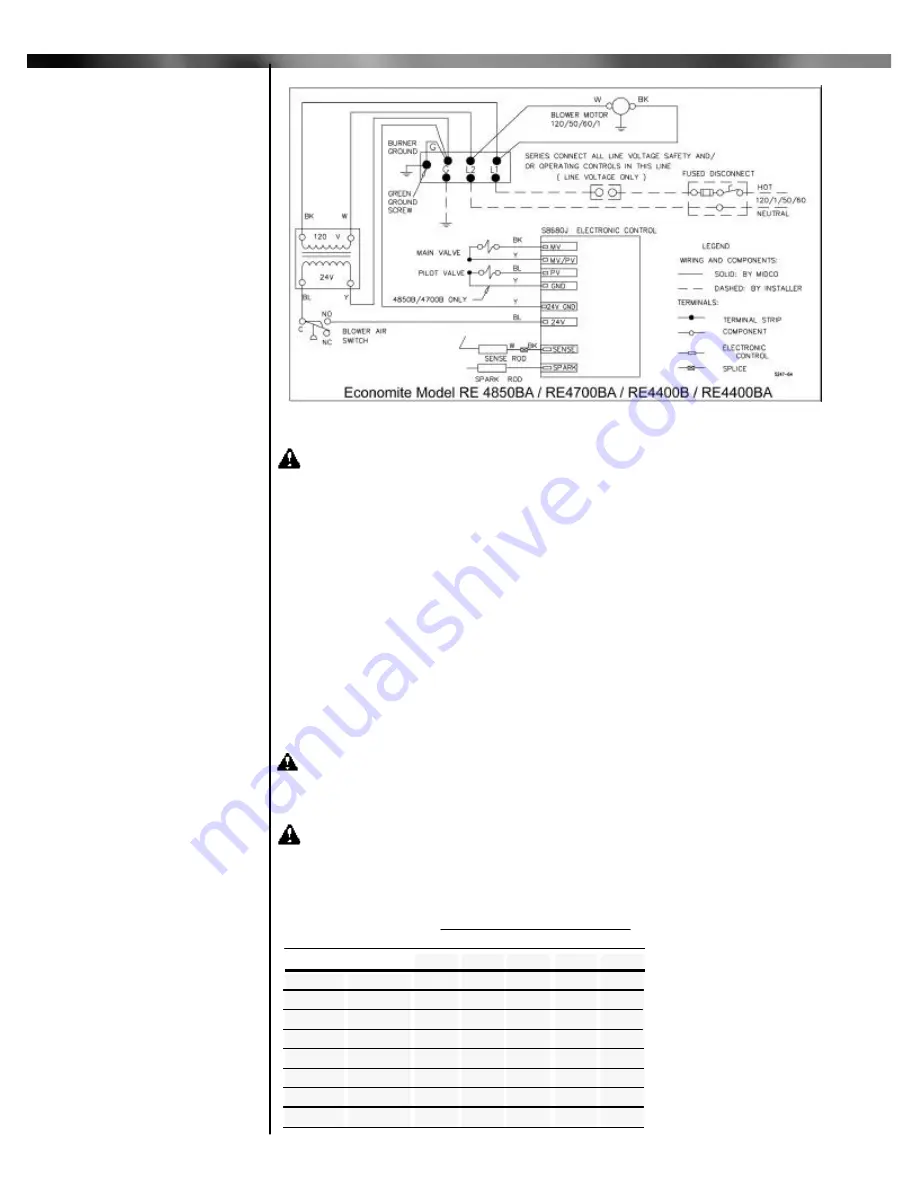
CAUTION:Refer to wiring diagram located on the inside of the burner housing
cover or above wiring diagram.
Installation wiring and grounding to the burner must conform to local codes, or, in their
absence in the
United States
to
National Electric Code, ANSI/NFPA No. 70
latest edition;
in
Canada, to Canadian Electrical Code Part 1, CSA Standard C22.1
?
Use copper wire not less than 14 gage for line voltage wiring. Hook up to a dedicated line
with an on-off disconnect switch and a minimum 10 Amp breaker.
?
The frame of the burner should be well grounded. Normally the piping and/or electric
conduit will provide sufficient grounding. However, a ground lug is located in control box for
positive grounding where insulated pipe couplings are used or where any doubt exists
regarding grounding sufficiency.
?
Confirm that the polarity is correct—hot wire to strip terminal L1, neutral L2—and that the
neutral line is not subject to induced low voltage (check L2 to earth ground) from other
equipment, as that can cause the Ignition Control Module to malfunction.
?
Each installation must include suitable limit control(s). Existing oil burner combination
operating and limit controls are normally NOT SUITABLE for gas burner use.
?
Connect motors used on forced air furnace fans or boiler pumps to a combination limit
control and switch.
?
Set the thermostat heat anticipator for the total current draw handled by the thermostat.
The current draw of the ECONOMITE 24V operating circuit is 0.9 amps.
CAUTION: Label all wires prior to disconnection when servicing controls.
Wiring errors can cause improper and dangerous operation. Verify proper operation
after servicing.
CAUTION: The available gas pressure should be within the limits shown in
SPECIFICATIONS section. Excessive pressure may damage electric valves, regulators
and manual valves. If the supply pressure exceeds the 14.0"W.C. maximum, a suitable
high pressure regulator must be installed between the Main Manual Shut-Off Valve and
burner shut-off valve as shown in Figure 5.
5
Part 1
Installation
Continued
Part 1 Installation
V
Electrical
VI
Piping
Wiring Diagram
Capacities shown are for a
total pressure drop of
0.3"W.C. For 0.5"W.C.
pressure drop, multiply
capacity shown by 1.3 .
Propane capacities shown
are for a total pressure drop
of 0.5” W.C. For higher
permissible pressure drops,
consult your gas supplier.
Table 2:
Schedule 40 NPT
Pipe-Capacity Chart
10
200
590
400
1075
900
40
275
200
500
450
1040
650
75
190
150
360
325
750
475
20
150
400
275
730
600
900
Pipe
Size
3/4
3/4
1
1
1 1/4
1 1/4
1 1/2
1 1/2
Natural
Propane
Natural
Propane
Natural
Propane
Natural
Propane
100
160
300
275
630
400
975
Approximate Capacity -MBH
Pipe Length
Type
of Gas


