background image

10          ScanWizard Industry Reference Manual

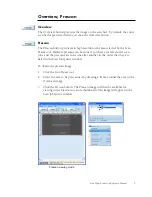
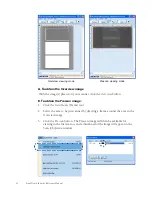
Overview viewing mode

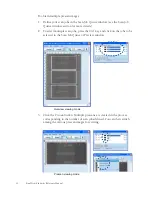
Prescan viewing mode

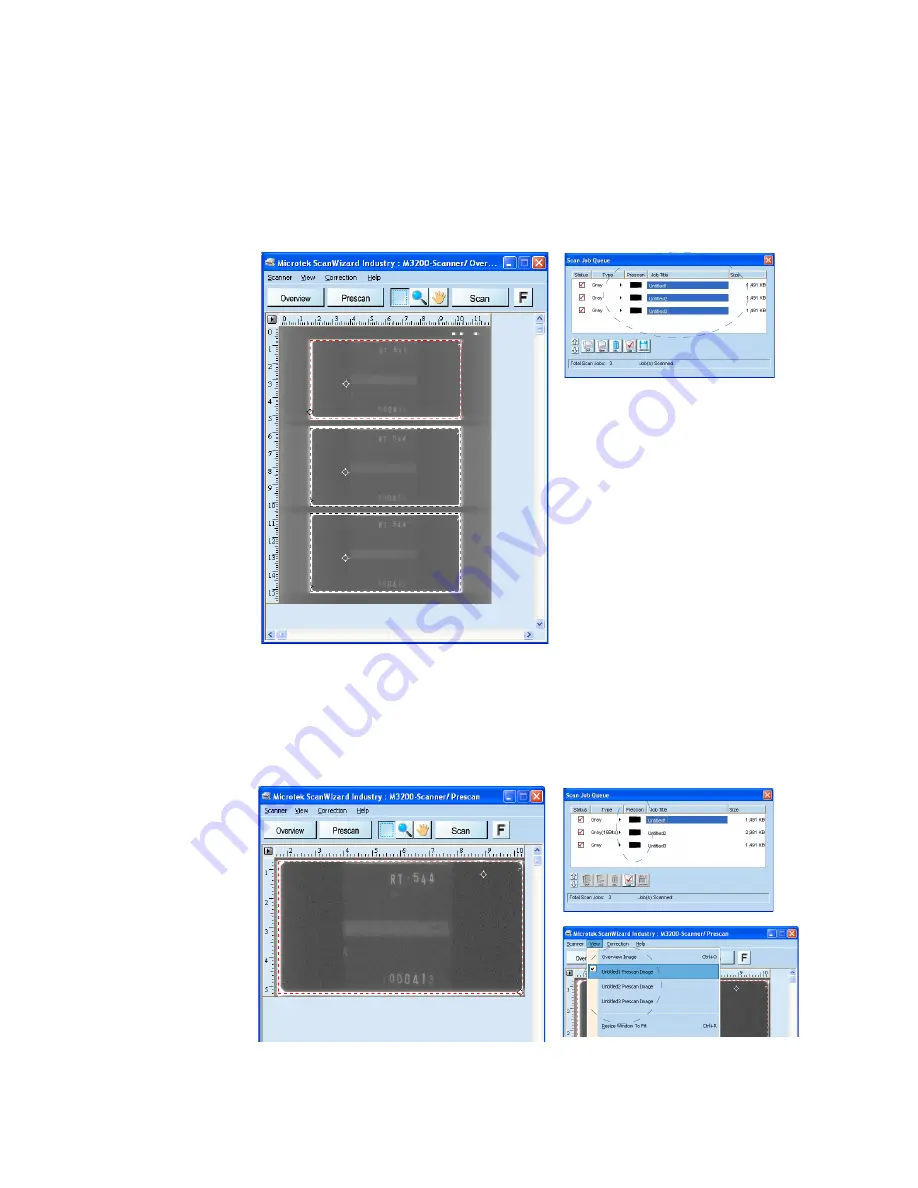
To obtain multiple prescan images:

1.

Define your scan jobs in the Scan Job Queue window (see the Scan Job
Queue window section for more details).

2.

To select multiple scan jobs, press the 

Ctrl  

key and click on the jobs to be

selected in the Scan Job Queue or Preview window.

3.

Click the 

Prescan 

button. Multiple prescans are created in the process,

corresponding to the number of scan jobs defined. You can then switch
among the various prescan images for viewing.

Summary of Contents for ScanWizard Industry

Page 1: ...Reference Manual...

Page 2: ...errors Important Documents that you scan may be pr otected under copyright law The unauthorized use of such documents could be a violation of the rights of the copyright holder Microtek bears no resp...

Page 3: ...Rulers Unit of Measurement 13 Transform 14 The Toolbar 15 Scan Frame Frame T ool 15 Magnify Glass Zoom T ool 16 Pane Move Tool 17 The Scanner Menu 18 Scanner Model 18 Get Current Scanner Info 19 Scann...

Page 4: ...46 Image T ype T ype 47 Resolution Settings 48 Scan Frame Image Size andUnit of Measurement 50 Optimization 52 Darkness 53 The Scan Job Queue Window 56 Elements of the Scan JobQueue window 56 Selectin...

Page 5: ...ference information is divided into three major sections corresponding to the three major windows of the program Preview Settings Scan Job Queue The ScanWizard Industry functions do not apply to all s...

Page 6: ...the ScanWizard Industry is started up The Scan Job Queue window appears when you bring up ScanWizard Industry at the first time You may hide or show it from the View menu and click on the command Hid...

Page 7: ...select Microtek ScanWizard Industry After being launched the main screen will appear but the very first time that ScanWizard Industry is started up the three windows will all appear The next time you...

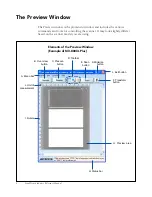
Page 8: ...ools for controlling the scanner It may look slightly differet based on the scanner model you are using Elements of the Preview Window Example of MII 800XL Plus A Menu bar B Overview button C Prescan...

Page 9: ...e Manual 5 Elements of the Preview Window Example of MII 900 Plus A Menu bar B Overview button D Toolbar E Scan button F Transform button G Preview area I Rulers J Unit of measurement H Status bar K M...

Page 10: ...oom tool and Pane Move tool E Scan button This button starts the final scanning process F Transform button This button lets you flip the image horizontally or rotate the image vertically G Preview are...

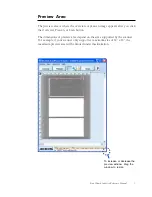
Page 11: ...you click the Overview Prescan or Scan button The dimensions of preview area depend on the sizes supported by the scanner For example if your scanner only supports a maximum size of 12 x 16 the maximu...

Page 12: ...a value greater than 17 for example 20 in the Height H edit box of the Scan Frame settings Then press the Overview button to perform a preview of the image Thereafter the preview area will be resized...

Page 13: ...n Frame tool Multiple prescans can be done if you have several selected scan jobs and the prescans are done one after another in the order that they are listed in the Scan Job Queue window To obtain t...

Page 14: ...see the Scan Job Queue window section for more details 2 To select multiple scan jobs press the Ctrl key and click on the jobs to be selected in the Scan Job Queue or Preview window 3 Click the Presc...

Page 15: ...ox appears key in a file name then select TIFF JPG or J2K as the export file format and click Save to perform the final scan File name This is the file name to store images Save as type This menu box...

Page 16: ...e File Option button is a file compression tool allowing you to save your scanned image with different image quality This button is activated only when the file format is set as TIFF or JPG otherwise...

Page 17: ...d left sides of the Preview window help you with measurement and alignment marking off measurement according to the selected unit The unit of measurement can be selected from the Unit box in the Setti...

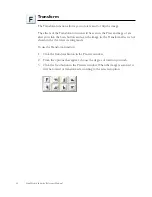
Page 18: ...you click the Scan button and scan the image in the Transform effect is not shown in the Overview viewing mode To use the Transform function 1 Click the Transform button in the Preview window 2 From t...

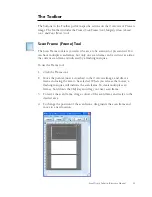
Page 19: ...an be current at a time the current scan frame is indicated by a flashing marquee To use the Frame tool 1 Click the Frame tool 2 Move the pointer now a crossbar to the Overview image and draw a frame...

Page 20: ...on levels increase from 100 to 200 to 400 and to the maximum 800 To magnify reduce hold down the Shift key and with the Magnify Glass tool selected click the image A minus sign will be in the middle o...

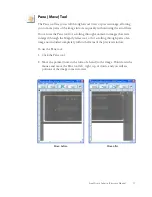
Page 21: ...or scrolling through zoomed in images that were enlarged through the Magnify Glass tool or for scrolling through parts of an image not included completely within the frame of the preview window To use...

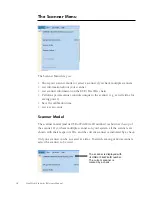
Page 22: ...on on the USB FireWire chain Perform special scanner controls unique to the scanner e g set idle time for saving power Save the calibration time Get a scan count Scanner Model The scanner model and it...

Page 23: ...r model the scanner ID number and the firmware version Scanner Probe This command shows the scanner information on your USB or FireWire chain If your scanner does not show in the Scanner Probe dialog...

Page 24: ...es or disable this feature completely by unchecking the Auto Power Saving Mode check box By default the lamp warm up time is 3 minutes A lamp warm up dialog box will appear if you try to perform a sca...

Page 25: ...eed to calibrate your scanner every time when you press the Scan button This command is enabled only when the scanner model used supports this function i e MII 800XL Plus otherwise it will be grayed o...

Page 26: ...r s series number etc Such a trace data is encrypted and can be saved in a SCI file format for output use It is very useful in getting a scan data after the scanner is being used for a period of time...

Page 27: ...es Overview image This is an image obtained when you click the Overview button in the Preview window The image shows you whatever is on your scan bed Prescan image This is a detailed image obtained fr...

Page 28: ...er click the Overview button B To obtain the Prescan image 1 Click the Scan Frame Frame tool 2 Select the area to be prescanned by drawing a frame around the area in the Overview image 3 Click the Pre...

Page 29: ...eue or Preview window 3 Click the Prescan button Multiple prescans are created in the process corresponding to the number of scan jobs defined You can then switch among the various prescan images for...

Page 30: ...ows or if you have a expanded your Preview window such that it covers the Settings window Show Hide Commands These commands allow you to switch between showing or hiding the Scan Job Queue window and...

Page 31: ...allowing you to adjust and enhance the image and image corrections are displayed in real time Elements of the Advanced Image Correction AIC Dialog Box E Preview option A Left thumbnail B Right thumbna...

Page 32: ...hecked changes or enhancements are applied immediately to the Preview window image for both Overview and Prescan images If unchecked changes are seen only after you close the AIC dialog box F AIC pop...

Page 33: ...d Default button The button cancels the changes you have made with the image correction tools and restores all settings to their default values Revert button This button cancels out the changes that w...

Page 34: ...ting as a custom setting The next time you wish to retrieve that particular white point setting simply go to the AIC pop up menu and choose that setting A Adding custom settings The Add to Menu Add to...

Page 35: ...ettings available To remove a custom setting for an AIC tool click the Remove Setting in that tool s AIC pop up menu When a dialog box comes up select the particular setting to be removed then click R...

Page 36: ...Setup Click to let ScanWizard Industry determine the shadow and highlight points automatically Observe histogram values for distribution of the Lightness L channel in the image as cursor is swept arou...

Page 37: ...cify the percentage by which the white and black points respectively can be clipped from the histogram The clipping is done after you click the Auto button in the AIC White Black Points dialog box For...

Page 38: ...Output Level lets you set the minimum output level of the black point The higher the percentage value the lower the contrast will be The Maximum Output Level lets you set the output level of the white...

Page 39: ...he middle pixels between the resulting image and the original When you open the Curves dialog box the line on the graph is diagonal because the Input and Output values are the same When the curve is m...

Page 40: ...created the easier and smoother it is to manipulate the curve To remove a handle drag it off the graph or the grid Dragging the top right section of the curve below the default diagonal line will add...

Page 41: ...a value in the edit box Dragging points on the curve to a Gamma value above 1 00 will lighten the dark tones Dragging points on the curve to a Gamma value below 1 00 will add shadows to light tones Dr...

Page 42: ...u finally scan it in For the Unsharp Masking filter the final scan result can be simulated and previewed either from the thumbnail on the filters dialog box or from the preview image in the Preview wi...

Page 43: ...lue Value range is 99 Click a Weight edit box representing an adjacent pixel for you to assign a weighted value Enter the value by which you want to multiply the pixel in that position multiplied For...

Page 44: ...ted when this filter adjusts the color values of the affected pixels The dialog box below appears when you choose Gaussian Blur from the Filters menu Enter a value 1 10 in the Strength edit box or dra...

Page 45: ...arpen is applied Only the pixels with the range of contrast between adjacent pixels before sharpening is applied to an edge A lower Threshold value produces a more pronounced effect Enter a value 0 60...

Page 46: ...Manual G Automatic Sharpness Enhancement The Automatic Sharpness Enhancement feature includes Sharpen Low Sharpen Medium and Sharpen High This feature emphasizes the edges contours of an image contrib...

Page 47: ...y scanning software Microtek Web Site This command allows you to link to Microtek s website You can download the driver from Microtek support site if it is necessary to be upgraded About This command...

Page 48: ...he Settings window contains the parameters for outputting your scanned image for the current scan job Elements of the Settings Window A Scan Job B Image Type C Resolution settings D Scan Frame options...

Page 49: ...ting and the Resolution unit which presents you resolution unit and the size of the dot pixel Your most recent scan resolution settings will be recorded as well D Scan Frame options Includes the Scan...

Page 50: ...in the Job box of the Settings window To select from multiple scan jobs choose the scan job you wish in the Scan Job box this will automatically select the corresponding scan job in the Preview and S...

Page 51: ...scan job ScanWizard Industry allows direct scanning Grayscale color space only Grayscale Grayscale images use shades of gray to simulate gradations of color or tonal values and contain 8 bits per pix...

Page 52: ...lution is the real resolution as measured by the scanner s optics Interpolated resolution is software enhanced resolution and can be useful for enlarging very small images or for printing line art to...

Page 53: ...en in the Resolution edit box together with the resolution unit ppi For instance if your image will be scanned at 200 ppi the dot size will be 0 127 mm and at 400 ppi the dot size will be 0 0635 mm If...

Page 54: ...stry you can choose from a list of predefined Scan Frame settings which are designed for the tailor made holders came with your scanner To do this click Scan Frame in the Settings window and choose a...

Page 55: ...to remove a custom setting from the list of scan frame settings available To remove a custom setting click Scan Frame to open its drop down menu and then choose Remove Settings When a dialog box comes...

Page 56: ...e process requires extra time to yield higher quality images To use the Optimization function 1 In the Preview window click the Overview button to preview the image 2 Select the image area in the prev...

Page 57: ...extend scanning processing time for it requires extra time to produce a better visible image After each darkness value there comes a corresponded and suggested density value for your reference To use...

Page 58: ...setting After you select your desired value this value is then memorized for subsequent use until a new value is selected and then it will be taken over B Adding custom settings The Add to Menu Add to...

Page 59: ...box comes up select the setting you want to remove and then click Remove in the dialog box D Loading retrieving custom Darkness settings To load or retrieve a custom setting that you have previously d...

Page 60: ...r that they appear in the Scan Job Queue window The Scan Job Queue window works only for the scanners that support multi film scanning ex MII 800XL Plus If the scanner model you purchased is not suppl...

Page 61: ...s perform a specific action on the selected scan job The Duplicate New Delete Check and Load Save buttons can be used on multiple selected scan jobs E Thumbnail of prescan image A thumbnail appears fo...

Page 62: ...rd Industry lets you edit multiple scan jobs at the same time increasing your efficiency in using the software To edit multiple scan jobs simply select all the scan jobs to be edited in the Scan Job Q...

Page 63: ...scan job the new scan job becomes the current scan job Duplicating a Scan Job The Duplicate button lets you duplicate the settings of a scan job This function is very helpful if you have created opti...

Page 64: ...ppear next to the selected scan job To uncheck a scan job highlight the scan job then click the Check button The scan job will be unchecked and the scan job will not be scanned when you click on the S...

Page 65: ...a selected folder 1 Click on the Load Save button to open the Job Template Manager window 2 Click the Folder icon yellow or use the current default folder to select the folder for saving scan jobs 3 H...

Page 66: ...the Scan Job Queue To remove a scan job from the Scan Job Queue 1 Click the Load Save button to open the Job Template Manager window 2 Highlight the scan job to be removed at the right column of the...

Page 67: ...ScanWizard Industry scanning software Your system components or the devices on your system such as an external hard drive CD ROM etc Software being used with your scanner Important Aside from having...

Page 68: ...64 ScanWizard Industry Reference Manual...

Reviews: