


6 ScanMaker s480/s380 Supplement
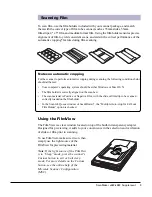
Scanning Photos (1)
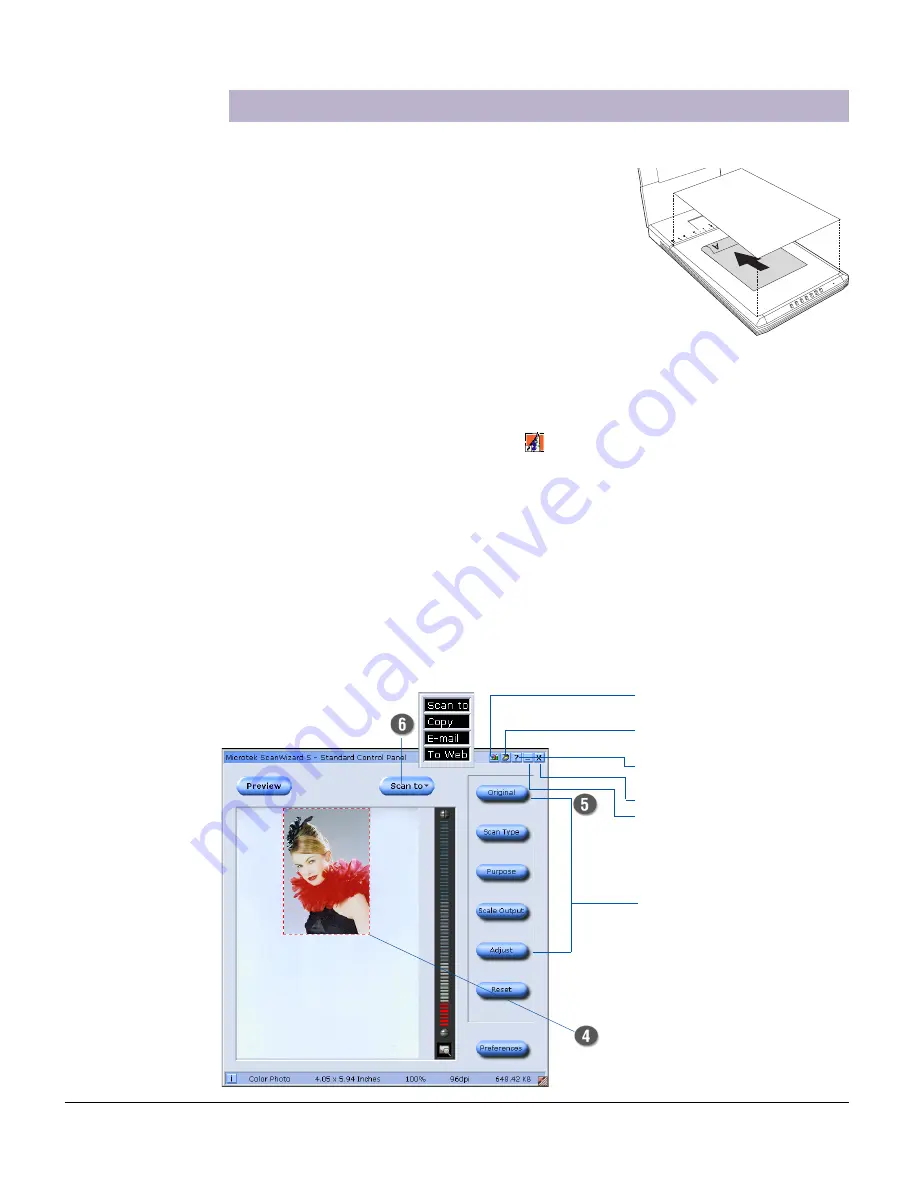
This scenario makes use of the Standard Control Panel.
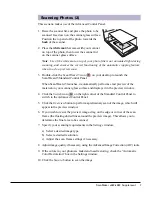
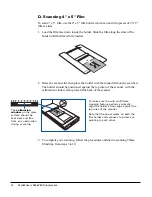
2. Place the white mat that came with your scanner on top
of the photo, then lower the scanner lid on the scanner
glass surface.
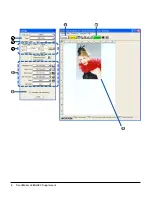
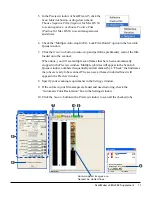
Resize the scan frame
to adjust the actual
size of your scan
• Allows you to switch to the
Advanced Control Panel
• Shows the scanner type,
model, and status
• Contains the built-in
ScanWizard 5 help
• Exits ScanWizard 5
• Minimizes ScanWizard 5
(Windows only)
Selections and options for
image settings
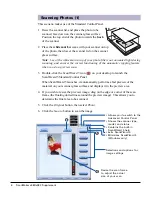
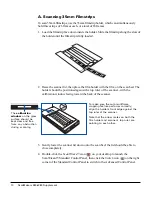
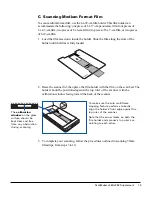
1. Raise the scanner lid, and place the photo to be
scanned face down on the scanner glass surface.
Position the top end of the photo towards the back
of the scanner
Note: Use of the white mat on top of your photo filters out unwanted light during
scanning, and ensures the correct functioning of the automatic cropping feature
when you do a preview scan.
3. Double-click the ScanWizard 5 icon (
) on your desktop to launch the
ScanWizard 5 Standard Control Panel.
When ScanWizard 5 launches, it automatically performs a fast preview of the
material on your scanner glass surface and displays it in the preview area.
4. If you wish to resize the preview image, drag on the edge or corner of the scan
frame (the floating dotted lines around the preview image). This allows you to
determine the final area to be scanned.
5. Click the Original button, then select Photo.
6. Click the Scan to button to scan the image.