


ArtixScan DI 4020 Plus/ArtixScan DI 2020 Plus User's Manual 37
Customizing the Function Buttons
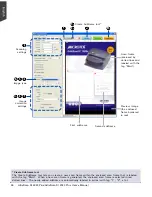
The ArtixScan DI 4020 Plus/2020 Plus is equipped with 3 programmable
function buttons (F1, F2, and F3) that can be customized to automate a number
of predefined operations, such as scanning to a file, sending an image to your
printer, scanning for OCR, etc. Customizing is done through the “Save Settings to
Function Button” command, as explained below.
1. Launch ScanWizard DI
(either as a stand-alone by clicking the program icon,
or by using the “File-Import” or “Scan” command from an application
program).
2. Follow the procedures (steps 3 through 7) for the “Scanning a Single-sheet
Document” section to specify your scanning requirements in the ScanWizard
DI panel.
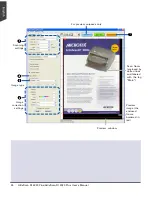
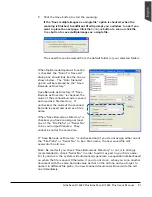
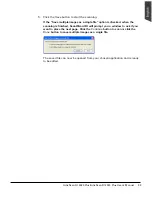
3. When you finish specifying the
scanning settings, choose the “Save
Settings to Function Button”
command from the File menu. The
dialog box appears.
3 Programmable Function buttons
F1 F2 F3