


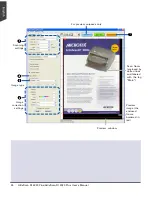


34 ArtixScan DI 4020 Plus/ArtixScan DI 2020 Plus User's Manual
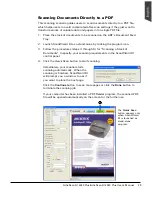
Scanning for PDF
The scanner can easily convert any paper document into an image and saves it as
an Adobe Portable Document Format (PDF) file for viewing with the Adobe
application software. It also offers variable compression levels for full controls
over file sizes and image quality.
1. Place the documents to be scanned on the ADF's Document Feed Tray.
2. Launch ScanWizard DI in stand-alone mode by clicking the program icon on
the desktop.
3. Follow the procedures (steps 3 through 6) for “Scanning a Stack of
Documents” to specify your scanning requirements.
4. Click the
Custom Scan
button and select
Save to File
to open the “Custom
Scan-Save to File” dialog box.
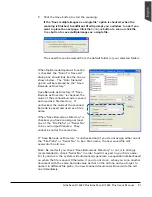
In the “Custom Scan-Scan to File” dialog box, specify the following settings:
a) Key in your preferred file name
in the “File name” edit box, or
use the default “Image” as a root
file name.
b) Select “Portable Document
Format” as your file-saving
format from the “Save as type”
drop-down menu.
c) Check the “Save multiple images
as a single file” option to store
all the scanned images as a
single file if desired.
d) Check the “Send image to
application after saving” option,
then choose your Adobe
application software from the
options.
5. Click the
Save
button.
The originals are sequentially
scanned until the stack of documents
is depleted; when finished, all the
scanned images are saved as a single
file. The saved file can now be
opened from your chosen application
and is ready to be viewed.
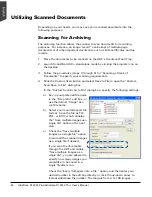
Note
: The scanner also allows you to scan a text document and convert it to an
editable PDF file for editing with the Adobe Acrobat writer. Follow the procedures
for “Scanning for OCR”, in step 4b, select the “PDF with hidden text” as your file-
saving format.
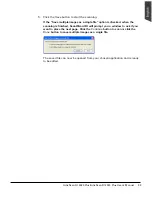
The File Option button is active when
the “RGB Color” or “Grayscale” is set as
your image output type and the PDF is
chosen. With this function, you can
control the image quality compression as
your desired.