2
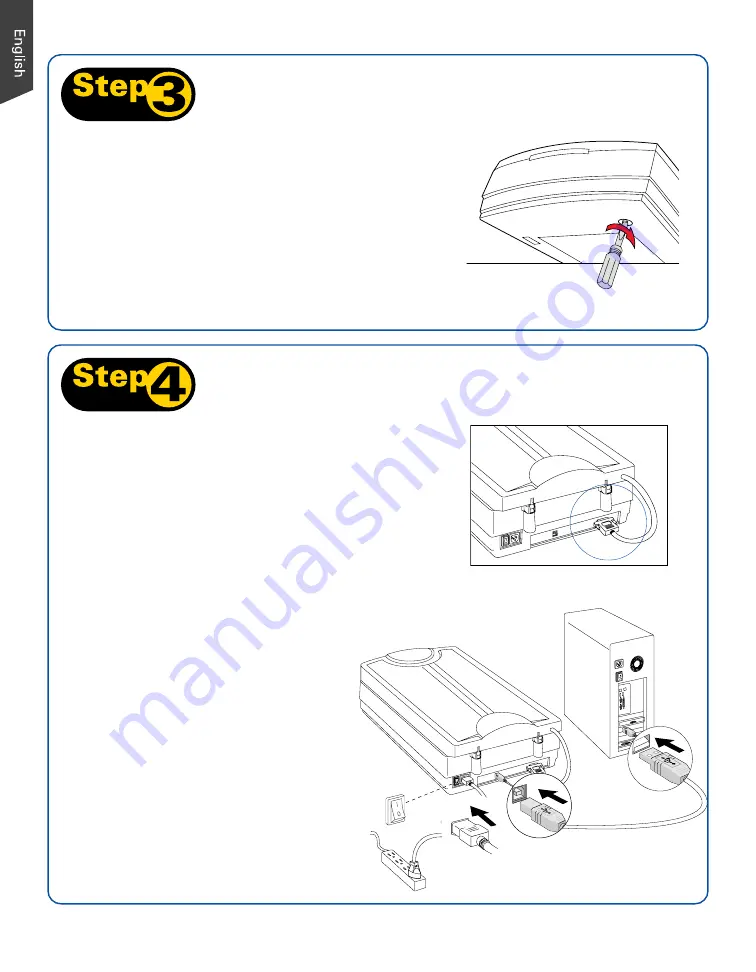
Step 3:
Unlock Scanner
A.
Remove the yellow “Step 3” sticker from your scanner.
B.
With the scanner power off, tilt the front right corner of
the scanner to see the locking screw at the bottom.
C.
Using a screwdriver, push and turn the locking screw
counterclockwise to the unlock position. When successfully
unlocked, the screw will push out a little, protruding
slightly from the bottom of the scanner.
Step 4:
Connect Scanner
To the scanner lid
Make sure the scanner lid (TMA) is properly installed, with its
connector securely connected to the scanner’s 15-pin
accessory port. Refer to the next section “Using the TMA-III”
for the details about the connection of the TMA.
NOTE
: To lock the scanner (for shipping and other reasons), refer to
“ArtixScan 3200XL User Guide” in your Microtek Software CD/DVD.
To the power adapter
A.
Remove the yellow “Step 4” sticker from your
scanner.
B.
Connect the power cord to the back of the
scanner.
C.
Plug the power cord into a power source.
To the Hi-Speed USB cable
D.
Connect one end of the cable to your
computer.
E.
Connect the other end of the cable to the
scanner.
F.
Press the power switch at the back of your
scanner, and wait for the indicator light on
the front panel to stop blinking and stay on
steady.
The system will detect your
scanner automatically.
B
F
D
E
C
Summary of Contents for ArtixScan 3200XL
Page 12: ...12...


