background image

1

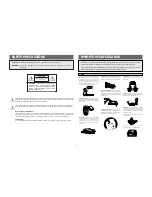
SAFETY PRECAUTIONS

CAUTION :

TO PREVENT ELECTRIC SHOCK, MATCH WIDE BLADE OF PLUG TO WIDE SLOT.

WARNING :

TO PREVENT FIRE OR SHOCK HAZARD, DO NOT EXPOSE THIS APPLIANCE TO RAIN OR
MOISTURE.

CAUTION

RISK OF ELECTRIC SHOCKS

DO NOT OPEN

C A U T I O N :

T O R E D U C E T H E R I S K O F

ELECTRIC SHOCK, DO NOT REMOVE COVER
(OR BACK). NO USER-SERVICEABLE PARTS
INSIDE. REFER SERVICING TO QUALIFIED
SERVICE PERSONNEL.

The lightning flash with arrowhead symbol, within an equilateral triangle, is intended to alert the user to the
presence of uninsulated "dangerous voltage" within the product's enclosure that may be of sufficient
magnitude to constitute a risk of electric shock to persons.

The exclamation point within an equilateral triangle is intended to alert the user to the presence of

important operating and maintenance (servicing) instructions in the literature accompanying the appliance.

Note to CATV System Installer:

This reminder is provided to call the CATV system installer's attention to Article 820-40 of the NEC that
provides guidelines for proper grounding and, in particular, specifies that the cable ground shall be
connected to the grounding system of the building, as close to the point of cable entry as practical.

FCC Warning:

Any unauthorized changes or modifications to this equipment would void the user's authority to operate.

IMPORTANT SAFEGUARDS

In addition to the careful attention devoted to quality standards in the manufacture of your video product,
Safety is a major factor in the design of every instrument. However, safety is your responsibility too.

These pages list important information that will help to assure your enjoyment and proper use of a Video
Cassette Recorder. Please read them carefully before operating your video product.

!

!

USE

Power Sources–

This set should be operated only

from the type of power source indicated on the
marking label. If you are not sure of the type of
electrical power supplied at your home, consult your
dealer or local power company. For those sets
designed to operate from battery power, or other
sources, refer to the operating instructions.

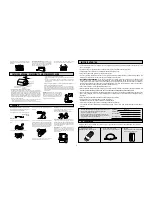
Water and Moisture–

Do not use the set near water

for example, near a bathtub, washbowl, kitchen sink,
laundry tub, in a wet basement, or near a swimming
pool, and the like.

Accessories–

Do not place the set on an unstable

cart, stand, tripod, bracket, or table. The set may fall,
causing serious injury to a child or an adult, and
serious damage to the set. Use only a cart, stand,
tripod, bracket, or table recommended by the
manufacturer.

Overloading–

Do not overload wall outlets, extension

cords or convenience receptables beyond their
capacity, since this can result in fire or electric shock.

Object and Liquid Entry–

Never push objects of any

kinds into the set through openings as they may touch
dangerous voltage points or short out parts that could
result in a fire or electric shock. Never spill liquid of
any kind on the set.

Portable Cart Warning–

An appliance and cart

combination should be moved with care. Quick stops,
excessive force, and uneven surfaces may cause the
appliance and cart combination to overturn.

Attachments–

Do not use attachments not

recommended by the manufacturer, as they may
cause hazards.

Cleaning–

Unplug the set from the wall outlet before

cleaning it. Do not use liquid cleaners or aerosol
cleaners. Use a damp cloth for cleaning.

Ventilation–

This slots and openings in the cabinet

are provided for necessary ventilation to ensure
reliable operation of the set and to protect it from
over-heating, these slots and openings should never
be blocked or covered.

–Never cover the slots and openings with a cloth or

other materials.

Never block the slots and openings by placing the
set on a bed, sofa, rug or other similar surface.

AC 90~260V

UNPLUG

@

@

Summary of Contents for DV-T572A

Page 1: ...4 HEAD VCR TV VC R ME NU CLEAR DIS PLAY EJECT CH TR K SLOW SH T SPEED CM SKIP ATR 3S END START 1 2 3 4 5 6 7 8 9 100 INP UT PLAY REW REC O TR FF STOP P S 0 POWE R...

Page 2: ...ould be operated only from the type of power source indicated on the marking label If you are not sure of the type of electrical power supplied at your home consult your dealer or local power company...

Page 3: ...tions When the power cord or plug is damaged or frayed If liquid has been spilled or objects have fallen into the set If the set has been exposed to rain or water If the set has been dropped or the ca...

Page 4: ...carefully read and follow the operating instructions in this manual in the sequence in which they are presented Should you experience a problem please follow the Trouble Shooting Guide on page 27 Safe...

Page 5: ...uality recording an indoor antenna or a telescopic antenna is not recommended The use of an outdoor type antenna is required If you are not sure about the connection please refer to qualified service...

Page 6: ...mbler boxes are available from cable companies Consult your local cable company for more information concerning connection to their descrambler equipment There are many ways to connect the VCR to a ca...

Page 7: ...scrambled channels while recording another channel Using the VCR tuner to select channels NOTE To record from converter descrambler VCR tuner must be tuned to the converter descrambler output channels...

Page 8: ...Y 10 FAST FORWARD CUE KEY 11 RECORD OTR KEY 7 1 AC POWER CORD 2 AUDIO OUT JACK 3 AUDIO IN JACK 4 ANTENNA INPUT 5 RESET KEY 6 VIDEO OUT JACK 7 VIDEO IN JACK 8 CHANNEL SELECTION SWITCH 9 RF OUTPUT REAR...

Page 9: ...wind REC Timer recording R0 00 R1 00OTR One Touch Recording SLOW Slow Motion REC Record PAUS Pause Still STOP Stop REPT Auto Repeat SAFE Child Lock Power turn on off key Menu key Clear key Direct Acce...

Page 10: ...ol is vertical to the remote sensor it will work within about 23 feet 7m from the VCR 4 Point the front of the remote control directly at the front of the VCR Function keys do not work when pressing s...

Page 11: ...y back auto matically VIDEO CASSETTE LOADING UNLOADING NOTES An inverted cassette cannot be inserted Be sure to insert the cassette firmly into the slot otherwise it will be automatically ejected The...

Page 12: ...e tape advances at high speed without picture and sound Press the REW key in the STOP mode The tape is rewound at the high speed without picture and sound Press the EJECT key The tape will come out of...

Page 13: ...once or twice in the PLAYBACK mode Then the tape advances rapidly with the picture and the SCH letter appears on the display panel Press the REW key once or twice in the PLAYBACK mode Then the tape i...

Page 14: ...8 9 100 INPUT PLAY REW REC OTR FF STOP P S 0 POWER Speed is increased by pressing the SLOW SHT and SLOW SHT keys once every time When the SLOW SHT key is pressed once every time the speed will change...

Page 15: ...ntrol if the VCR indicator is not on the display panel Set the TV to CH3 or 4 Press the MENU key then the MENU screen will appear Pressing this key once more makes the MENU screen disappear Using the...

Page 16: ...rst time will appear on the display panel Set the VCR to VCR mode by pressing the TV VCR key on the remote control if the VCR indication not appear on the display panel Set the TV to CH 3 or 4 EXAMPLE...

Page 17: ...to exit MENU CABLE CHANNEL SET Turn on the TV and VCR and set the TV to 3CH or 4CH Set the VCR to VCR mode by pressing the TV VCR key on the remote control if the VCR indication is not on the display...

Page 18: ...CORD A CABLE PROGRAM PREPARATION First turn on the TV and set it to your VCR channel Loading Load a cassette into VCR making sure that the safety tab is intact The power will turn on automatically and...

Page 19: ...at we wish to record 20 May from 10 30 to 11 30 and the programme we wish to record is on TV Channel 6 NOTE If the Programming mode is selected when current time has not been set on the Clock Clock mu...

Page 20: ...ings insert a cassette and turn the VCR off before the program start Press to continue MENU ONE TIME Channel 0 6 Antenna Start Time 1 0 End Time Start Date Tape Speed SP Press CLEAR to correct Press M...

Page 21: ...g in progress press and hold the STOP key approximately 3 seconds CHECKING TIMER PROGRAMS CANCELLING TIMER PROGRAMS No programs have been saved Press to continue MENU PROGRAM 1 has been canceled Press...

Page 22: ...ke sure that OPERATION When setting the Programmable Timer record should be taken to prevent the preset times overlapping If one preset time starts before a programme that is being recorded has finish...

Page 23: ...TV to your VCR channel Set the VCR to the VCR mode by pressing the TV VCR key when the VCR indicator is not on the display panel Make sure that the clock is adjusted to the current time When you want...

Page 24: ...Dimmer ON or OFF mode will toggle by pressing the number key 3 The light of LED array can be diminished by DIMMER feature DIMMER Press the number key 4 in the PREFERENCES mode to select the SYSTEM SEL...

Page 25: ...NS mode to select Go To Search mode Press number buttons to enter the hour s and or minutes of the counter reading you want the VCR to go to Press FF to search forward or REW to search in reverse Pres...

Page 26: ...eatedly This function operates five times repeatedly and then resume the playback mode During Auto repeat if the PLAY key is pressed the tape will exit from the Auto Repeat mode and continue to playba...

Page 27: ...nect the VCR to another VCR or camcorder you can duplicate a previously recorded cassette Make all connections before turning on the power For duplicating a previously recorded tape from a camcorder f...

Page 28: ...r still picture A feature of this VCR that allows you to stop the motion of the tape completely so that you can watch a single scene as if it were a still picture VISS VHS Index Search System A featur...

Page 29: ...NERAL Power requirements 90 260 50 60Hz AC Power consumption 17W Under 4W in stand by mode DIMENSIONS Set size WxHxD 360x91x280 mm Carton size WxHxD 449x175x398 mm Weight gross 4 2Kg SPECIFICATIONS Pr...

Reviews: