RAIDBank4 Owner’s Manual
32
4-RAID Control-Web Interface
2. RAID Set Functions
Select the RAID Set Function to manually configure the RAID set for the first time or delete/
reconfigure existing RAID sets. The RAID Set functions allows more complete control over
the RAID creation process, but requires more interaction then the Quick Volume/RAID Setup
option.
To enter a RAID Set Functions, Click on the
“RAID Set Functions”
menu, and the RAID
set submenus will be displayed.
2.1 Create A New RAID Set
Note:
The numbers of physical drives in a specific RAID set
determine the RAID levels that can be implemented with the
RAID set.
RAID 0 requires 1 or more physical drives per RAID set.
RAID 1 requires at least 2 physical drives per RAID set.
RAID 1 + Spare requires at least 3 physical drives per RAID set.
RAID 3/5 requires at least 3 physical drives per RAID set.
RAID 3/5 + Spare requires at least 4 physical drives per RAID set.
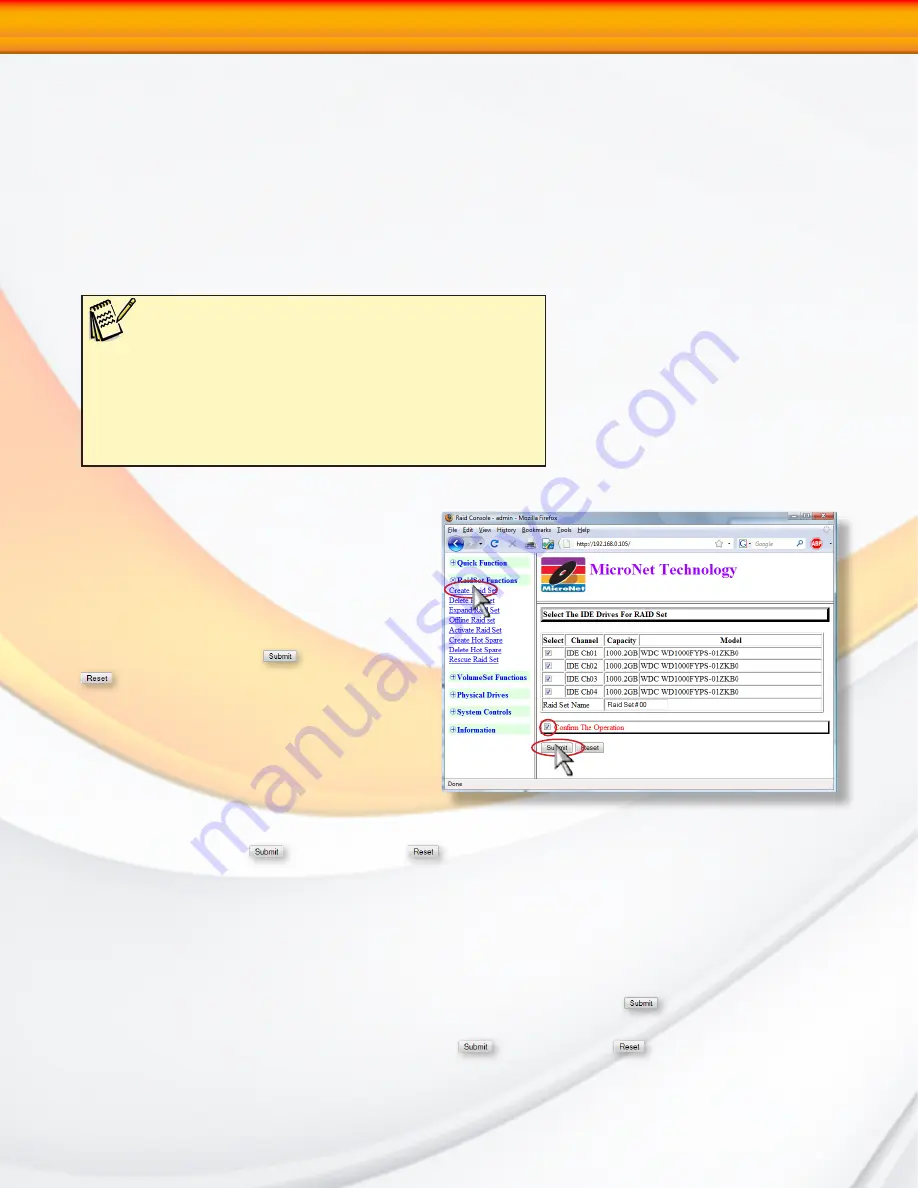
Choose “RAID Set Function” from the main
menu. clink on the “Create RAID Set” menu
option. Check the checkbox corresponding
to the disks to be used in the RAIDSet.
Yoy may also name the resulting RAIDset
(optional.) When all selections have been
made, check the “Confirm The Operation”
checkbox and click
to commit or
to revert all options to default. The
RAIDSet is now ready for volume creation
(See
Section 3.1 “Create a Volume Set”
)
2.2 Delete Existing RAID Set
Once this option is selected, a table will
appear with the available RAID set(s).
Check the radio button next to the RAIDset(s) to be deleted, check the “Confirm The Operation”
checkbox and click
to commit or
to revert all options to default. A Confirmation
screen appears prior to the deletion.
2.3 Expand Existing RAID Set
Instead of deleting a RAID set and recreating it with additional disk drives, the Expand existing
RAID Set function allows the user to add disk drives to the RAID set that already exists.
When this option is selected, a table will appear with the available RAID set(s). Check the
radio button next to the RAIDset(s) to be expanded, and click the
Button. if spare disks
are available, they will be listed. Check the radio button next to the drive(s) to add, check the
“Confirm The Operation” checkbox and click
to commit or
to revert all options to
default. A Confirmation screen appears prior to the expansion. The new added capacity will
be available for new volume sets. To define one or more volume sets, follow the instruction


