background image


7. DMX CHANNELS 
 

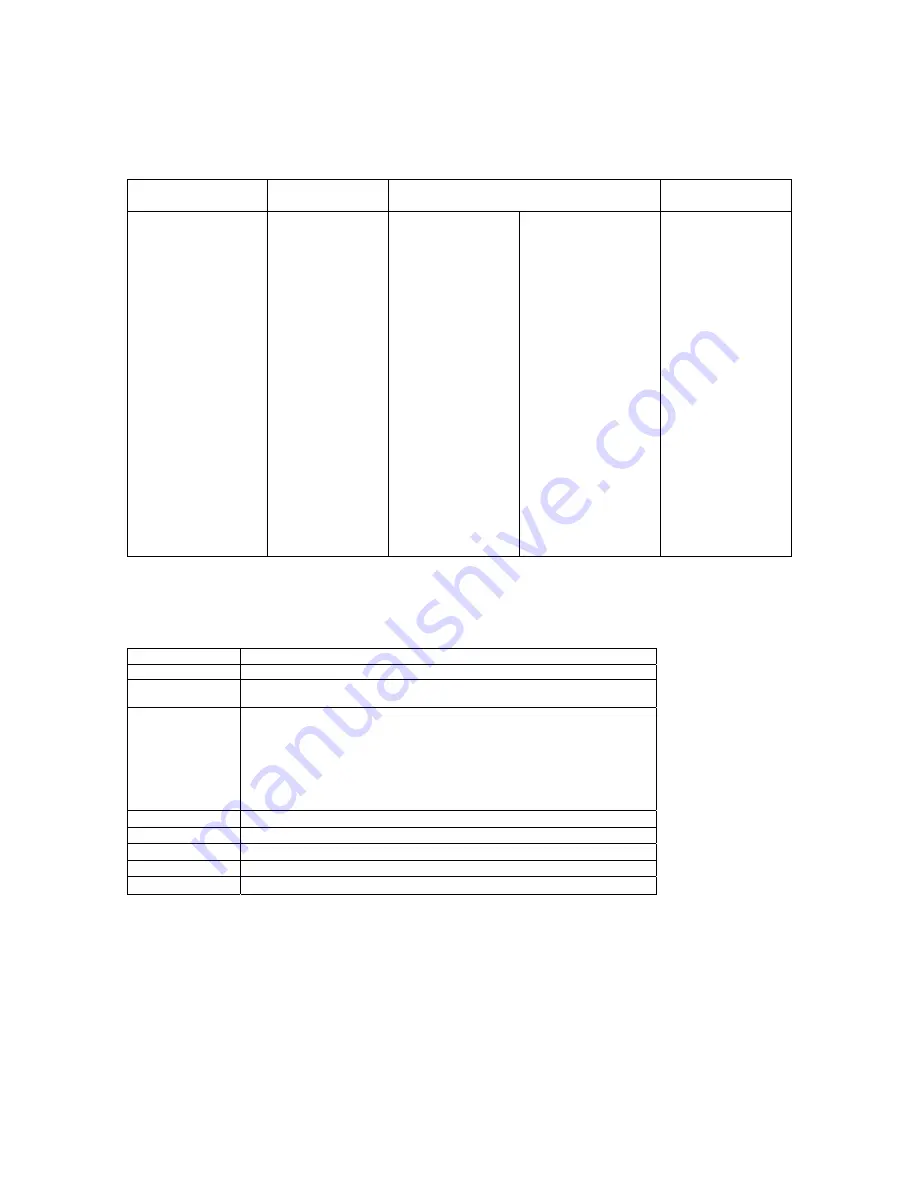
Mode 1: 4 DMX Channels 

Ch 1: Master 
Dimmer 

Ch 2: Effects 

Ch 3: Colours 

Ch 4: Speed Effect 

000 – 255 
Brightness Adjust  
0 - 100% 

000 – 023 Effect 1 
024 – 046 Effect 2 
047 – 069 Effect 3 
070 – 092 Effect 4 
093 – 115 Effect 5 
116 – 139 Effect 6 
140 – 162 Effect 7 
163 – 185 Effect 8 
186 – 208 Effect 9 
209 – 231 Effect 10 
232 – 254 Effect 11 
255 Effect 12 

000 – 005 Colour 1 
006 – 010 Colour 2 
011 – 015 Colour 3 
016 – 020 Colour 4 
021 – 026 Colour 5 
027 – 031 Colour 6 
032 – 036 Colour 7 
037 – 041 Colour 8 
042 – 046 Colour 9 
047 – 052 Colour 10 
053 – 057 Colour 11 
058 – 062 Colour 12 
063 – 067 Colour 13 
068 – 072 Colour 14 
073 – 078 Colour 15 
079 – 083 Colour 16 
084 – 088 Colour 17 
089 – 093 Colour 18 
094 – 098 Colour 19 
099 – 104 Colour 20 
105 – 109 Colour 21 
110 – 114 Colour 22 
115 – 119 Colour 23 
120 – 124 Colour 24 
125 – 130 Colour 25 

131 – 135 Colour 26 
136 – 140 Colour 27 
141 – 145 Colour 28 
146 – 150 Colour 29 
151 – 156 Colour 30 
157 – 161 Colour 31 
162 – 166 Colour 32 
167 – 171 Colour 33 
172 – 176 Colour 34 
177 – 182 Colour 35 
183 – 187 Colour 36 
188 – 192 Colour 37 
193 – 197 Colour 38 
198 – 202 Colour 39 
203 – 208 Colour 40 
209 – 213 Colour 41 
214 – 218 Colour 42 
219 – 223 Colour 43 
224 – 228 Colour 44 
229 – 234 Colour 45 
235 – 239 Colour 46 
240 – 244 Colour 47 
245 – 249 Colour 48 
250 – 254 Colour 49 
255 – 255 Colour 50 

000 – 255 
Speed Adjust 
Slow - Fast 


Mode 2: 8 DMX Channels 

Channel Function 

Master Dimmer  

000 – 255 Brightness Adjust  0 – 100% 

Strobe 


000 – 004 No Function 


005 – 255 Strobe Slow to Fast 

Effects 


000 – 015 No Function 


016 – 055 50 Colour Step Changing 


056 – 095 50 Colour Cross Fade 


096 – 135 50 Colour Flowing From Left to Right 


136 – 175 50 Colour Flowing From Right to Left 


176 – 215 50 Colour Chasing From Center to Ends 


216 – 255 50 Colour Chasing From Ends to Center 

Red 


000 – 255 Brightness Adjust  0 – 100%

Green 


000 – 255 Brightness Adjust  0 – 100%

Blue 


000 – 255 Brightness Adjust  0 – 100%

White 


000 – 255 Brightness Adjust  0 – 100%

Amber 


000 – 255 Brightness Adjust  0 – 100%


Summary of Contents for LED Razor45

Page 1: ......

Page 2: ...ash is made of a new type of high temperature strength of engineering plastics and cast aluminum The fixture is designed and manufactured strictly following CE standards complying with international s...

Page 3: ...d on or near combustible substances Keep more than 50cm distance from wall for proper ventilation and air flow If your fixture is or has become damaged in any way it shall be exclusively replaced or r...

Page 4: ...f DMX channels and allows one to control multiple units independently or simultaneously on a small DMX console The figure below shows a simple DMX layout On the same starting channel say 001 there are...

Page 5: ...it in PROGRAM Auto and Sound mode to run the whole system In Master Slave operating mode all Slave units are to be set to Slave Mode and Slave ID is required for each Slave unit 1 Press MENU button go...

Page 6: ...press Fun button to enter Test Mode 2 Use Up Down button to select Test LED or Test Fan then press Fun button to go to Test LED or Test Fan 3 Press Up Down to test Red Green Blue White and Amber LEDs...

Page 7: ...onnectors Please refer to the diagram below DMX 512 Connection With DMX Terminator For installations where the DMX cable has to run a long distance or is in an electrically noisy environment it is rec...

Page 8: ...7 6 MENU NAVIGATION When navigating the menu Use UP button to move up Use DOWN button to move down Use FUN button to move right Use MENU button to move left...

Page 9: ...150 Colour 29 151 156 Colour 30 157 161 Colour 31 162 166 Colour 32 167 171 Colour 33 172 176 Colour 34 177 182 Colour 35 183 187 Colour 36 188 192 Colour 37 193 197 Colour 38 198 202 Colour 39 203 20...

Page 10: ...Brightness Adjust 0 100 6 Blue 000 255 Brightness Adjust 0 100 7 White 000 255 Brightness Adjust 0 100 8 Amber 000 255 Brightness Adjust 0 100 Section 2 9 Strobe 000 004 No Function 005 255 Strobe Sl...

Page 11: ...ds to Center 4 LED 1 Red 000 255 Brightness Adjust 0 100 5 LED 2 Green 000 255 Brightness Adjust 0 100 6 LED 3 Blue 000 255 Brightness Adjust 0 100 7 LED 4 White 000 255 Brightness Adjust 0 100 8 LED...

Page 12: ...000 255 Brightness Adjust 0 100 10 LED 6 Red 000 255 Brightness Adjust 0 100 11 LED 7 Green 000 255 Brightness Adjust 0 100 12 LED 8 Blue 000 255 Brightness Adjust 0 100 13 LED 9 White 000 255 Bright...

Page 13: ...ace lens kit and follow reverse steps to close the fixture IMPORTANT When replacing the lens assembly please make sure that the power is disconnected from the fixture beforehand LEDs on PCBs are sensi...

Page 14: ...13 10 UNIT OVERVIEW...

Page 15: ...accumulation of dust dirt etc 2 Clean the fan each week 3 A detailed electrical check by approved technician every three months is advised Ensure the circuit contacts are in good condition and preven...

Page 16: ......

Reviews: