TAKING INTO USE
1. Charge the lamp before using it.
Batteries self-discharge during storage and must be charged prior to taking the lamp into use.
Please note that the lamp will not offer its full operating time until it has been charged and discharged ca.
5 – 10 times
2. Mount the quick charger stand MICA MLC
Choose a suitable installation location and mount the MLC charging stand with two screws. The stand may
not be placed on a platform manufactured of a highly flammable material or installed inside the explosive
hazardous area.
Connect the power supply wiring (use either a constant 12-24V DC voltage power supply like a vehicle
battery or a MICA IL-2 AC/DC adapter) in the charging stand’s round quick coupling. Alternatively, you can
connect the power supply wires in the screw terminals on the back
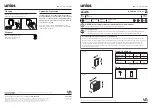
of the stand (be sure to connect the plus and the minus poles
correctly and finally tighten the cable clamp; the plus wire (+) is
marked in red). Please see the diagram!
The red L1 light will light up when the power supply is connected, at the same time the L2 and L3 lights will
flash.
Supply voltage of the charging stand must be continuous and it may not be disconnected by using a timer or
any similar device.
A = Operating Switch
B = Type plate
C = High power LED
D = Belt clip
E = LED indicator for battery charge
MICA ML-808 ATEX User manual
Note! When installing MLC into vehicles using
24V system MICA Converter 24V/12V need to
be inserted between vehicle battery supply and
MLC charger(s) if MLC is used to charge ML-
808 lamps. Please contact your local retailer for
information.


