background image

11  

Hip pads 

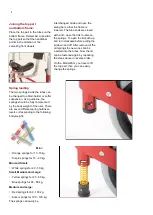
The hip-/side pads are to be 
mounted on the uprights. Fit the 
two pipe sections around the 
stanchion, tighten them together 
using the two screws. 
The hip-/side pads can be 
adjusted in or out of the seat 
by loosening the thumbscrew. 
Tighten the thumbscrew again 
after adjustment. 


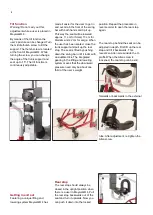
Height reductions set


Each reduction set consist of 1 pair of 
4 units – as per below picture(1 set (1 
pcs each)); 
 
2 pcs special fittings 
2 pcs Threaded rod 
2 pcs bushing 
2 pcs Allen screw head 


Loosen 

the tilt bar from lower frame. 
The existing threaded rod, the 
bushing and the allen screw head 
shall be used to mount the special 
fitting on the tilt bar.       


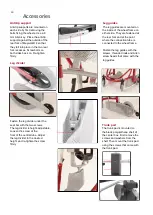
The 

new threaded rod, the bushing 
and the allen screw head shall be 
used to mount the special fitting on 
the lower frame and the wide 
open part of the new fitting 


The 

new threaded rod is somewhat longer 
than 
the red holder to give free access to 
the special fitting 


NOTE 

There is no Height reductions set for 
Mini. 


Cleaning, disinfection and 
maintenance 

Meywalk® 4 can be washed in 
warm water with detergent but 
take care not to wash the foam 
padding on the rear of the trunk 
support, handlebar and rearstop. 
With time the painted frame may 
take on a matt appearance if 
washed with detergent repeatedly. 
If so, the frame can be 
polished with car polish. Follow 
the instructions of the polish 
manufacturer. 
The frame and plastic parts can 
be disinfected with standard, 
alcohol-based disinfectants. 
The foam padding may not be 
disinfected. 
It is recommended to regularly 
check the tightness of all 
thumbscrews, 
nuts, bolts and screws. 
Re-tighten if necessary. Check 
the parking brake function. When 
the brakes are on it should not 
be possible to push the walker. 
When the brakes are off it should 
be easy to push the walker. 
Furthermore, all moving parts 
should function easily and at a 
low level of noise. Should you 
experience any friction noise or 
squeaking, then have the walker 
checked by a professional. 
 

Recycling


When handing over or recycling 
the walker all necessary 
technical documentation must 
be delivered to the new user to 
ensure safe handling. 
The walker must be cleaned, 
disinfected and checked for 
damages by a professional 
before handing over. 
 

Disposal  

When your walker is no longer 
in use and you wish to dispose 
of it please check the rules and 
regulations with your local waste 
management company. 

Summary of Contents for Meywalk 4

Page 1: ...Handleiding Model Micro Mini Small Medium and Large...

Page 2: ...assingen stap voor stap 6 Buizen 6 Stuur 6 Zitting 7 Rompsteun hoogte 7 Rompsteun vervanging 7 Kantelfunctie 8 In en uitstappen 8 Zitvergrendeling 8 Rompsteun 9 Remmen 9 Sleepremmen 9 Teruglooprem 9 D...

Page 3: ...t het kantelen van het loophulpmiddel De Meywalk 4 rolt soepel en gemakkelijk Houd er dan ook altijd rekening mee dat het gevaar bestaat dat de gebruiker ook omver kan rollen Houd de kantelbeugel alti...

Page 4: ...zit en rompsteun Een set veren gerelateerd aan het ge bruikersgewicht Accessoires zoals besteld Meywalk 4 onderdelen Rompbeugel Handgreep Sterknop voor instellen hoogte rompst Sterknop voor instellen...

Page 5: ...g Purple springs for 15 20 kg Mini and Small White springs for 20 50 kg Small Medium and Large Yellow springs for 45 65 kg Blue springs for 65 80 kg Medium and Large Red springs for 80 100 kg Silver s...

Page 6: ...height Fasten the spanner grips firmly It is important that both sides are adjusted to an equal height You can check this by way of the indentations on the tubes Handlebar The angle of the handlebar c...

Page 7: ...e desired height has been found Trunk support height Adjust the trunk support according to the individual user s height Turn the upper thumb screw located at the front of Meywalk 4 The thumb screw fea...

Page 8: ...ser has been seated close the trunk support and pull up the rear stop The seat is lifted by pushing down the swing bar until it locks with an audible click The integrated gearing in the lifting and lo...

Page 9: ...n Drag brakes The drag brakes work by the roller at the back pressing against the tire First loosen the nut on the Allen screw Then turn the Allen screw to press the roller against the tire Tighten th...

Page 10: ...he screw at the front of the central tube Adjust the leg divider to the desired height and re tighten the screw firmly Leg guides The leg guides are mounted on the inside of the wheel frame on either...

Page 11: ...the foam padding on the rear of the trunk support handlebar and rearstop With time the painted frame may take on a matt appearance if washed with detergent repeatedly If so the frame can be polished...

Page 12: ...h 77 cm 80 cm 85 cm 86 cm 100 cm Outer width 51 cm 56 cm 62 cm 62 cm 68 cm Inner width 42 cm 44 cm 49 cm 50 cm 57 cm Seat height inner leg length 25 45 cm 28 46cm 44 67 cm 60 84 cm 80 104 cm Trunk sup...

Reviews: