90-823224--2 796
454 CID (7.4L) / 502 CID (8.2L) - 3A-37
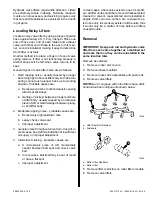
Oil Pan
Removal
1. Drain crankcase oil.
2. Remove dipstick and tube, or tubes, if equipped
with two. Note shape of port and starboard tubes
as shown following to aid in reassembly. On High
Output (H.O.) Engine only, disconnect outlet
hose of seawater pump.
IMPORTANT: On Generation V engines DO NOT
move or disturb the orientation of fitting on bot-
tom of pan or incorrect oil level readings may be
obtained.
71308
c
a
b
Generation V MIE Engine Oil Pan
a - Factory Positioned Fitting For Tubes (Do Not Move)
b - Port Tube
c - Starboard Tube
3. Remove oil pan.
Installation
1. Clean sealing surfaces of engine block and oil
pan.
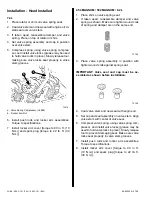
2. Apply a small amount of Quicksilver RTV Sealer
to joints of rear seal retainer and joints of front
cover.
IMPORTANT: Quicksilver RTV Sealer sets up in
about 15 minutes. Be sure to complete assembly
promptly.
72544
b
a
a - Joints Of Rear Seal Retainer
b - Joints Of Front Cover
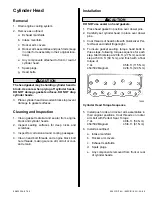
3. Install oil pan gasket in position as shown.
NOTE:A one-piece oil pan gasket may be re-used if
it is still pliable and is not cracked, torn or otherwise
damaged.
72545
a
a - Oil Pan Gasket
4. Install oil pan. Starting from the center and work-
ing outward in each direction, tighten 5/16-18
threaded fasteners to 165 lb. in. (19 N·m).
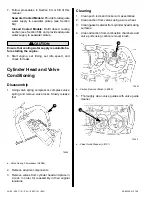
5. Install dipstick tube(s) and dipstick(s). Be certain,
if equipped with two tubes, that they are fitted
where they were removed, and positioned as
shown following.


