Mcr WIP type multi-blade fire dampers
7/17
MERCOR SA –
the Company reserves the right to make modifications and changes.
6.3. BUILDING IN (EMBEDDING)
The mcr WIP type fire damper works correctly if the rotation axis of the partition is horizontal. The release and
control mechanism may be located on the right or left of a fire damper irrespectively of the air flow direction.
Installing a fire damper on its side, i.e. with rotation axes of the partition being vertical, is only permitted when this
has been previously made known to the manufacturer at the time of placing the order.
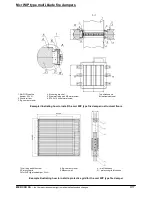
Before building in/embedding, a fire damper should be placed axially in a space dividing element (a wall or
structural floor that divides separate fire compartments), i.e. in a previously prepared opening. Next, level and
secure the fire damper so that it does not move. For fire dampers with dimensions greater than 700 x 700, a strut
should be used. Once the above have been completed, start manually the fire damper’s partition (blades
assembly), checking if it rotates correctly (it should not touch the housing elements, etc.). Close the fire damper’s
partition. The gap between the fire damper and the wall should be completely filled with appropriate mixture of your
choice (but with all the required certificates), which will provide the desired fire-resistance rating of the wall and the
fire damper. Moreover, special attention should be paid to ensure that the mixture does not come into contact with
the equipment of the fire damper responsible for its proper operation (release and control mechanism, partition,
seals and limiters). For this purpose, it is essential that you put plastic film or other material on the fire damper,
which will protect it while masonry and finishing work is being carried out. The partition has to remain closed until
the mixture sets. Once it has set, remove the protection and struts. Then, again open and close the fire damper’s
partition in order to check if it works correctly. In the case of installation of a fire damper in a wall made of boards,
the space between the fire damper housing and the wall should be completely filled with A1 class non-flammable
(certified) mineral wool. Its density and thickness should ensure fire-resistance not lower than that of the wall in
which the fire damper has been installed. Additionally, the filled space should be sealed with an appropriate mixture
or mastic having fire-resistance required by the wall. In order to ensure fire-resistance of a fire damper, the depth to
which it can be built in should never be exceeded, i.e. the rotation axis of the fire damper’s blades cannot be
outside the wall (off the wall surface). In the case of space dividing elements with a thickness comparable to that of
a fire damper, it is recommended that the fire damper be installed in such a manner that its axis divides the
thickness of the space dividing element precisely in half. The built-in fire damper has to be coaxially connected to a
ventilation duct. When installing a fire damper, be sure that you do not damage its body, and in particular do not
subject it to any stress. A fire damper cannot function as a “structural element” of a duct or ventilation system in
which it has been installed. It is unacceptable to drill through the fire damper’s housing, screw in bolts/screws and
other elements that pierce through the housing towards the interior of the fire damper. Having connected the fire
damper to a ventilation duct, check again if it works correctly. When installing the mcr WIP type fire dampers,
ensure in particular that the thermal release (fusible component) is not damaged. It should not be exposed to high
temperature (fire, welders, soldering irons), which causes its actuation (it is a component that has been designed to
be used once only and will not be replaced under warranty). Similarly, the intumescent seals installed in the
housing of the fire damper should not be exposed to high temperature. Expansion of the seals makes it impossible
to close the fire damper. After the installation has been completed, clean thoroughly the fire damper and ensure
that no debris has been left inside, as it could affect its correct operation.
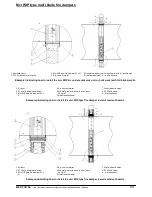
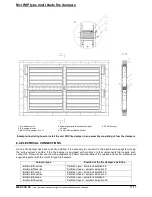
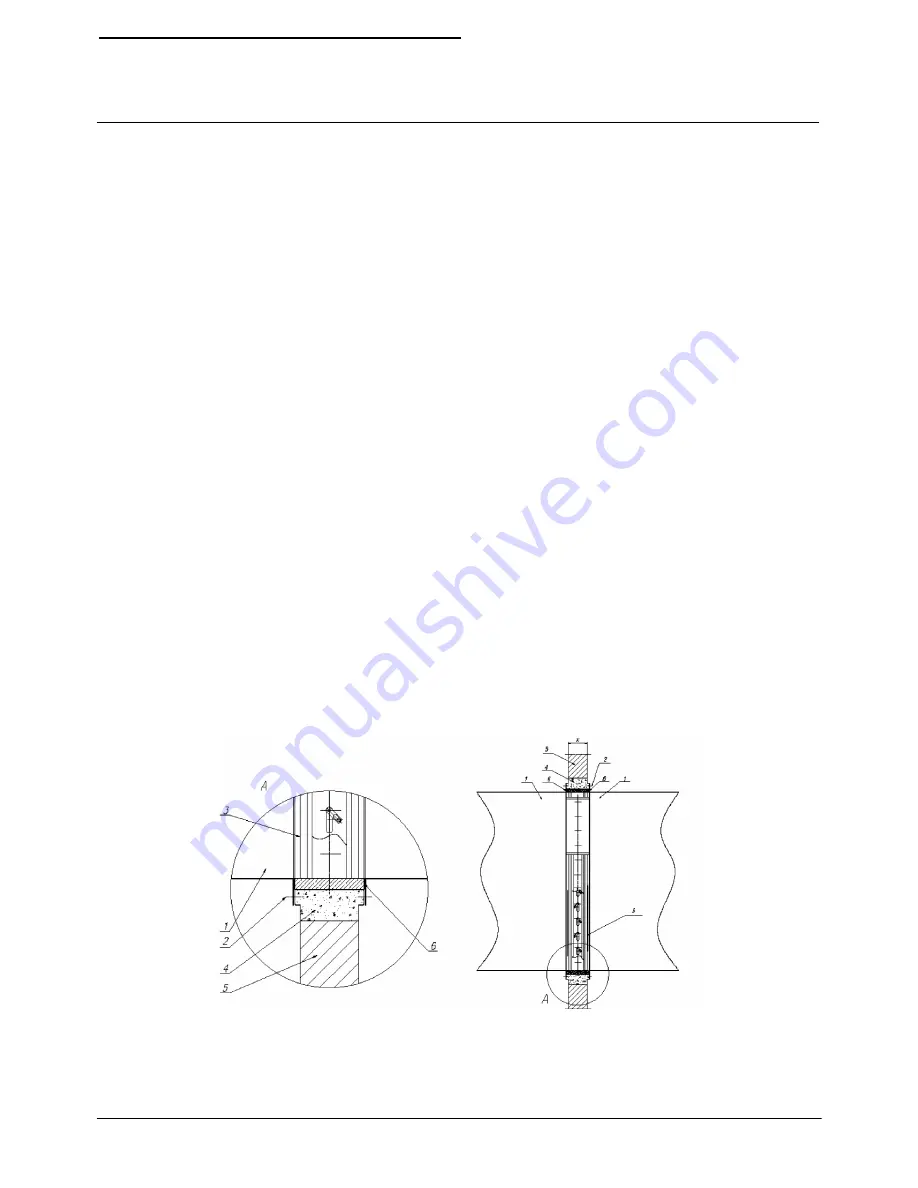
1. Ventilation duct
2.ST4.2x16 sheet metal screw
3.Mcr WIP type fire damper, W x H
4.E.g. cement mortar
5.Masonry wall
6.Heat-resistant seal X – Wall thickness
Example illustrating how to install the mcr WIP type fire damper in masonry and concrete walls


