3-12
Part Number: MER_IOM_8197455
Operation
Section 3
NETWORKING SCREENS
To make changes on the this screen a passcode must be
entered. Select the lock on the bottom left of the screen.
Enter a passcode on the pop-up number pad. If the
passcode is accepted there will be a yellow ring around the
screen.
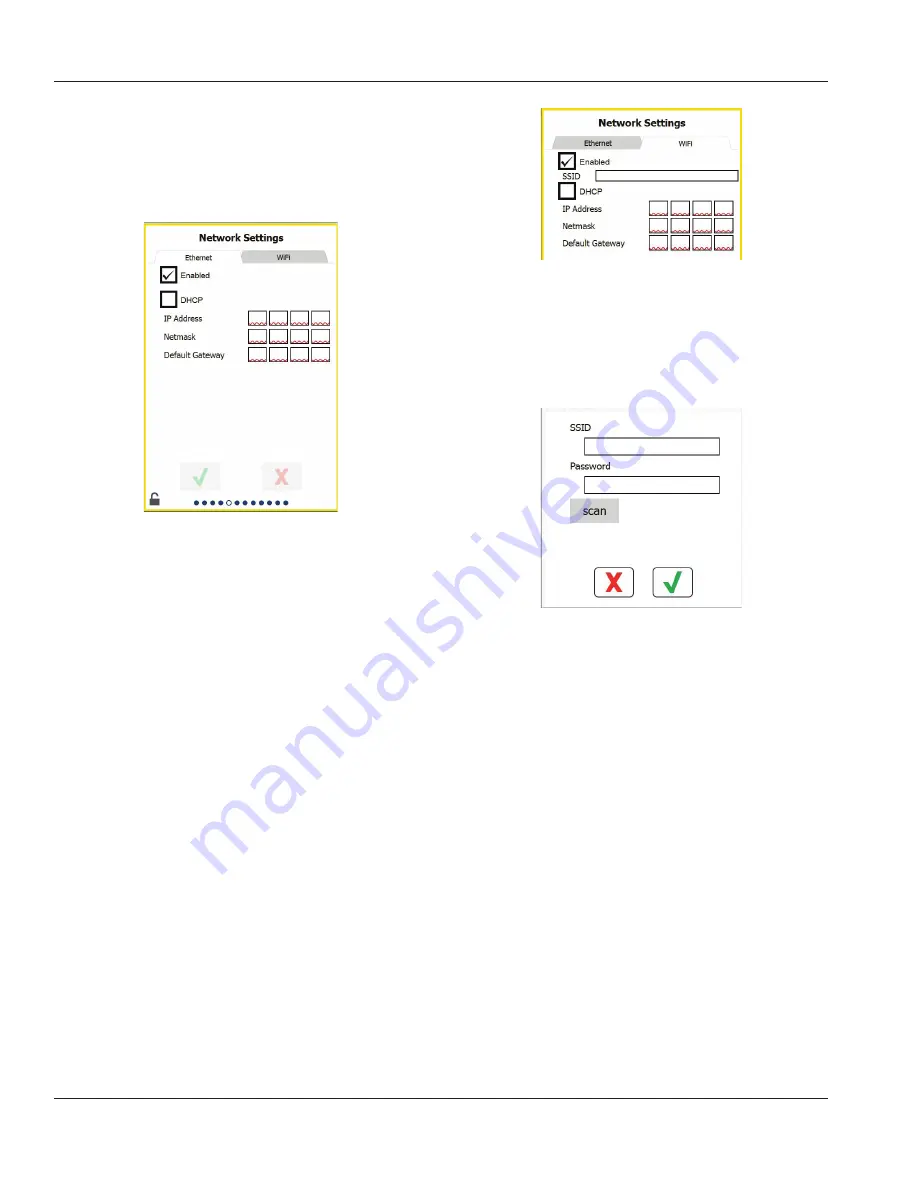
Ethernet Network Screen
Ethernet connectivity is for firmware development
purposes and is not available to the typical user. The Enable
box should always be UN-Checked. Having the Ethernet
Enable box checked can create WiFi connectivity problems.
Wi-Fi Network Screen
To connect the Holding Cabinet to the local WiFi check
both the Enable box and the DHCP box, then touch the box
just to the right of SSID. That will open a new window that
will allow you to enter the name and password of the WiFi
network you would like the holding cabinet to connect to.
See screen shot below.
Wi-Fi Pop-up For Scanning
Touching the scan button will display a list of all WiFi SSIDs
as well as their signal strength, that the cabinet is aware
of. Touching the SSID box will bring up an alphanumeric
keyboard with which you can enter the SSID of the WiFi
network you wish to connect to. Touch the return button
to return to the WiFi Pop-up For Scanning screen. Touch
the Password box to enter the network password (special
characters can be found on the 1# keyboard. Once on the
1# keyboard, more special characters can be found by
touching the up-arrow key.
When finished entering SSID and Password touch the green
check button to save your entries. Touch the green check
button to connect to the WiFi network. Once connected
the fields IP Address, Netmask, and Default Gateway will
be populated, if these fields are not populated the holding
cabinet is not connected to the WiFi network.


