


Pre drill
hole
P 4
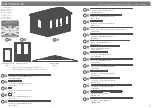
For assistance please contact customer care on: 01636 821215
Mercia Garden Products Limited,
Sutton On Trent,
Newark,
Nottinghamshire,
NG23 6QN
www.merciagardenproducts.co.uk
Please retain product label and instructions for future reference
70mm
screw
14
15
14
15
10
10
4
4
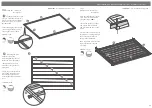
Step 2
Parts Needed - No. 4 QTY 2
No. 10 QTY 2
Place the starter boards (No. 4)
on to assembled base frame
along the longest sides.
*Ensure the notches at either
end of each board are flush
and level with the ends of the
frame.
Fix each of the starter boards to
the frame by screwing through
the notch into the frame as
shown in the illustration.
Once in position place the next
log board (No. 10) onto the
assembly.
4x70mm Screws
14
14
14
14
14
14
14
14
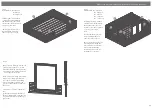
IMPORTANT:
Pre-drill before fixing screws.
Pre drill
hole
70mm
screw
a
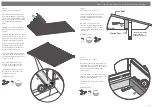
Step 1
Parts Needed - No. 14 QTY 10
No. 15 QTY 2
Lay the bearers (No’s. 14 &
15) onto a firm and level surface
(free from areas where standing
water can collect ) as shown in
the illustration.
Fix the framing together at each
corner using 8x70mm screws,
ensuring the frame is flush.
8x70mm Screws
Pre drill
hole
70mm
screw
b
Following the same
method arrange the
remaining framing (No. 14)
inside the assembled frame.
*Ensure there is an equal
amount of space between
each frame.
Secure each of the frames in
place using 2x70mm screws
for each side of the bearer,
ensuring the framing remains
level.
32x70mm Screws
a
b
14
15
14
4
IMPORTANT:
Pre-drill before fixing screws.


