


3
4
5
6
7
8
9
10
11
12
13
14
15
16
17
18
19
20
21
P 2
0619LOG015-V4
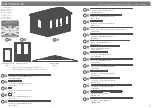
Overall Dimensions:
Width = 4024mm
Depth = 3125mm
Height = 2569mm
Base Dimensions:
Width = 3803mm
Depth = 2799mm
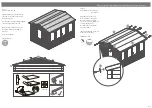
Please retain product label and instructions for future reference
Before assembly
please make sure you have a
suitable base ready to erect your
building
MADE IN GREAT BRITAIN
Gable
2996mm
QTY 2
Starter Board - 66x19x4000mm QTY 2
LB19RT66-A-4000
Log Board - 120x19x1216mm QTY 12
LB19-B-1216
Log Board - 120x19x232mm QTY 24
LB19-B-232
Log Board - 120x19x232mm QTY 24
LB19-C-232
Log Board - 120x19x4000mm
LB19-AD-4000
Log Board - 50x19x4000mm QTY 2
LB19RG50-A-4000
Log Board - 120x19x2996mm QTY 25
LB19-A-2996
Log Board - 120x19x1123mm QTY 24
LB19-B-1123
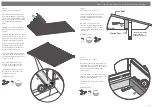
Roof Purlin - 40x90x4004mm QTY 3
F4090-4004
Bearer - 44x44x3720mm QTY 10
F4444-3720-PT
Bearer - 44x44x2804mm QTY 2
F4444-2804-PT
Fascia - 16x120x1608mm QTY 4
S16120-G-1608
Fascia - 16x120x4004mm QTY 2
S16120-4004
Eaves Frame - 27x44x4004mm QTY 2
F2744-4004
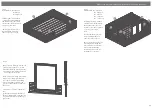
Roof Board - 16x121x1600mm QTY 72
MB16-C-1600
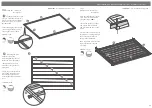
Floor Board - 16x121x2760mm QTY 34
MB16-C-2760
Storm Brace - 27x44x2000mm QTY 8
F2744-2000
22
2
1
Short Window Pack*
QTY 3
Double Door Pack*
23
Log Board - 66x19x2996mm
LB19-AD-2996
Log Board - 120x19x4000mm QTY 19
LB19-A-4000
*All components for the Windows and Doors are
shown in the Windows and Doors instruction packs.
Closure Trim - 16x28x2400mm (approx length) QTY 14
S1628-2400


