background image

85-03-01058-O 

FV33i Gen 3 

Page 

53


4.6


LEVELING BOLTS 

4.6.1


Leveling Bolts Definition 

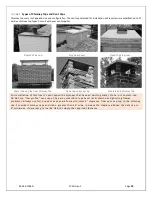
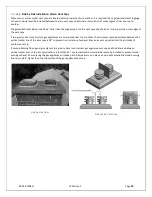
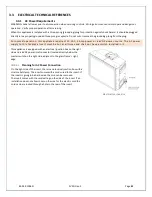
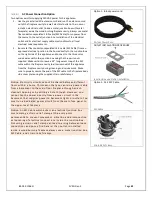
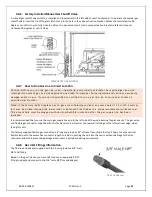
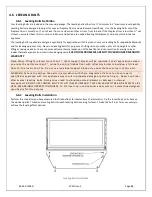
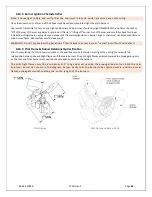
Four leveling bolts are included in the manual package. The leveling bolts allow for a ¼” minimum to 1” maximum leveling ability. 

Leveling bolts are designed to adjust for uneven fireplace floors and yield plumb Insert Body.  Use the leveling bolts only if the 

fireplace floor is more than ¼” out of level from one side to another or from front to back. If the fireplace floor is less than ¼” out 

of level, use metal sheet shims in various thickness and build up to needed leveling thicknesses at various points around the 

appliance. 
The leveling bolts supplied are designed specifically for application with this product. only use leveling bolts supplied by Mendota 

and for leveling purposes only.  Never use leveling bolts for purposes of lifting unit up to make up for ash lip heights or other 

lifting or raising needs. Such use can cause extreme thermal expansion of firebox floor and can result in oil canning noise or 
louder thermal expansion and constriction banging noise. 

SUCH NOISE PROBLEMS ARE NOT COVERED UNDER MENDOTA 

WARRANTY


Note: When lifting this Insert more than 1”, other support blocks will be required. For all applications when 

you raise the unit more than 1”, reline the entire firebox floor with refractory bricks to build up a full level 

floor for the Insert to sit on. Do not use individual support block only under the four corners of this unit. 

WARNING:  Failure to position the parts in accordance with these diagrams or failure to use only parts 

specifically approved with this appliance may result in property damage or personal injury.  Never use other 

after-market leveling bolts. Doing so can lead to vibration noise problems or damage to internal 

components.DO NOT USE LONGER BOLTS TO LIFT INSERT UPWARD. THIS CAN CAUSE OTHER SIDE EFFECTS LIKE 

HEAT EXPANSION/CONTRACTION NOISES. To lift Insert up, use Firebricks and mortar or a metal box designed 

specifically for this purpose. 

4.6.2


Leveling Bolts Installation 

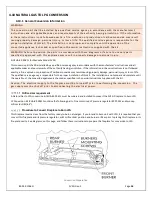
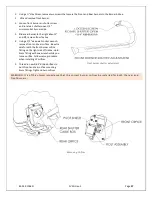
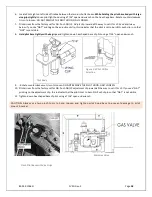
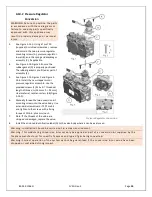
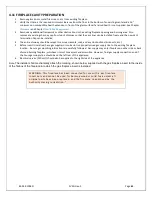
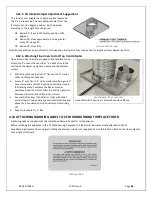
Perform this step after you have measured the firebox floor for level surface characteristics. Tip the Insert body on its back on 

the wooden pallet. Thread one leveling bolt into each leveling bolt receiving fastener. Thread the bolt in as far as necessary to 

achieve the leveling effect desired. 


Leveling Bolts Installation 

Summary of Contents for FV33I Gen 3

Page 1: ...AIRE SI VOUS SENTEZ UNE ODEUR DE GAZ Ne pas tenter d allumer d appareil Ne touchez à aucun interrupteur Ne pas vous servir des téléphones se trouvant dans le bâtiment où vous trouvez Appelez immédiatement votre fournisseur de gaz depuis un voisin Suivez les instructions du fournisseur Si vous ne pouvez rejoindre le fournisseur de gaz appelez le service des incendies L installation et l entretien d...

Page 2: ...too hot to touch As long as all required clearances to combustibles are met and the required finishing materials are used this appliance will perform safely Note that the exposed surfaces immediately surrounding the Insert can have surface temperatures that are too hot to touch This level of surface temperature is considered normal and does not indicate any hazardous situation WARNING The supplied...

Page 3: ...GENERAL TECHNICAL REFERENCES 10 3 2 MECHANICAL TECHNICAL REFERENCES 12 3 2 16 5 1 Paint Types Approved for Use 34 3 2 16 5 2 Sealants Type Approved for Use 34 3 2 16 5 3 Wood Application Cautions 34 3 3 ELECTRICAL TECHNICAL REFERENCES 41 3 4 PLUMBING TECHNICAL REFERENCES 45 4 1 INSTALLATION CHECKLIST 49 4 2 UNPACKING THE INSERT 50 4 3 CONTENTS OF THE MANUAL PACKET 51 4 4 WHAT IS NOT INCLUDED WITH ...

Page 4: ...OMEOWNER 71 5 4 OPERATING INFORMATION 71 5 5 REMOTE CONTROL OPERATING INSTRUCTIONS 74 5 6 IPI AND PILOT ON DEMAND MODES 76 5 7 FIRST TIME LIGHTING INSTRUCTIONS 77 5 8 OPERATING INSTRUCTIONS 77 5 9 TO TURN OFF GAS TO FIREPLACE 77 5 10 FREQUENTLY ASKED QUESTIONS 78 6 1 REQUIRED PERIODIC INSPECTIONS 82 6 2 CLEANING VIEWING GLASS 82 6 3 REQUIRED ANNUAL MAINTENANCE 82 6 4 OVER FIRING OR UNDER FIRING OF...

Page 5: ...code authorities for details on installation requirements The Mendota Fireplace must be vented to the outside in accordance with the latest edition of the National Fuel Gas Code In the absence of local codes the installation must conform to the most current edition of the National Fuel Gas Code ANSI Z223 1 also known as NFPA 54 CAUTION The Mendota Fireplace Insert may be installed in a manufacture...

Page 6: ...du panneau à un technicien agréé WARNING Mendota gas fireplaces are heat producing appliances Do not burn wood paper or other materials in this fireplace This fireplace is designed as a supplemental heat source It is advisable to have an alternative primary heat supply WARNING Improper installation adjustment alteration service or maintenance can cause injury or property damage Refer to this manua...

Page 7: ...ments abritant les commandes les brûleurs et les conduits de circulation d air de l appareil soient tenus propres Always keep the fireplace clear and free from combustible materials gasoline and other flammable vapors and liquids Never obstruct the flow of combustion and ventilation air Keep the front of the fireplace clear of all obstacles and materials for servicing and proper operation Use only...

Page 8: ... cleaner KelKem Turn off the gas before servicing this fireplace It is recommended that a qualified service technician perform a fireplace check up at the beginning of each heating season Do not place furniture or any other combustible household objects within 60 of the fireplace front per fire safety code This vented gas fireplace heater is not for use with air filters Foyer au gaz à évacuation N...

Page 9: ...tts State Building Code 3 A metal or plastic identification plate shall be permanently mounted to the exterior of the building at a minimum height of eight 8 feet above grade directly in line with the exhaust vent terminal for the horizontally vented gas fueled heating appliance or equipment The sign shall read in print size no less than one half 1 2 in size GAS VENT DIRECTLY BELOW KEEP CLEAR OF A...

Page 10: ... of initial burn allow fireplace to cool Proceed with Mendota Fireplace Insert Curing Instructions This fireplace must be installed and serviced by a qualified installer service agency or the gas supplier Any adjustments to burner pilot logs or coal bed must be made by a qualified installer service agency or the gas supplier If the ignition control system goes into lockout mode always wait 5 minut...

Page 11: ...continue to Step 3 Step 3 Final Curing Cycle With the fireplace still turned on from Step 2 Set the Fan Speed Control to the lowest setting Level 1 If any new curing odors are detected continue to run the fireplace with this setting until the curing odors have diminished ATTENTION Slight odors may still be noticeable on future startups of the fireplace These will diminish over time as the fireplac...

Page 12: ... Cavity For refacing around an existing Masonry Fireplace or a Factory Built Zero Clearance Woodburning Fireplace see Re facing a Woodburning Fireplace WARNING Do not attempt to install this Gas Fired Insert Heater inside any cavities other than a Masonry Woodburning Fireplace cavity or a Factory Built Zero Clearance Woodburning Fireplace cavity Doing so will lead to a house fire which can lead to...

Page 13: ...g label is located in the air gap on the left side of the Insert between the glass frame and outer edge of the Insert It is secured to a chain and loosely inserted in the left air gap and can be pulled out to be viewed Figure 2 1 Listing Label Serial Label Location ...

Page 14: ...ed all the warning and caution statements during installation and maintenance of this appliance Supplied in manual box To be attached to existing fireplace opening prior to insert installation Located on right side of unit near electrical inlet Located on top of unit near vent adapter Located on chain with serial plate at bottom of unit ...

Page 15: ...85 03 01058 O FV33i Gen 3 Page 15 Located on glass door of unit ...

Page 16: ...4 diameter EXHAUST 3 diameter AIR INLET APPROVED VENTS 10 Feet Minimum Vent Length 55 Feet Maximum Vent Length BDM brand 3 X 4 liners and vent cap Duravent brand Insert Vent Kits with 3 X 4 liners and vent cap Duravent brand 3 X 4 Liners 3 X 4 to 4 X 6 5 8 Coaxial Chimney Top Adapter and High Wind Cap ICC brand EXELDirect 3 X 4 liners and vent cap Olympia brand 3 X 4 liners and VDV CC 43 vent cap ...

Page 17: ...eratures that are too hot to touch This level of surface temperature is considered normal and does not indicate any hazardous situation Hearth Pad Temperatures The top exposed surface of the noncombustible hearth pads can reach a temperature that is too hot to touch as high as 250o F This is considered normal Surround Face Temperatures The steel surround installed on this Insert is designed to cov...

Page 18: ...85 03 01058 O FV33i Gen 3 Page 18 3 2 6 Overall Insert Dimensions Front View Top View Back View Right Side View ...

Page 19: ...n 3 Page 19 3 2 7 Insert Features Identification See Insert Features Diagram below Identify the features included with this Insert and their locations Insert Features Diagram MANUAL GAS SHUTOFF LEFT SIDE SWITCHES RIGHT SIDE ...

Page 20: ...eration after fireplace flames turn off Lifting Handles Two lifting handles one on each side are provided The lifting handles make it easy for two individuals to lift this Insert WARNING The lifting handles are designed only for lifting and moving the fireplace short distances Such as lifting the fireplace onto a transport cart or shifting the fireplace during installation Do not attempt to carry ...

Page 21: ...e for any reason The cover plate position is adjustable front to back by 1 4 To adjust the floor cover plate position loosen four Philips head screws do not remove loosen only and adjust the floor cover plate position dependent on if you will be using a decorative door kit faceplate surround or a Basix surround For a faceplate for door kits slide the floor cover plate forward fully and tighten the...

Page 22: ...plate surround application and slide all the way rearward for a Basix surround application 2 Slide Insert inside fireplace cavity as far as possible 3 Identify the front edge of the floor cover plate 4 Measure from the front edge of the floor cover plate to the face of the adjacent wall surface that the surround outer edge will butt against This measurement will be equal to the required outer edge...

Page 23: ...ow installation of this Insert in cavities with shallower depths Consult with your Mendota Dealer for specific details and availability Use a Basix if installing one of these decorative options a Barrier Screen only with no decorative option b Traditions Decorative Front c Grace Decorative Front wide narrow arched or rectangle d Willowbrook Decorative Front arched or rectangle e Solo Decorative Fr...

Page 24: ...ert in cavities of shallower depths Consult with your Mendota Dealer for specific details and availability Use if installing one of these decorative door options a Andover Door Kit b Prairie Door Kit c Bentley Door Kit d Homestead Door Kit e Willow Door Kit Size Width in A Height in B Outer Edge Return Option X SMALL SMALL 36 24 SMALL MEDIUM 40 27 MEDIUM LARGE 44 31 RECTANGLE FACEPLATE SURROUND SI...

Page 25: ...edge This type of outer edge is available in either rectangle or arched shaped surrounds and any custom surround 4 Outer edge greater than in any size up to 10 This type of outer edge is available for any custom surround Outer Edge Size vs Fireplace Depth Requirements The minimum fireplace depth required in the existing wood burning fireplace to fit this Insert into will vary depending on the oute...

Page 26: ...articular size to meet installation depth needs You may request a rendering prior to ordering the custom which can show the decorative front of your choice on top of the custom surround You may request a rendering with known dimensions or you may supply the fireplace opening dimensions and request as an example equal reveal outside a Grace kit or a door kit Mendota will provide you with a rendered...

Page 27: ...ges of the visible glass unless such objects are more than 18 away from the visible side edges of the glass See Side Wall Clearances If the required clearance cannot be met to a pre existing combustible side wall an NFPA approved clearance reduction shield metal or ceramic board must be added to the side wall Horizontal Clearance Reduction by 66 NPFA 211 Approved Install 20 gauge or heavier steel ...

Page 28: ...ng mantel does not conform to required clearances either remove and relocate the combustible mantel at an approved height or add a 20 gage metal shield underneath the combustible mantel that extends the full width and depth of the combustible mantel Provide a 1 active air space between the metal shield and the bottom surface of the combustible mantel Use ceramic spacers to create the 1 active air ...

Page 29: ...85 03 01058 O FV33i Gen 3 Page 29 Mantel Clearance Reduction Method ...

Page 30: ...t guarantee any materials used around the insert Mendota disclaims any and all liability for any damage to finishing materials including warping discoloring cracking peeling or flaking This also includes any off gassing or unpleasant smells from materials when they are heated Hearth Pad Materials A hearth pad with an R Value of at least 1 is required unless the insert is raised off the floor 6 or ...

Page 31: ...cross the opening of the fireplace On the bottom face of this horizontal galvanized steel stud a heat rise barrier made from thick noncombustible mineral board must be installed in a manner which completely blocks heat from seeping and rising upwards between the existing wall face and the newly installed wall surface structure Warning Failure to install this Heat Rise Barrier board can lead to a f...

Page 32: ...rials including warping discoloring cracking peeling or flaking This also includes any off gassing or unpleasant smells from materials when they are heated R Values of Common Finishing Materials R Values of Hearth Pad Boards Material Thickness R Value Application Mineral Fiber Board Micore 160 300 SB 1 2 1 2 1 4 Only approved for use as an insulator under other non combustible finishing material f...

Page 33: ...le Granite and Natural Stones Marble granite and other natural stone products are approved for use as mantel facing and hearth pad materials with the following limitations and understanding of these cautionary statements Never use a one piece marble granite or natural stone that is water jet or mechanically cut in a U shape as facing material to cover the sides and top areas around this product Do...

Page 34: ...paint for applications on facings mantels corbels or floors within 2 in front of an insert raised 6 or higher avoid off the shelf paints which may have modifier additives used to increase hiding ability accelerate drying times and curing times Consult with a reputable paints and sealants supplier and acquire industrial acrylic paints or alkyd based paints 3 2 16 5 2 Sealants Type Approved for Use ...

Page 35: ...ceed maximum operation temperatures Mendota Hearth will not be held liable for any adverse effects on a television or other products located near to a Mendota Hearth fireplace The drawings below show recommendations that may be used as a guide for those consumers that decide to locate a television above a Mendota Hearth fireplace These recommendations have been found to reduce the heat impact to a...

Page 36: ...above the fireplace The cavity shall be at least 6 inches taller and 6 inches wider than the television The cavity s bottom surface must be a minimum of 24 inches above the top air gap of this fireplace The cavity must be deep enough for the television to be recessed at least 2 inches in from the wall ...

Page 37: ...m using a 4 exhaust flex and 6 air intake flex with spring spacers between the two flex pipes Air Intake Liner Stubbing When existing wood burning chimney size is too small to run both 4 and 3 liners it is an option to cut the air intake flexible duct short and run only the 4 vent flexible duct to the vent cap connector This is generally called stubbing However understand that doing so may lead to...

Page 38: ...Safety Institute of America recommends that open masonry fireplaces should be swept at 1 8 of sooty buildup and sooner if there is any glaze present in the system This is considered to be enough fuel buildup to cause a chimney fire capable of damaging the chimney or spreading to the home Factory built fireplaces should be swept when any appreciable buildup occurs The logic is that the deposit is q...

Page 39: ...himney Top Stone Cap Chimney Top Concrete Cap Chimney Top For installation of this Insert s vent cap with chimneys that have an existing metal stone or concrete cap Do Not use low profile vent caps They are vulnerable to exhaust recirculation and ghosting flames problems Always use full size vent caps and allow a minimum 3 clearance from vent cap top to the chimney cap For wider chimney caps and s...

Page 40: ...ppliances are terminated next to each other the minimum required distance between the vertical center line of the vent caps is 18 to prevent recirculation of exhaust from one vent cap outlet into the air intake of another vent cap If a wood burning flue opening is adjacent to a gravity direct vent system gas appliance vent cap and the distance between vertical center lines of the two terminations ...

Page 41: ...The AC power supply to this fireplace Insert must be hot at all times and shall not have a switch installed in it This appliance is equipped with an electrical junction box on the right side and a 6V DC power inlet connector located directly below the master switch on the right side adjacent to the glass frame s right edge Planning for AC Power Connection On the right side of the insert there is a...

Page 42: ...vity during cleaning and service work Make sure to properly secure the end of the MC cable to the fireplace body side cover plate using the supplied strain relief clamps Notice Electricity circuits cannot be shared between different floors within a home This means that you can run a power cable from a basement to the main floor fireplace through an ash cleanout opening or by drilling a hole throug...

Page 43: ...C power to the unit when necessary To operate this appliance during a power outage plug in the backup battery pack harness into the backup power inlet Then Insert four 4 fresh AA batteries in the battery pack This appliance operates on 6 Volts DC power only Do not attempt to use higher voltage or lower voltage power sources The four 4 AA batteries will allow operation of this Insert for approximat...

Page 44: ...proper and dangerous operation Verify proper operation after servicing 3 3 1 Wi Fi Dongle and Application This appliance has the capability to be controlled via an application through Wi Fi The Wi Fi dongle is factory installed and wired between the dongle and the control module The Wi Fi dongle shall be attached to the RH access panel assembly with Velcro The Wi Fi dongle is equipped with a reset...

Page 45: ...e NPT end adapter comes installed on the insert The flex supply line comes installed through the back of the insert If an installation does not allow room for the gas line at the back of the insert the gas line can be rerouted out the side of the insert To reroute the flex line disconnect the flex line from the ball valve and pull it out of the insert Then reconnect the flex line to the ball valve...

Page 46: ... equal to or less than 1 2 psi 3 5 kPa If the factory built fireplace has no gas access hole s provided an access hole 1 5 or less may be drilled through the lower sides or bottom of the firebox in a proper workmanship like manner This access hole must be plugged with non combustible insulation after the gas supply line has been installed 3 4 4 Drip Leg Recommended It is recommended that a drip le...

Page 47: ...ole s provided an access hole of 1 5 in 37 5 mm or less may be drilled through the lower sides or bottom of the firebox in a proper workmanship like manner This access hole must be plugged with non combustible insulation after the gas supply line has been installed It is recommended that you run the main gas supply line end to the left side of the wood burning fireplace cavity The gas valve and fl...

Page 48: ...be at least 30 000 Btu LPG Input Rate Verification Verify main orifice size The main orifice body has the orifice hole size stamped on it LPG orifice size shall be 3 64 rear burner and 3 64 front burner for all elevations Verify that the manifold gas pressure is within 10 0 WC 1 8 3 4 10 High Altitude De Rating If you are de rating this appliance at a high altitude attach the High Altitude De Rati...

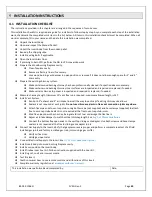
Page 49: ... flex run is required maximum allowed length is 55 Install Vent System Run both 4 exhaust and 3 air intake liners all the way to vent cap if existing chimney size allows Sealant is not required at vent joints Do not use silicone sealants in flex vent connection joints anywhere Attach flex pipe ends to vent cap stubs using both screws not supplied and hose clamps supplied to attach flex to vent cap...

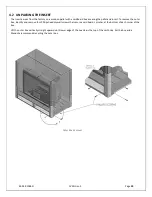
Page 50: ...llet and insert To remove the outer box identify and remove four Philips head drywall screws that secure a cardboard L pincher at the bottom of each corner of the box Lift the outer box vertically straight upward until lower edge of the box clears the top of the unit body Set the box aside Mendota recommends recycling the outer box Outer Box Removal ...

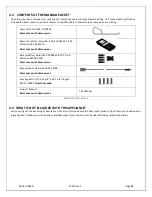
Page 51: ...ust Leave with Homeowner Backup Battery Holder 05 02 00345 QTY 4 AA Batteries 65 06 01147 Must Leave with Homeowner Backup Power Harness 10 03 00128 Must Leave with Homeowner Leveling Bolts QTY 4 AL 3 8 16 X 1 1 4 Length 50 01 00289 Install if needed Owner s Manual Must Leave with Homeowner This Manual Manual Packet Contents 4 4 WHAT IS NOT INCLUDED WITH THIS APPLIANCE Surround log set firebox lin...

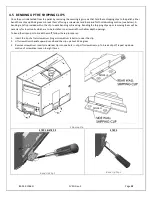
Page 52: ...ing the shipping clips up or removing them will be necessary for Insert units which are to be installed in narrow width or shallow depth openings To bend the clips up or to break them off follow these procedures 1 Insert the tip of a flat screwdriver longer screwdriver is better under the clip 2 Lift screwdrivers handle upwards and bend the clip up about 45 degrees 3 Remove screwdriver Insert scre...

Page 53: ...ROBLEMS ARE NOT COVERED UNDER MENDOTA WARRANTY Note When lifting this Insert more than 1 other support blocks will be required For all applications when you raise the unit more than 1 reline the entire firebox floor with refractory bricks to build up a full level floor for the Insert to sit on Do not use individual support block only under the four corners of this unit WARNING Failure to position ...

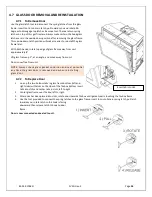
Page 54: ...t an angle and move away from unit Door is now free from unit NOTE Always check glass gasket condition and seal potential any time the glass door is removed and when reinstalling glass door 4 7 2 To Replace Door 1 Line up the two bottom tabs in glass frame bottom left and right sides with slots on the sides of the firebox bottom Insert tabs into slots and center tabs in slots left to right 2 Cente...

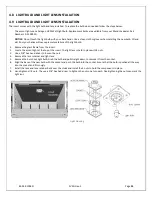
Page 55: ...bulb 1 Remove the glass frame from the insert 2 Locate the accent light at the top of the insert The light lens is held in place with 4 nuts 3 Use a 3 8 hex hand driver to loosen the nuts 4 Remove the lens retainer and light lens 5 Remove the burnt out light bulb Grab the bulb and pull straight down to remove it from the socket 6 Align the base of the new bulb with the socket and push the bulb int...

Page 56: ... jurisdiction If the information in these instructions is not followed exactly a fire explosion or production of carbon monoxide may result causing property damage personal injury or loss of life The qualified service agency is responsible for the proper installation of this kit The installation is not proper and complete until the operation of the converted appliance is checked as specified in th...

Page 57: ...a 1 2 deep well socket wrench remove front and rear orifices Be extra careful with the front burner orifice fitting on the right side of firebox Hold brass fitting with one wrench while you loosen orifice Follow same procedure when installing LP orifices 5 Thread in new 3 64 drilled orifices to both front and rear orifice mounting brass fittings Tighten down orifices WARNING It is of the utmost im...

Page 58: ...h clip in so that NAT is not visible 8 Hold pilot base tightly with vice grips and tighten down hex shaped base of pilot using a 7 16 open end wrench Pilot Body Figure 3 2 Pilot Orifice Selection 9 Rotate counterclockwise turn to loosen DO NOT REMOVE THE PILOT HOOD ONLY LOOSEN 10 Pilot arrives from the factory set for NG Push NG LP adjustment clip inward all the way to set it for LP If you see NAT...

Page 59: ...mble Use the provided screws F M4 x 0 7 threaded length of thread L 16mm 0 0 5mm steel material resistance class 8 8 Figure 3 14 5 6 Manually thread the two conversion kit mounting screws into the valve body Use a standard screwdriver or T20 Torx bit and tighten to the screws with a fixing torque of 25lb in plus or minus 5 7 Note If the threads of the value are stripped or damaged replace the valv...

Page 60: ...n burner flame Vent system must be leak proof WARNING Do not proceed with operation of this fireplace unless burner cycles on off without delays 4 10 4 Pilot Flame Burner Relationship Verification Prior to completing the LPG conversion process the qualified service technician must light the pilot light and verify the relationship between the pilot light flames and the main burners The pilot light ...

Page 61: ... etc 5 Before Insert is installed have gas supplier or contractor run properly sized gas supply line to the existing fireplace location Be sure gas plumbing instructions are carefully followed Gas supply may enter fireplace on either side or back of wood burning fireplace whichever is most convenient and accessible However final gas supply connection end of the house gas supply line should be on t...

Page 62: ...NOTE Mendota recommends that both exhaust and air intake flex liners be run all the way to the vent cap Seals between flex liners and unit top and vent cap must be permanent and as airtight as possible Never use silicone sealants in pipe joints Use of sealants at flex pipe joints is not required Do use both securing screws and hose clamps at all four flex connection points When existing wood burni...

Page 63: ...top of unit Remove the vent adapter by unlatching spring loaded lever from front of the unit Use the glass latch tool to hook into the latch pull forward and lift latch up to release Removing Vent Adapter Flex Liners Connections Round high wind cap Square Cap Round Cap ...

Page 64: ...sheet metal strap loop to the flex end of the liner s and tie a rope to it Two installers should proceed to the roof and drop the rope with weight on the end to make sure it goes all the way down and insert the 4 and 3 liners past the flexible portion into the existing chimney 3 One installer should then return to the fireplace opening and pull the rope to guide the liner s into place through the ...

Page 65: ...g the vent cap base plate or flashing to the Chimney Top Note It is required that the chimney top be permanently sealed to prevent cold air infiltration into the home The vent cap base plate of a square shaped vent cap or the base plate of a co linear to coaxial vent adapter chimney top adapter must be sealed airtight and permanently to the existing chimney top To seal to the top of a chimney foll...

Page 66: ...ter collar on sliding vent adapter 2 Secure 4 vent flex to 4 starter collar employing one 4 hose clamp and a ratchet Position hose clamp close to the flashing plate Compress the flex as much as possible around the starter collar to obtain a tight joint between starter stubs and flex inner surface 3 Secure the flex liner to the starter collar with sheet metal screws in two equally spaced radial loc...

Page 67: ...fy power connection 4 Create large vertical loops behind or to the side of the Insert body with both excess gas flex line and excess electrical MC Cable 5 Slide vent adapter forward between guide rails Vent adapter s front flat section should contact insert top as you slide the Vent Adapter forward 6 Use spring loaded lever to pull vent adapter back into place on the unit and then latch it to fron...

Page 68: ...asix or Faceplate with the shoulder rivets that are factory installed on the left and right sides of the Insert outer skin s front edge Lift slightly and slide hooks onto the shoulders of the shoulder rivets 5 If you wish you may use the four 8 X 1 2 long sheet metal screws provided to secure the Basix or Faceplate permanently to the Insert body However Mendota discourages doing so unless necessar...

Page 69: ...justments to the air shutter may be necessary for final flame appearance These small shutter adjustments can be made by the following procedure NOTE Very small changes in shutter settings make major changes in flame appearance Note Two air shutters exist One for the front burner and one for the rear burner Both burners need individual adjustment for flame color and glow effect control 1 Air shutte...

Page 70: ... lighting and log installation instructions Make certain that pilot flame lights immediately and lights both front and rear burners DO NOT proceed with operation unless burner cycles on off without delays and the flame is stable and not lifting off burner after 5 minutes of initial ignition Caution If ignition control system goes into lockout mode be sure to wait a minimum of five minutes before r...

Page 71: ...internal firebox lining options and external decorative options Visit www mendotahearth com and your local Mendota dealer s show room to view all options available 5 2 HEATING PERFORMANCE Mendota s high heat output fireplace Insert will heat a large area of your home Air movement options for maximizing heat circulation that can be considered are operating the Insert s convection blowers continuous...

Page 72: ...ase of an emergency toggle the master switch to off to turn off the main burners To synchronize the fireplace and remote control follow the steps below 1 Toggle the master switch to on toggle up 2 Locate sync switch above master switch in the right side air gap Press the sync button and release The fireplace will beep three times indicating that it is ready to synchronize with a remote control Not...

Page 73: ... to another room or if the remote batteries are very weak b Normal Thermostat On In this mode the fireplace will turn itself on and off depending on the temperature you set When you set the fireplace thermostat the fireplace will stay functioning until the room temperature increases 1o F above the set thermostat temperature To increase the thermostat temperature press the up button until the desir...

Page 74: ...ng Smart Thermostat a If the thermostat icon displays as OFF Manual the fireplace will ignite and start on Hi b If the thermostat icon displays as ON Normal Thermostat the fireplace will only ignite if the thermostat temperature is greater than the room temperature c If the thermostat icon displays as SMART Smart Thermostat the fireplace will only ignite if the thermostat temperature is greater th...

Page 75: ... The fan speed can be adjusted through six speeds and off To activate this function press the Mode button until it displays the fan icon Use the up down arrow button to turn on off or adjust the fan speed Once you set the desired fan control the system will remember your selected fan speed until you manually change it Accent Light This function controls the accent light functions Pressing the UP b...

Page 76: ...gnite and remain on for a time of 7 days of inactivity before shutting off Each time the fireplace is used the 7 day clock will reset 5 6 1 Setting to IPI or CPI mode With the remote control OFF press the MODE button You will see either CPI or IPI displayed on the screen Press the Up arrow button to set CPI mode and press the DOWN arrow button to set IPI mode Once set to the desired setting press ...

Page 77: ...ed the valve will automatically open and the burner will light The burner will initially light to full flame Adjust it to an appealing setting with the remote See Remote Operating Instructions in Operating Instructions Manual Warning If the pilot fails to light the system will lockout Press ON OFF button on remote control to Turn Off the system and reset the lockout Allow five minutes for any gas ...

Page 78: ...ire department for assistance 5 10 2 Where can I find the model and serial numbers When requesting service you will be asked to provide the model number and serial number to your Mendota dealer This information will expedite the warranty verification process This is an example of your listing label Listing label location The listing label is located in the air gap on the left side of the Insert be...

Page 79: ...an all lint and dust build up around the control Inspect the condition of any wiring under the burner for melting or damage 2 Clean pilot light flame sensor rod and sparker rod using emery cloth Vacuum clean pilot light assembly 3 Visual check of pilot flames is required Pilot flame must overlap flame sensor and burner ignition ports always Especially for LP gas applications always verify visible ...

Page 80: ...rectly Improper setup and adjustment is not covered under warranty 5 10 7 What should I do if my fireplace is sooting Sooting is caused by improper installation or air shutter operation However some small areas of soot deposits on log surfaces are deemed acceptable If you observe large soot areas larger than 1 x1 on log surfaces or signs of sooting on the door glass usually a thin black film on th...

Page 81: ...wn 4 If you see set the thermostat button is now enabled 5 If you see clear the thermostat button is disabled 6 Repeat this procedure if you did not see set or clear to add remove the thermostat option 5 10 12 Why won t my fireplace turn on If your remote control is working but your fireplace will not turn on your fireplace may be in lockout mode How to reset a lockout 1 Turn off remote 2 Turn on ...

Page 82: ... glass is hot The viewing glass should be cleaned periodically Exterior glass surface may be cleaned with cleaner as desired To clean Interior glass surface remove glass frame assembly To Remove Door Use Kel Kem polish plus part 65 06 00455 or comparable product to clean glass interior surface Do not use oven cleaner or abrasive cleaners to clean glass 6 3 REQUIRED ANNUAL MAINTENANCE In addition t...

Page 83: ...compounds which can damage the burner materials and the ceramic glass Use of unpurified gas will void the warranty for this product 6 5 IGNITION SYSTEM LOCKOUT MODE AND RE LIGHTING If ignition system goes into lockout mode be sure to wait a minimum of five minutes before attempting to re light If lockout occurs frequently contact you Mendota Dealer for diagnosing the problem Frequent lockout can b...

Page 84: ...65 07 00744 Ball Valve 6 1 65 14 00364 Front Rear Orifice 3 64 7 1 65 07 00755 3 8 X48 Flex Gas Supply Line Connector Kit 8 1 70 01 00130 Burner Rear 9 1 HA 82 00408 Burner Assembly Front 10 1 05 02 00345 Backup Battery Holder 11 1 10 03 00128 Backup Power Harness 12 1 10 03 00066 Power Cord 96 13 1 15 02 00129 Blower LH 14 1 15 02 00130 Blower RH 15 1 10 11 00025 Accent Light Lens 16 1 10 11 0002...

Page 85: ...85 03 01058 FV33i Gen 3 Page 85 6 7 2 Convection Air Blower System Parts Blower System Parts 6 7 3 Burner System Parts Burners Systems Parts ...

Page 86: ...85 03 01058 FV33i Gen 3 Page 86 6 7 4 Gas Valve Train Parts Gas Valve Train Parts Gas Valve Assembly Parts ...

Page 87: ...85 03 01058 FV33i Gen 3 Page 87 6 7 5 Ignition Control Module Assembly Parts 6 7 6 Accent Light Accent Light Bulb Lens Installation Accent Light Lens Installation 05 02 00416 HA 110 00105 ...
Page 88: ...The adhesive on the gasket should contact the glass surface Use tracer lines in gasket to determine where the glass should sit on the gasket surface 4 Place glass and gasket assembly in glass frame and carefully bend down glass retainer tabs Extra glass retainer tabs are provided should any originally used tabs break off The glass frame assembly and its individual components are available through ...

Page 89: ...n manual Burner flames are stable and are not lifting off burner Inform owner that an initial curing step is required Read and follow Mendota Fireplace and Insert Curing Instructions found on unit and in owner s manual Smoke will emit during initial curing step Provide owner with contents of owner s manual packet Owner s manuals remote control transmitter glass latch tool backup battery system etc...

Page 90: ...rmal breakage only STD Stainless Steel Burner Tubes Ceramic Burners STD All Castings EXT STD Valve Assembly and all gas control components Pilot Assembly Flame Sensor Spark Electrode Pilot Tubing Orifices Thermocouple Thermopile EXT STD All other Electrical Components Ignition Control Boards Wiring Switches Blowers Blower Control Module Battery Pack EXT STD Venting Venting Components EXT STD Remot...

Page 91: ...med to be defective prior to processing or authorizing of any claim Failure to allow this upon request will void the warranty All warranty claims must be submitted by the dealer servicing the claim including a copy of the Bill of Sale proof of purchase by you All claims must be complete and provide full details as requested by Mendota to receive consideration for evaluation Incomplete claims may b...

Page 92: ...t covered under the terms of this warranty 14 Freight damages for products or parts are not covered under the terms of the warranty 15 Products made or provided by other manufacturers and used in conjunction with the Mendota appliance without prior authorization from Mendota may void this warranty Limitations of Liability The original purchaser s exclusive remedy under this warranty and Mendota s ...

Page 93: ... register with Mendota to qualify for the Lifetime Limited Warranty within 30 days Product registration will activate your Lifetime Limited Warranty Owners should complete the forms available at mendotahearth com warranty Note Your Mendota dealer can assist with warranty applications and information ...

Page 94: ...85 03 01058 FV33i Gen 3 Page 94 NOTES ...

Page 95: ......

Page 96: ...Johnson Gas Appliance Company 520 E Avenue NW Cedar Rapids Iowa 52405 Mendota Warranty Registration ...

Reviews: