background image

14

.AC power supply outlet should be putted near to the monitor, and in your reach, so that you 

can cut off the power supply in time


Operation instructions


Connect with the computer


一、

Do turn off the pc and power supply when you connect system


二、

Please operate according to the following procedures when you connect monitor with your 

system


1


Connect the power cord for your monitor to the power port on the back of the monitor 

plug the power cord for the monitor into a nearby outlet.


2


.Connect your signal cable to the video port on your computer, fasten it,


3


Press the power switch and open the monitor


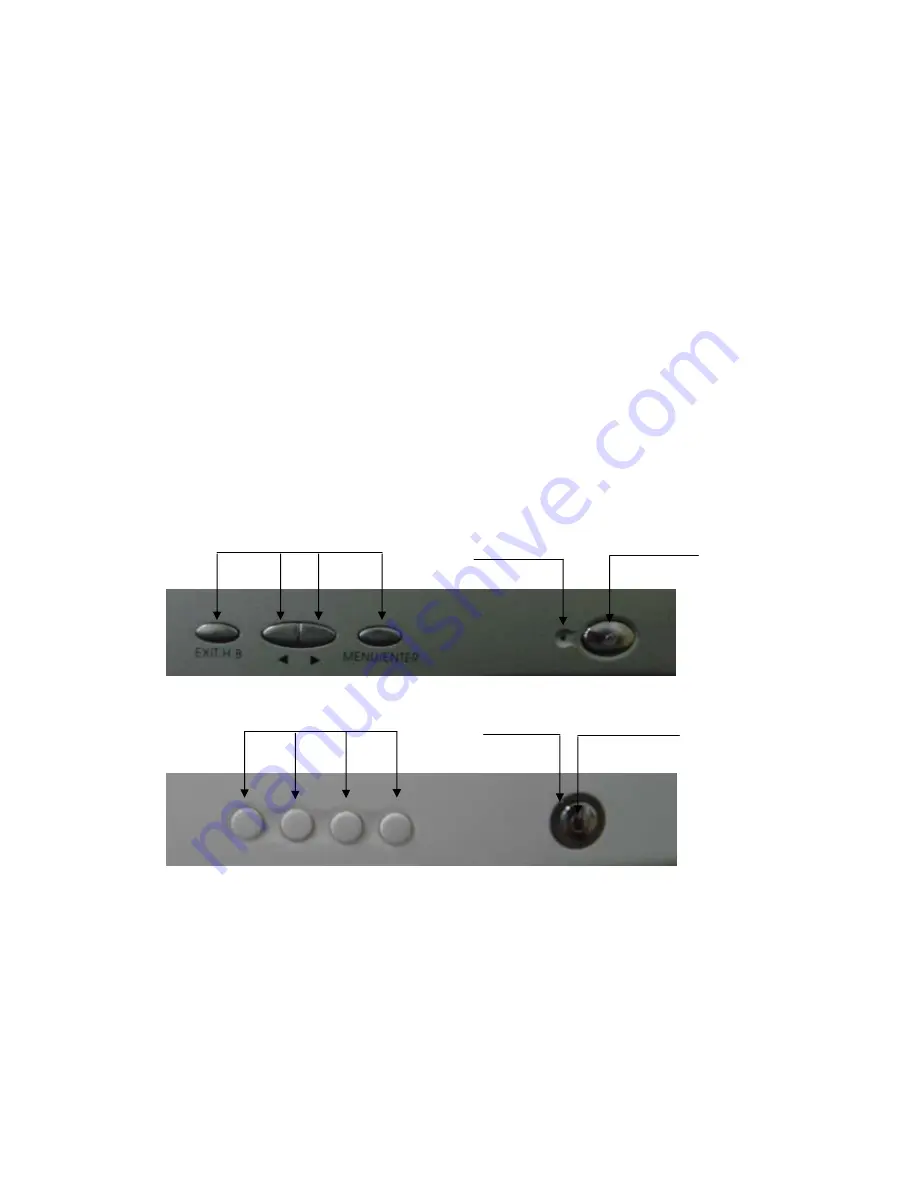
.Following is OSD operation of figure 


function for press.                            Led for power                          switch for power 


5


function for press          Led for power     switch for power    .    . 


Introduction of function keys


*

EXIT/H.B”. button is used to switch between three brightness modes (soft ,standard and rich 

vibrant mode) and to exit the main menu,

MENU/ENTER

button is to display the menu and 

to confirm the selection or setting.

+/

and

“—

/

is used to make selections and in operation 

menu and to make adjustment.


Summary of Contents for MM1720

Page 1: ...1 Memorex MM1720 17 Color Monitor Operation Manual Please read the operation manual carefully before using...

Page 2: ...Operation directory Operation Instructions 3 Introduction of function keys 4 Three brightness mode 4 Main menu for customs adjustment 4 Menu Function and descriptions 5 Control system of power supply...

Page 3: ...t static elect ricity and anti dazzle Compatible with many kinds of specifications Including IBM XGA VGA SVGA VESA Scopes of automatic scan Horizontal frequency 29 75KHz Vertical frequency 46 140Hz Su...

Page 4: ...ntilation 6 Never insert metal object into the ventilation holes in order to prevent electricity shock 7 Put the monitor at dry and no dust place do not put it in damp basement or hall where there is...

Page 5: ...the power cord for the monitor into a nearby outlet 2 Connect your signal cable to the video port on your computer fasten it 3 Press the power switch and open the monitor Following is OSD operation o...

Page 6: ...there is no menu on the screen you can enter the main menu for customs adjustment by pressing the key MENU ENTER Step2 Choose the function icon which needs adjusting through the key and you can move...

Page 7: ...ion Corrects the image for barrel distortion Trapezoid Corrects the image for trapezoidal distortion Parallelogram Corrects the image for parallelogram distortion Pin Balance Adjust if distort occurs...

Page 8: ...nterference will show if so adjust the line wave and field wave till it get normal Both values are 0 in general conditions Control System of Power Supply energy saving The monitor is EPA ENERGY STAR c...

Page 9: ...o connector with the DDC2B capability Number RGB Mode Signal Signal Pin 1 RED Pin 1 2 Green Pin 2 3 Blue Pin 3 4 Ground Pin 4 5 Ground Pin 5 6 Red Ground Pin 6 7 Green Ground Pin 7 8 Blue Ground Pin 8...

Page 10: ...ower supply or not Switch of Power supply is off not Signal cable connected correctly or not monitor is on the condition of energy saving or not Connect the Power supply Close the switch Connect the s...

Page 11: ...de several factory preset standards which include normal video display standards supported by most video adaptors If the monitor recognizes that the current standard is supported it will use this stan...

Reviews: