15
• If the appliance, cord or plug have been
damaged, have them inspected and if
necessary repaired by an authorised repair
engineer. Never try to repair the appliance
yourself. Please contact the store where
you bought the appliance for repairs under
the guarantee. Unauthorised repairs or
modifications to the appliance will invalidate
the guarantee.
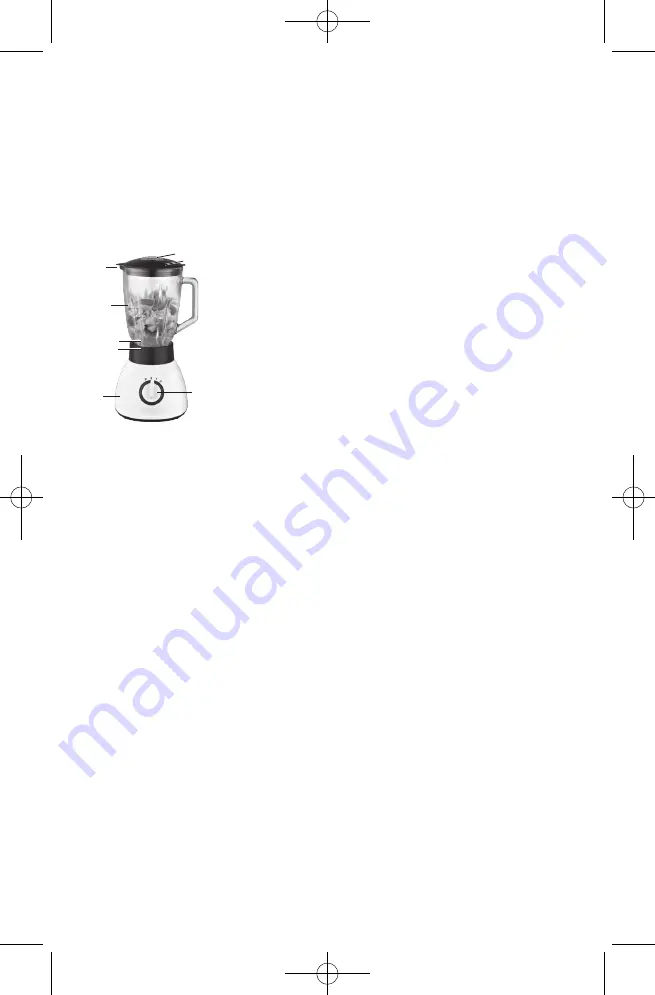
KEY TO MAIN COMPONENTS OF THE
APPLIANCE
1. Pouring spout
2. Blender glass with scale
3. Motor section
4. On/Off button
5. Blender glass lid
6. Cap
7. Blade
8. Blade unit
PRIOR TO FIRST USE
• Before using for the first time, or after
prolonged storage without use, wash any
parts that will come into contact with food.
• Spare cord can be wrapped around the
cord storage holders at the bottom of the
appliance.
USING THE APPLIANCE
1. Place the motor section (3) on a level
surface, e.g. a kitchen counter, and make
sure it is standing firmly on the four suction
cups underneath.
2. Assemble the blade section: Turn the blade
unit (8) upside down, place the sealing ring
inside the unit, and fit the blade in the unit.
3. Screw the blade section onto the bottom of
the blender glass.
4. Fit the blender glass on the drive shaft of
the motor section, and turn it slightly, until it
locks into place.
5. Lift the blender glass lid (5) (can be a bit
tight).
6. Pour food into the blender glass.
o NOTE! Never add liquid or food above
the “1,000 ml” mark on the blender glass.
7. Fit the lid onto the blender glass, so the
curved edge is over the pouring spout (1).
First, push the rear of the lid into the glass
next to the handle, and then push down the
front of the lid next to the pouring spout.
Ensure the lid is firmly pressed into place.
8. Place the cap (6) in the hole in the lid and
turn it until it locks into place.
9. Plug in and switch on the power.
10. Place a hand on the lid and switch on the
appliance by turning the On/Off button (4) to
“1” (low speed) or “2” (high speed).
11. The appliance also has a pulsing option with
extra speed.
o Turn the On/Off button to “P” and hold it
briefly in that position.
o When you release the button, it reverts to
“0” and the appliance stops.
12. You can add more food to the blender glass
during operation through the opening in the
lid. Always switch off the appliance before
removing the cap and adding more food.
13. Turn off the appliance by turning the On/
Off button to “0” when you have finished
blending. Wait until the blade has come to a
complete stop before removing the lid.
NOTE!
• Do not leave the appliance running non
stop for more than 2 minute at a time. If the
appliance has been running for 2 minute,
allow it to cool down for 2 minute before you
use it again.
• Always add liquid to the blender glass when
crushing ice cubes.
CLEANING
When cleaning the appliance, you should pay
attention to the following points:
• Remove plug from the mains socket, and
allow the appliance to cool down before
cleaning it.
• Do not immerse the motor section of the
appliance in water and make sure no water
enters the appliance.
• Clean the motor section by wiping it with a
damp cloth. A little detergent can be added
if the appliance is heavily soiled.
• Never use a scouring pad, steel wool or any
form of strong solvents or abrasive cleaning
agents to clean the appliance, as those
may damage the outside surfaces of the
appliance.
1.
2.
3.
4.
5.
6.
7.
8.
Summary of Contents for 16180059
Page 23: ...23 ...


