11
GB
Q
Starting up
Q
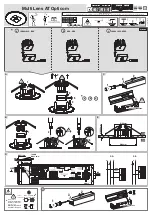
Assembling and setting up the light (Fig.
A)
j
Install the light in accordance with Fig. A.
j
Place the light with the assembled rods into the ground
(lawn, flower bed, etc).
Note:
Ensure that the product stands firmly in place. Do not
use any force when assembling or setting up the product, e.g.
hammer blows. This damages the product.
Note:
For the best results, put the light in a place where the
solar cell
4
is exposed to direct sunlight for as long as possible.
Do not put the light under bushes, trees, canopies etc. as this
reduces the incidence of incoming sunlight. Position the lamp in
such a way that the solar cell
4
is not covered or in the shade.
Note:
Make sure that the solar cell
4
is not near another
source of light such as street or garden lighting as the light will
otherwise not switch itself on automatically when it starts to
get dark.
j
Switch the AUTO / OFF switch
11
on the bottom of the solar
casing
5
into the AUTO or OFF position to switch the lamp
on or off.
Note:
The LED light bulb
2
will automatically switch between
the colours red, blue and green.
Note:
Switch the lamp off (OFF position) if the lamp will be
in the dark for any length of time (e.g. when transporting it
with a rechargeable battery
9
inserted) or the burn time is
not satisfactory due to a very short incidence of light.
j
Open the solar casing
5
into a horizontal position.
j
Switch the AUTO / OFF switch
11
on the bottom of the solar
casing
5
into the AUTO position to recharge the rechargeable
102935 PL_HU_SI_CZ_SK.indd 11
9/2/2014 5:28:51 PM


