background image

WasteStar installation operating instructions FC 


9670512


Design and construction subject to change without prior notice!  


Page 

32

 of 

40


12 

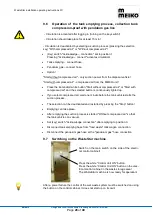
Changing the waste container on the drainage 
press suction tank (container use) 


Switch off the machine ("Control unit OFF" pushbutton) 


Remove the full waste container. 


Position and secure a new waste container. 


Switch on the machine (white pushbutton "Control unit ON") 


13 

Maintenance and care 

13.1  Care, general 

The installation has been designed to keep the need for cleaning, care and 
maintenance to a minimum. 
However, for reliable, safe and long-term function of the installation, and in the in-
terest of hygiene and cleanliness, correct care and maintenance is necessary. 
 

13.2  Care of stainless steel surfaces 

We recommend cleaning the stainless steel surfaces only when needed with 
cleaner and care products suitable for stainless steel. 
Lightly soiled parts can be wiped with a (possibly damp) cloth or sponge. 
Be sure to wipe dry after cleaning to avoid traces of scale. Use demineralised wa-
ter if possible. 
 
Do not use aggressive cleaning or scouring agents. 
The care products must not attack the stainless steel, form deposits, or cause dis-
coloration. 
Never use cleaning agents that contain hydrochloric acid or bleaches based on 
chlorine. 
 
Never use cleaning equipment that you have used previously by non-stainless 
steel to avoid external corrosion. 
 
Aggressive, external influences due to cleaning and care products that evaporate 
in the vicinity of the system, or direct application, may lead to system damage and 
put the material at risk (e.g. aggressive tile cleaners). 
 
Caution! 
Observe the manufacturers' safety rules on the original packing and safety data 
sheets. 


Summary of Contents for WasteStar FC

Page 1: ...ating Instructions for the MEIKO disposal system for organic kitchen waste WasteStar FC Flexible Concept Translation of the Original operating instructions 9670512 Valid from 2009 11 Update 2019 05 27...

Page 2: ...4 Foreseeable use 9 4 EC DECLARATION OF CONFORMITY 10 4 1 Declaration of Incorporation 11 5 GENERAL SAFETY RULES 13 5 1 Operator s duty of care 13 5 2 Measures to ensure safe system operation 13 5 3 B...

Page 3: ...the WasteStar machine out of service 29 10 CLEANING AND SWITCHING OFF THE SYSTEM 30 10 1 Cleaning the pipe magnet daily 30 10 2 Cleaning the agitator monthly 30 10 3 Cleaning of the collection tank e...

Page 4: ...herefore be based on the details the images or the descriptions contained in these operating instructions Should you require any further information or in case any particular problems not dealt with i...

Page 5: ...OFFENBURG Phone 49 781 203 0 http www meiko de info meiko de or Name and address of the MEIKO branch manufacturer s agent or from MEIKO authorised Service Partners Enter company s stamp or address 1...

Page 6: ...WARNING Refers to a dangerous situation which can result in death or serious bodily injury NOTE Refers to a situation which can result in damage to property Application information and other useful i...

Page 7: ...al separate infeed station A button is pressed for vac uuming into the collection tank Optionally the contents of the grease and starch separator grease oil sludge starch can also be conducted to the...

Page 8: ...central separate infeed station A button is pressed for vac uuming into the suction tank The disintegrator breaks down the organic waste after it has been extracted and then feeds it to a drainage pre...

Page 9: ...alified and instructed personnel operates the system only Qualified personnel must be older than 14 years of age Personnel must have been adequately qualified instructed and authorised by the operator...

Page 10: ...the product conforms to the essential requirements of the following EC Directives harmonized stand ards national standards Par la pr sente nous certifions sous notre seule responsabilit la conformit...

Page 11: ...tisfont aux exigences fondamentales en mati re de s curit et de sant conform ment l annexe I de la directive sur les machines 2006 42 CE Les dossiers techniques sp cifiques conform ment l annexe VII B...

Page 12: ...mpleted machinery specified above is to be incorporated also complies with the provisions of the Machinery Directive 2006 42 EC La mise en service de la machine est interdite jusqu ce qu il ait t d te...

Page 13: ...chapter Intended use in order to preserve the operational and safety guarantees whenever re quired only original parts supplied by the manufacturer are used The user loses all potential claims if the...

Page 14: ...of the installation or if it is used for pur poses for which it was not intended The installation may only be operated by adequately qualified staff who have been trained by the operating company and...

Page 15: ...ed staff Do not use the machine if you are unsure about system operation Always keep flaps and cladding sheets closed NOTE Wear suitable work clothing Loose clothing and jewellery increases the risk o...

Page 16: ...ansport procedures must be carried out by qualified personnel only and in ac cordance with the safety precautions Read the chapter General safety instructions The installation must only be transported...

Page 17: ...system is supplied with slide rails to optimise the transition point where appli cable Working on the electric fittings DANGER Risk of injury due to electric shock Work or repairs to the electrical eq...

Page 18: ...plate must match those of the standard drawing and the locally available con nection conditions Conditions to be provided by the customer Frost free storage and installation area Electrical connection...

Page 19: ...device must have 4 poles with alternating current 2 poles The installation must be connected to a potential equalisation system If the neutral line N is not earthed you must use a 4 pin master switch...

Page 20: ...uries during the setting in operation of the in stallation please observe the following points WARNING Risk of injury damage to property As a result of unintended work on the system The chapter Genera...

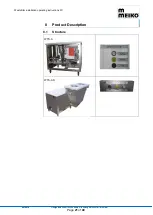
Page 21: ...WasteStar installation operating instructions FC 9670512 Design and construction subject to change without prior notice Page 21 of 40 8 Product Description 8 1 Structure WTS A WTS AS...

Page 22: ...structions FC 9670512 Design and construction subject to change without prior notice Page 22 of 40 WTS AI Feeding station with control section WTS AK WTS AM Suction station of the fresh grease separat...

Page 23: ...Star installation operating instructions FC 9670512 Design and construction subject to change without prior notice Page 23 of 40 WTS R Switch cabinet with control elements Tank emptying unit with cont...

Page 24: ...y pressing the black OFF button Note 1 The orange release light on the control panel means the system is ready for suc tion Note 2 Whenever the feeding is switched on the white ON button flashes if th...

Page 25: ...the OFF button is pressed during the suction process Note 1 The orange release light on the control panel means the system is ready for suc tion Note 2 If the feeding is switch on the white ON button...

Page 26: ...pressing the Stop button and started again Emptying can take place After emptying the tank vehicle has to be vacuumed for approx 2 min Set key switch Acknowledge connection after emptying to position...

Page 27: ...air or Without compressed air Key switch Acknowledge connection set to position 1 Pressing Acknowledge connect activates circulation Tank emptying connect hose Option Start without compressed air only...

Page 28: ...d air or Start with compressed air and the selected button is continuously lighted up If you select compressed air wait one minute before the tank vehicle starts the suction process The selection can...

Page 29: ...l cabinet in the waste storage area The WasteStar machine is switched off Switch off the main switch on the electrical control cabinet The WasteStar machine is now out of service In principle The cont...

Page 30: ...can result in severe injury or damage to proper ty DANGER Risk of injury severe injury or death Caused by unauthorised access to the collection tank Before commencing cleaning work the collecting tan...

Page 31: ...ank Open the collection tank and visually check for foreign matter and dirt Spray out the collection tank and remove any potential foreign matter Close the collection tank 11 Discharging the collectio...

Page 32: ...ommend cleaning the stainless steel surfaces only when needed with cleaner and care products suitable for stainless steel Lightly soiled parts can be wiped with a possibly damp cloth or sponge Be sure...

Page 33: ...technician Activity Installation and assembly Commissioning Operation use Cleaning Check safety fittings Troubleshooting Troubleshooting me chanical Troubleshooting electri cal Maintenance Repair work...

Page 34: ...ed or decommissioned except in the event of maintenance and repair work Danger of scalding burning Before carrying out any maintenance and repair work ensure that all the parts of the machine that may...

Page 35: ...ed on the basis of DIN EN ISO 11204 precision class 2 Noise level in the workplace LpA 85 dB measurement uncertainty 2 5 dB 19 Non ionising radiation Non ionising radiation is not produced intentional...

Page 36: ...examination prior to commissioning as well as periodic inspections during their service life The following responsibilities are incumbent upon the customer operator of the WasteStar system PLEASE NOTE...

Page 37: ...llection tank 31 Disposal 35 Disposal of packing material 17 F Faults 15 Foreseeable use 9 I Inspecting pressure vessels for systems that require monitoring 36 Installation and assembly 16 Installatio...

Page 38: ...WasteStar installation operating instructions FC 9670512 Design and construction subject to change without prior notice Page 38 of 40 23 NOTES...

Page 39: ...WasteStar installation operating instructions FC 9670512 Design and construction subject to change without prior notice Page 39 of 40...

Page 40: ......
Reviews: