


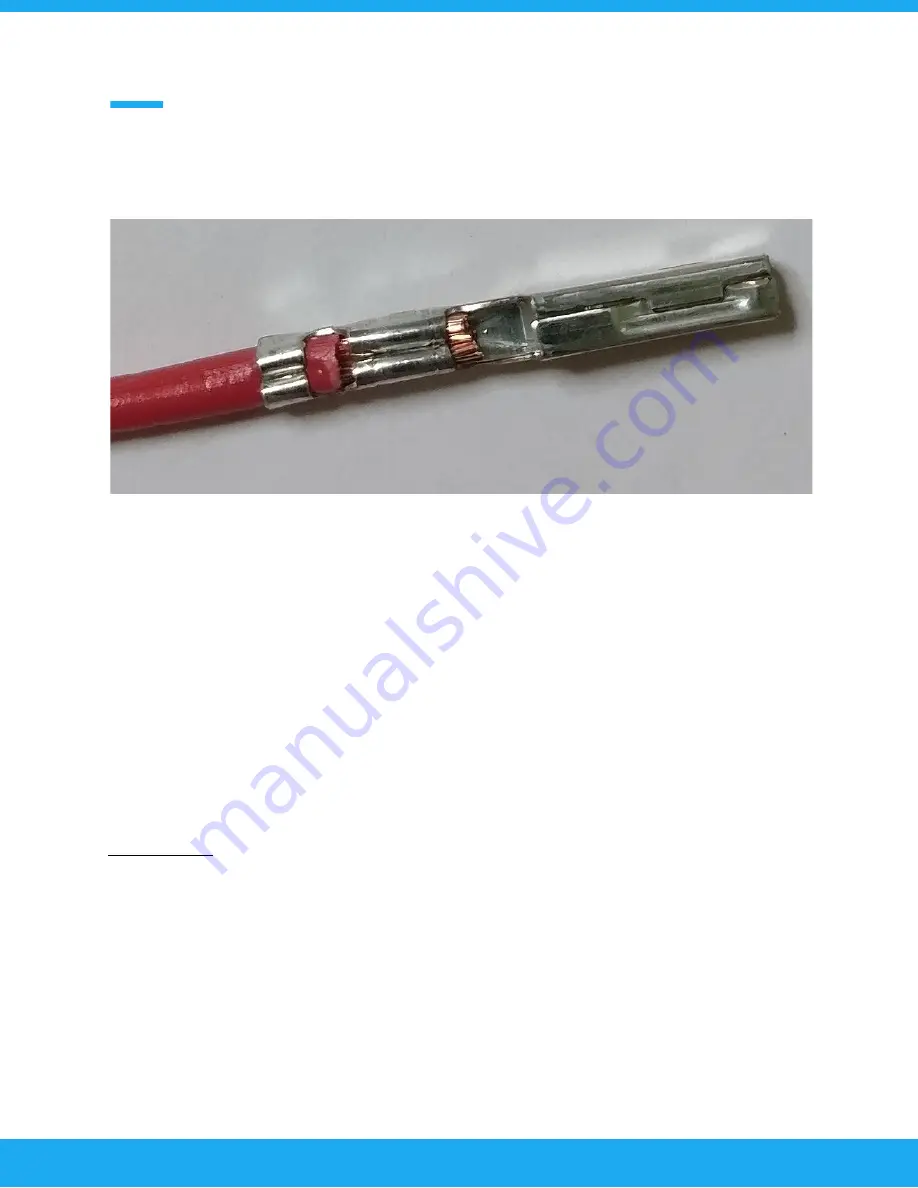
Step 3:
Crimp the tab that holds on to the insulation of the wire.
Now the wire has been properly crimped to the connector pin and can be inserted to the
connector.
Note:
It is necessary to use a proper crimping tool. This ensures correct power transfer between wire
and connector.
It is not possible to crimp these connectors with regular pliers
that are not
intended for crimping. The pictured connector was crimped with “Hozan P-706” crimpers that are
affordable even for the hobbyist. Added bonus is that the crimpers can be utilized with most of
the open barrel automotive connectors.
Soldering:
Do not solder!
Soldering the connectors may result in the wires cracking at the connector end.
Also if solder gets inside the pin, it will lock the spring in the pin connector resulting intermittent
failures. This type of failure is especially nasty because it will not show up when measuring the
loom with a continuity tester, as the actual failure point is in the mated connector. It is best to use
50 bucks to get the proper crimp tool than to pay big money to a shop to troubleshoot your
install.
6