Setup
12
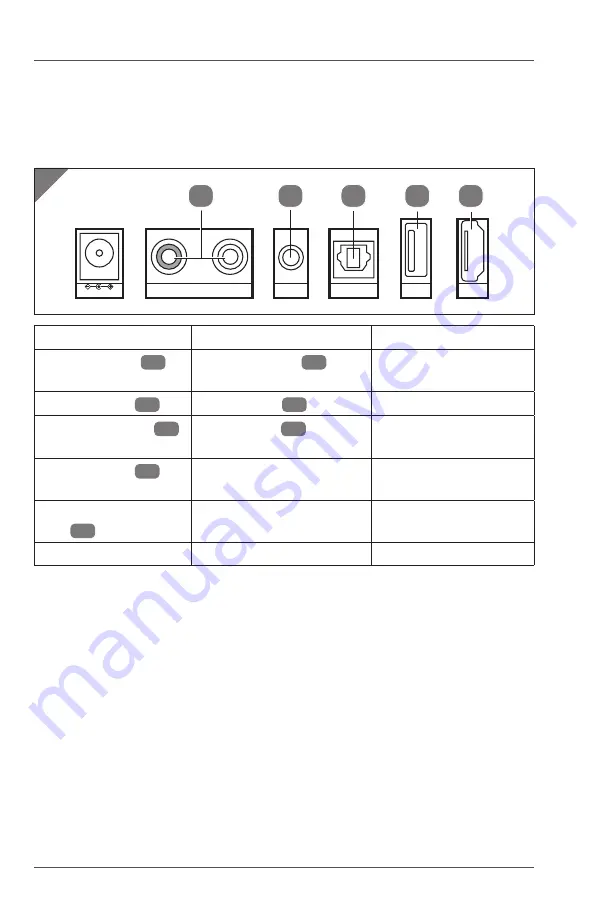
Audio connections
The product allows you to play audio output from various connected audio
devices. You can make one or more connections according to your audio
settings. Use the connectors and cables indicated in the table below to make
audio connections.
1
DC-24V-IN
AUX-IN
LINE-IN
OPTICAL-IN
USB-IN
R
L
HDMI
ARC/CEC
8
9
10
11
12
Connector
(see
Fig. 1
)
Cable/device
Use examples
AUX input jacks
8
(see
note 1
)
RCA audio cable
16
TV, DVD player, satellite
receiver
Line input jack
9
Line-in
cable
15
MP3 player
Optical input port
10
(see
note 2
)
Optical cable
17
TV, digital receiver
USB input port
11
(see
note 3
)
USB flash drive
(not provided)
Playback of audio files
(format: MP3 and WAV)
HDMI ARC/CEC input
port
12
(see
note 4
)
HDMI cable (not provided) TV, DVD player
Bluetooth (see
note 5
)
(not required)
Smartphone
Note:
1. Make sure the red connectors of the RCA audio cable are connected to
the right (R) channels and the white connectors to the left (L) channels of
the AUX input jacks of the product and the AUX output jacks of your audio
device.
2. On your audio device, make sure the audio setting is set to “PCM” or optical
audio.
3. Do not use the USB input port as a charging port for external devices.
4. On your audio device, make sure the audio setting is set to “ARC” or “HDMI
audio”.
If you are using the product with a TV for the first time, make sure the TV
audio setting is set to “PCM/2-CH”.
See chapter “Connecting audio devices via HDMI (ARC)” for more details.
5. See chapter “Bluetooth connection”.


