DMR HD3
17
JOB MANAGEMENT TABS
Tab
Description
Job Queue
Job queue will show you what jobs are
waiting to be completed. To cancel a job
press the cancel button on the left hand
side.
Job History The job history tab will show you previously
transcoded jobs
Upload
Queue
The upload queue tab will show you the FTP
uploads waiting to be transferred. To cancel
a transfer press the cancel button on the
right hand side.
Upload
History
The upload history tab shows you previously
uploaded files.
Notification Action
The Administrator can determine the action to take
when the HD3 hard drive is full. Make the selection and
press the Submit button.
Job Management
The job management page will show you the progress of
all manual FTP uploads as well as transcoding jobs.
Logging
The HD3 can be configured by the Administrator to log
events from the Logging section of the main menu.
Select the events you wish to save to a log and confirm
these settings with the Submit button. Current logs will
hold 14 days of data. Logs listed as “old” will include
the previous 14 days of data.
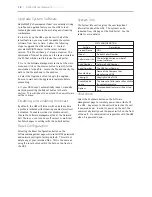
LOGS
Setting
Description
Event
Log
The time and date of all recordings and live
streams are captured in the event log. Also
included in this log are all actions related to the
archived media files (moving , renaming, deleting
content etc.)
Failed
Logins
All failed logins are logged and date stamped.
SMTP
Log
All emails sent from HD3 are logged and date
stamped.
Error Log
The error log will provide a description of the
problem that put the HD3 into an error state ( the
Yellow LED will be on)
The Software Management section of the HD3 menu
enables the system administrator to perform several
key functions. These include upgrading the system
software to a new version; and resetting the HD3
configuration to factory default network settings
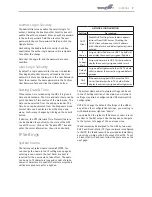
AV Controls
Audio input and output levels can be adjusted either
by sliding the pointer along the bar, or by entering a
value from 0 to 100 in the text field. Event tones can
be turned on to alert you when an event occurs. For
example, you will hear a tone when you stop recording.
The local display resolution, aspect ratio and player
status can be selected from the drop down menu.
Confirm these settings with the Submit button. The
settings will take effect with the next reboot.
The VTC settings for auto start function can select the
connection type from the drop down menu as serial or
LAN. If LAN is selected, the IP address and password
must be entered.
AV Test
The HD3 has the ability to test audio and video to
connected output devices without the need for live
input sources. There are four audio test tones and
three test images for confirming video and audio output
to a locally connected monitor. Once a test tone or
image has been selected, use the Stop Test button to
end the test.
The DVI inputs can be tested to a local monitor. To
test the live video, click on the DVI image and the
source connected to that input will display on the local
monitor.
Notifications Settings
The HD3 can be configured by the Administrator to
send email event notifications from the “Notifications”
section of the main menu by checking the Enable Event
Notifications box. Enter the email address to which the
notifications will be sent and select the events to track.
Confirm these settings with the Submit
button.
6
Management and System Tools

