14
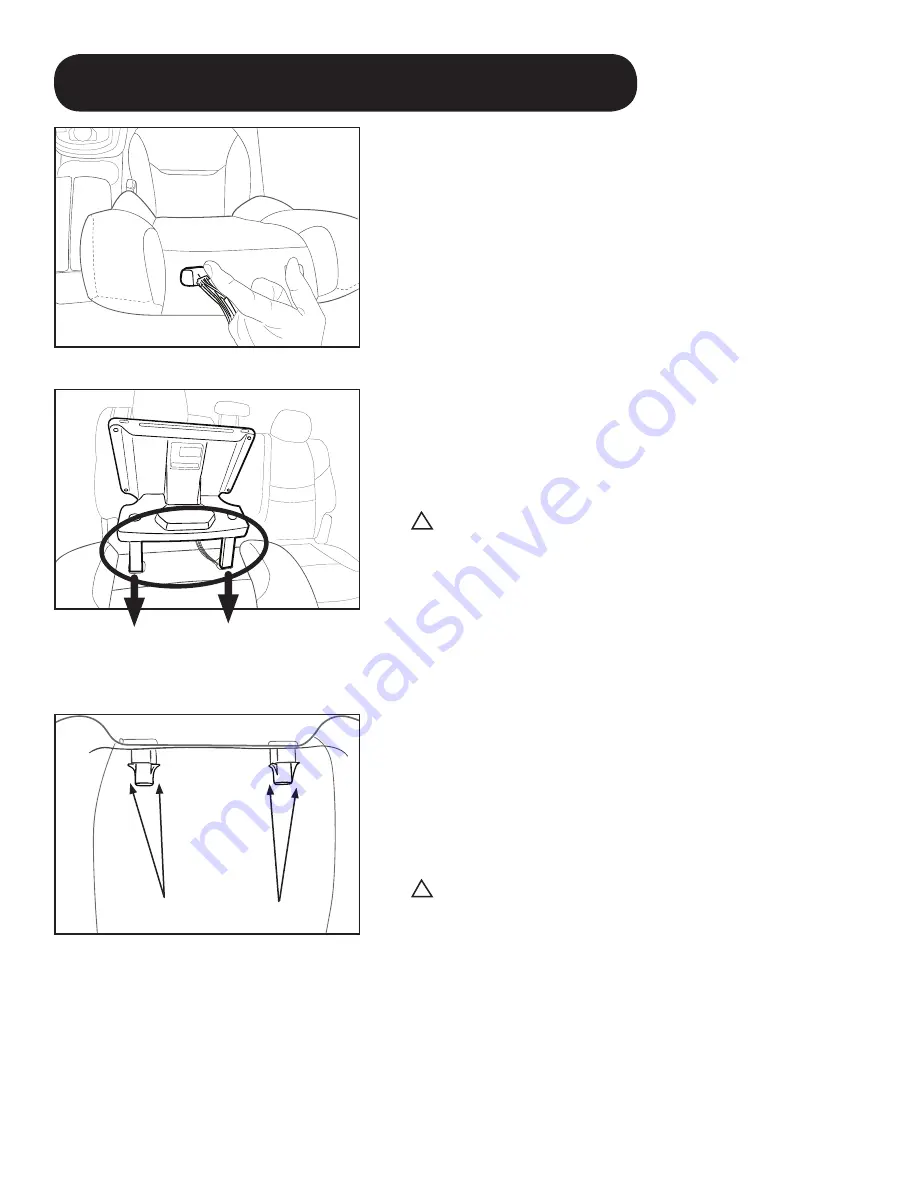
Figure 27
1. Pull the Seat Top RSES Assembly B from packaging,
leaving the protective film on the monitor.
2. Carefully unwrap all cables from the base of the monitor.
3. While sitting in the 2nd row, locate the left side opening
on the top of the seat.
4. Grasp the Power/Ground and GMSL connectors and
insert between the right side of the seat frame and the
seat material. (Figure 27)
5. Hold the monitor and position the RSES post guide
sleeves directly over the openings in the top of the seat.
6. Reach into the seat back, grasp both connectors and
carefully pull them to the bottom of the seat frame.
!
CAUTION – Do not contact, or secure RSES
wiring to airbag device or any airbag wiring!
7. Insert the monitor guide sleeves into the seat and push
downward with consistent and even pressure on both
sides of the monitor base until the guide sleeves are half
way into the seat. (Figure 28)
8. Grasp both connectors again and carefully pull to the
bottom of the seat.
9. Continue inserting, gradually pulling the cables fully to
the bottom of the seat, until they are fully inserted.
10. Cables can be smoothed out along the seat with the
fiber tool.
!
CAUTION - Verify the guide sleeves are fully
seated by reaching into the seat back and feeling the
locking tabs at the bottom of the seat frame tube.
Pull up on the monitor base to verify it does not
begin to pull out of the seat frame. (Figure 29)
P. PASSENGER SIDE RSES INSTALLATION
Figure 28
Figure 29
SeatTop-RSES Assembly B
MN
IC
FCC
S/N
Lorem ipsum dolor sit amet, consectetuer adipiscing
elit, sed diam
nonummy nibh euismod tincidunt ut laor
eet dolore magna aliquam erat
volutpat. Ut wisi enim ad minim v
eniam, quis nostrud exerci tation
ullamcorper suscipit lobortis nisl ut aliquip e
x ea commodo consequat.
Duis autem vel eum iriure dolor in hendr
erit in vulputate velit esse
molestie consequat, vel illum
Locking Tabs


