background image

 Getting Started with Base Only Systems

9

000001630

MaxAttach NAS 6000 Getting Started

 Getting Started with Base Only Systems

10: Install MaxNeighborhood Discovery and Setup Wizard

10/16/01 -- Revision 2.0.03

10: 

Install MaxNeighborhood Discovery and Setup Wizard

Install the MaxNeighborhood Discovery and Setup Wizard, find your new MaxAttach 
NAS 6000, and begin its initial configuration.

1.

Insert the CD labeled 

MaxAttach NAS 6000 Installation and Documentation CD


into 

your CD-ROM drive.

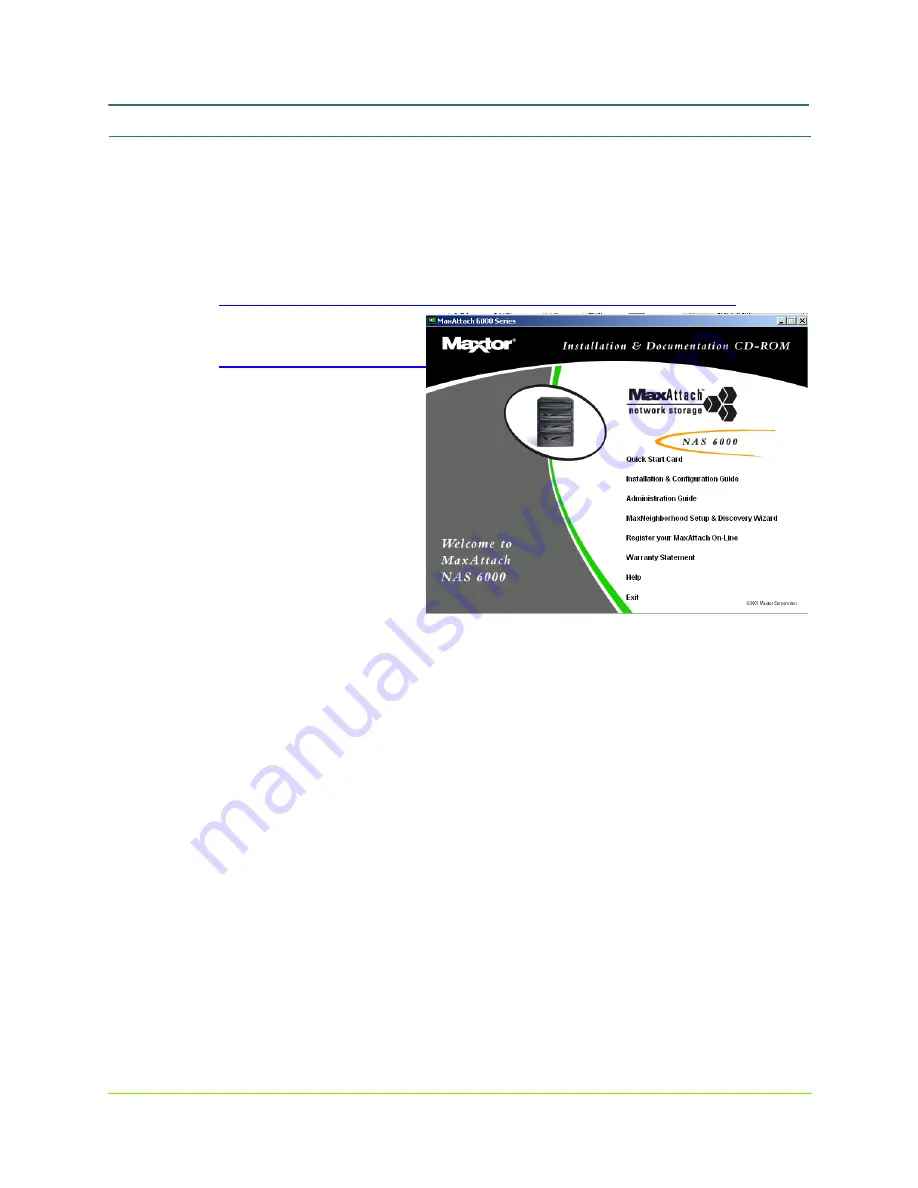
Figure #1

MaxNeighborhood 

Discovery Wizard Starting 
Page 

n

If the menu does not 
appear shortly after 
insertion, use Windows 
Explorer to locate the 
CD drive and launch 
the Setup.exe file on 
the CD.

2.

From the opening screen, 
select 

MaxNeighborhood Setup 

& Discovery Wizard

, and then 

follow the on-screen 
instructions.

Summary of Contents for MaxAttach NAS 6000

Page 1: ...Installation Guide Getting Started with MaxAttach NAS 6000 Rack Mount Base Unit Systems...

Page 2: ...s Day on site service for your NAS 6000 and wish to ensure that your service is activated If you have not already received a service activation contract from Maxtor please contact 1 800 4MAXTOR or vis...

Page 3: ...unted Systems PN 000001629 or n Chapter 2 Getting Started for Cabinet Systems in the MaxAttach NAS 6000 Installation and Configuration Guide PN 000001577 n Rack Mountable Base Units plus Expansion Uni...

Page 4: ...ipping box contains the components listed below Hardware n Base Unit with the following installed components n Two power supply modules n 12 hard disk drive carrier assemblies n One gigabit network in...

Page 5: ...wered Max Operating System Version 2 0 NOTE This standalone help file system is a compiled Microsoft HTML Help file with a CHM file extension It is specifically designed to display HTML help in Micros...

Page 6: ...ary NIC card used n One NIC cable for the administration network link mounted on the CPU if used n Network n A network connection into your network for each NIC cable n A client administration worksta...

Page 7: ...ack in the server location n If you use an existing rack a space of 4U per MaxAttach equipment shelf is required 2 Mount the MaxAttach Base Unit enclosure at the bottom of the rack n Recommend that yo...

Page 8: ...east one network connection is required n You can also add a network connection from the CPU I O panel network port to your network for administrative functions AC Power Connections 2 On the Base Unit...

Page 9: ...The drive releases from its Drive Bay connector 2 Pull the drive out of its Drive Bay n This is a good time to record the drive type and serial number 3 Replace the drive in its Drive Bay until it beg...

Page 10: ...Green Drive Activity LEDs The green disk drive activity LEDs will indicate when the system has reached a steady status n Amber Drive Unavailable LEDs The amber disk drive unavailable LEDS should be o...

Page 11: ...and Setup Wizard find your new MaxAttach NAS 6000 and begin its initial configuration 1 Insert the CD labeled MaxAttach NAS 6000 Installation and Documentation CD into your CD ROM drive Figure 1 MaxN...

Page 12: ...it message n Once installed you can launch MaxNeighborhood from your desktop by selecting Start Programs MaxNeighborhood MaxNeighborhood 2 When the search is complete all the MaxAttach units on your n...

Page 13: ...NAS 6000 13 Modifying Default Network Settings in Non DHCP Service If your MaxAttach NAS 6000 is attached to a network without a DHCP server or you want to manually assign your IP address your MaxAtt...

Page 14: ...arrow and highlighting Disabled 7 Next click Apply to make the changes permanent n Your MaxAttach NAS 6000 will now automatically reboot n A full reboot takes about 4 5 minutes 8 End this procedure b...

Page 15: ...r Interface Navigation Menu Bar 1 Enter the date time and your time zone Click NEXT 2 Enter the current password blank for first time setup the new password and confirm the new password Click NEXT 3 S...

Page 16: ...se Unit equipment shelf enclosure your system is ready for use For advanced configuration procedures for the Microsoft Windows Powered Max Operating System Version 2 0 see the MaxAttach NAS 6000 Admin...

Reviews: