13
12
model no. 058-9373-2 | contact us 1-888-670-6682
WARNING!
Potential hazard that could result in serious injury or
loss of life.
• Do not exceed the maximum pressure for the Air-
powered Gravity-feed Spray Gun or any other parts
in the compressor system. Failure to comply could
lead to serious injury or loss of life.
• Never aim or spray at yourself or anybody else as this
could cause serious injury. Failure to comply could
lead to serious injury or loss of life.
• After unpacking the tool, inspect it carefully and check
thoroughly for any damage that may have occurred
during transit. Ensure the tightness of fittings, bolts,
etc., before performing service operation.
Before assembly and preparation
1
3. Pour paint through a strainer, cheesecloth or
paint strainer to remove any foreign substances
from the paint (Fig. C).
NOTE:
D
o not ti
g
hten the canister too
mu
c
h b
y hand
, as
doi
ng s
o
may break
the
p
lastic canister.
2. Use the wrench provided and tighten the
nut (1) securely to ensure paint does not
leak (Fig. B).
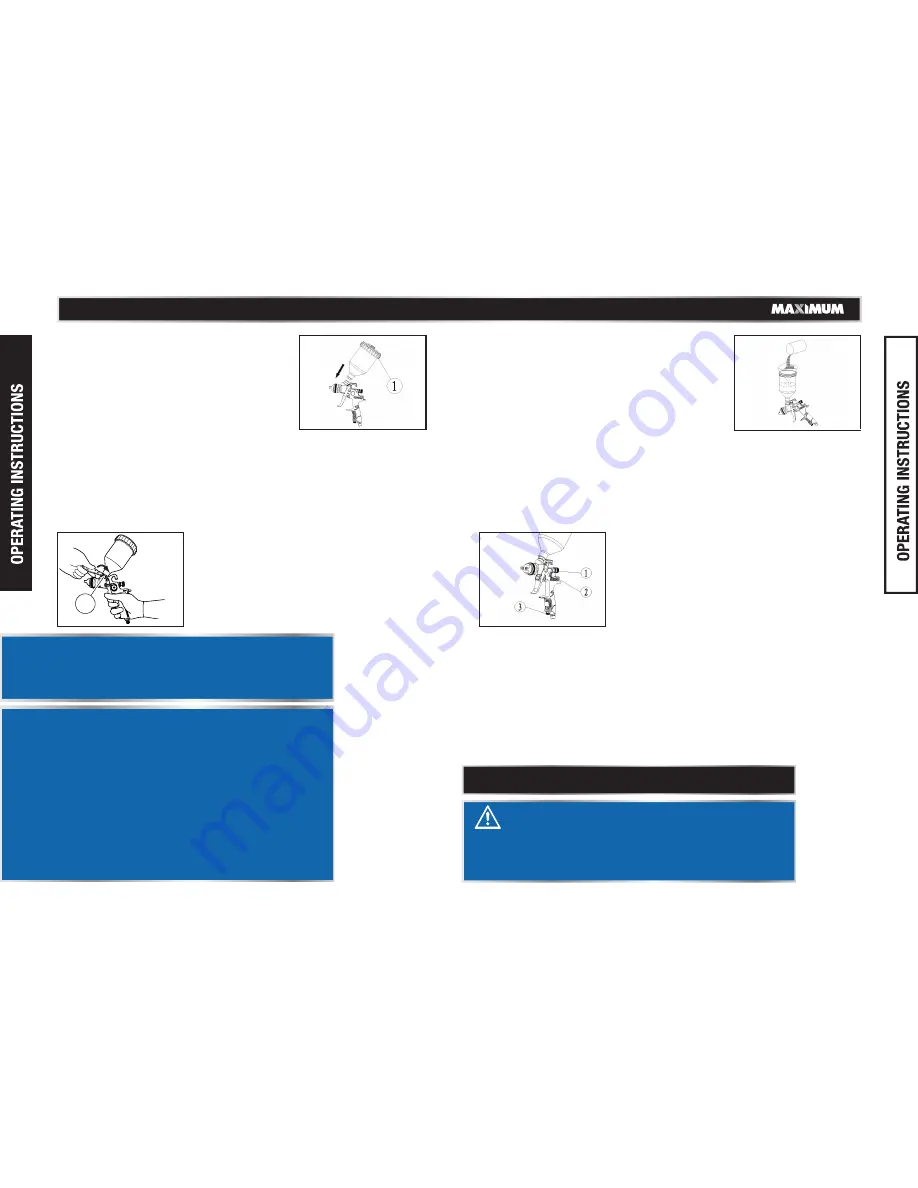
The Gravity-feed Spray Gun has a pattern
adjusting knob (1), a paint adjusting knob (2),
and an air adjusting knob (3) that are used to
obtain the desired pattern, to control the output
volume of paint, and to obtain fine atomization,
respectively (Fig. D).
1. Attach the empty canister (1) to the
spray gun by lining up the threads then
holding the gun stationary and twisting
the canister clockwise until snug (Fig. A)
4. Fill the canister 3/4 with paint.
5. Plug in compressor, turn it on set the pressure
regulator to 40 PSI, attach one end of the air
hose to the compressor and the other end of
the air hose to the spray gun. The spray gun is
now ready for use.
6. After connecting the spray gun to the air supply, ensure the fluid cap,
canister, and air hose are tightly connected to the Air-powered Gravity-
feed Spray Gun.
7. Use a piece of cardboard or other scrap material as a target for trial
spraying and adjust for desired spray pattern.
8. Test the consistency of the paint by making a few strokes on a cardboard
target. If the stroke appears to be very thick, add a small amount of thinner.
Rotate the paint adjusting knob clockwise to reduce the output volume of
paint and rotate the knob in a counter-clockwise direction to increase the
output volume of paint.
Rotate the air adjusting knob clockwise to reduce the output volume of air
and rotate the knob in a counter-clockwise direction to increase the output
volume of air.
Rotate the pattern adjusting knob in a clockwise direction to form a circular
spray pattern and rotate the knob in a counter-clockwise direction to form an
elliptical spray pattern.
PATTERN ADJUSTMENT
PAINT ADJUSTMENT
AIR VOLUME ADJUSTMENT
Adjustments
Paint filling
• Mixing and thinning of paint should be performed in
accordance with the paint manufacturer’s instructions.
Most materials readily spray if thinning is properly
performed.
Fig. A
Fig. B
Fig. D
Fig. C
• Do not exceed the thinning recommendations of the
paint manufacturer. Failure to comply may result in
moderate injury or damage to equipment.
CAUTION!
Potential hazard that may result in injury or damage to
equipment.
NOTE:
Always thin the paint with care.
TM


