131
11.1 SofTWare UPGrade INSTrUCTIoNS - CoNTINUed
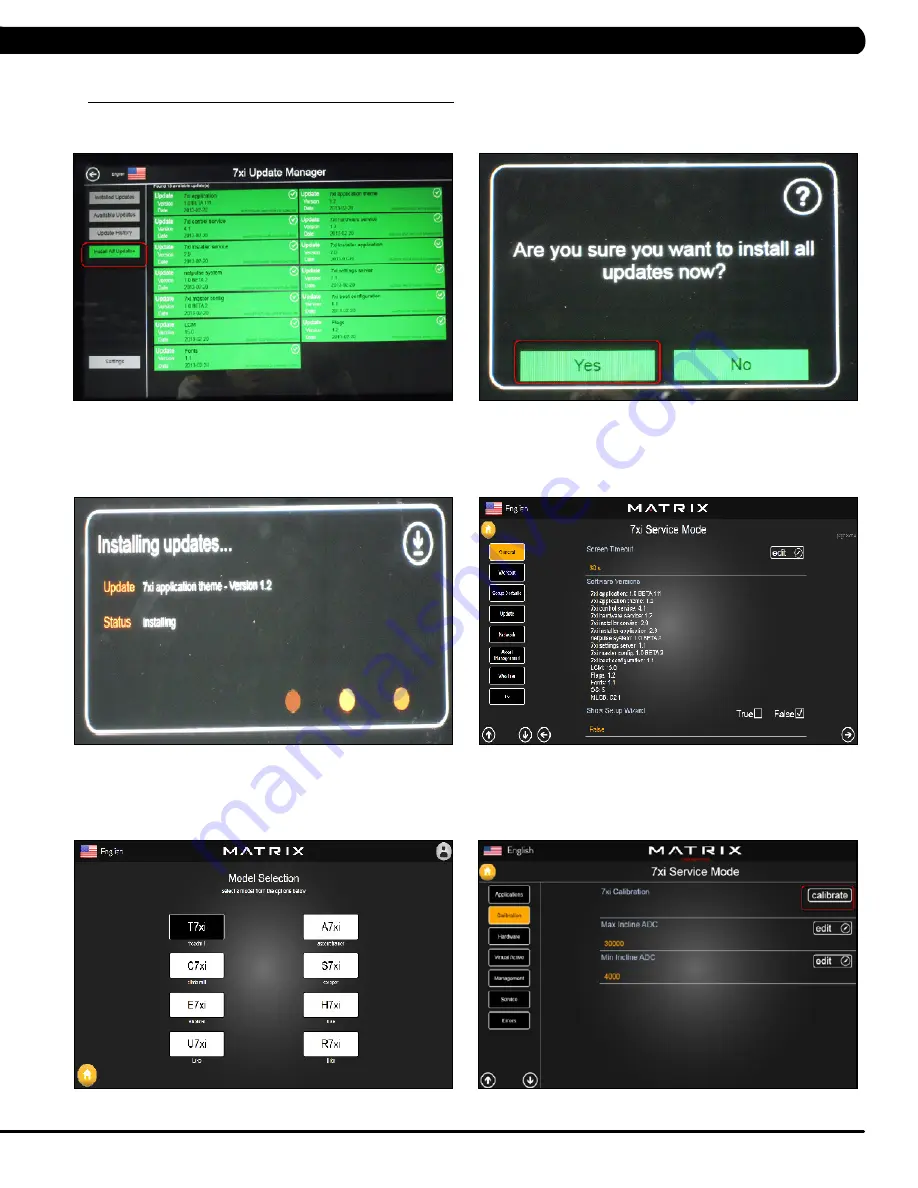
11) Press the Install All Updates key on the screen (Figure G).
12) Press the Yes key to auto run the upgrade process (Figure H).
13) The screen will show every software install status (Figure I). When the update is complete, the Treadmill will automatically return to the
standard display. Remove the USB Drive from the USB port in the console.
14) Enter Service Mode by pressing ENTER, 3, 0, 0, 1, ENTER on the lower keypad and press the General key on the screen. Then check if
the software versions are correct (Figure J).
15) Enter Service Mode by pressing ENTER, 3, 0, 0, 1, ENTER on the lower keypad and check that the Machine Type is correctly set for
treadmill. If not correct, press ENTER, 3, 0, 0, 2, ENTER on the lower keypad and select the correct Machine Type (Figure K).
16) Enter Service Mode by pressing ENTER, 3, 0, 0, 1, ENTER on the lower keypad and press the Calibration key on the screen. Then run auto
calibration (Figure L).
fIGUre H
fIGUre G
fIGUre l
fIGUre k
fIGUre I
fIGUre j
CHaPTer 11: SofTWare UPGrade INSTrUCTIoNS
Summary of Contents for T7XI-01
Page 1: ...T 7 x I 0 1 T r e a d m i l l S ER V I C E MA N U A l ...
Page 4: ...1 1 1 Serial Number Location Chapter 1 Serial number Location ...
Page 62: ...59 8 1 Electrical DiagramS Chapter 8 Troubleshooting ...
Page 65: ...62 8 1 Electrical DiagramS CONTINUED Chapter 8 Troubleshooting Quick key connect wire ...
Page 136: ...133 NOTES ...


