Operating Instructions
ASSEMBLY IS DONE. LET’S HAVE SOME FUN!
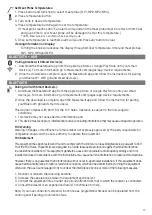
PRE-SEASONING
Pre-seasoning will rid your smoker of chemicals and oils left over by the manufacturing process, allowing
them to burn off. PRE-SEASON SMOKER PRIOR TO FIRST USE.
1. Insert the charcoal partition into the charcoal basket
2. Fill the charcoal basket ¼ - ½ full with charcoal (approximately 4-6pounds of charcoal).
3. Start the smoker following the START-UP instructions, and set the temperature to 275°F for 120 minutes.
4. After 120 minutes, set the temperature to 400°F, allow the smoker to burn out the remaining charcoal.
5. Allow the smoker to cool COMPLETELY.
6. Once cool, remove all the ash from the ash tray in the smoker. Wipe down your charcoal partition,
charcoal basket, and ash tray with vegetable shortening. This will help keep these components
seasoned.
7. Once oiled, repeat steps 1 – 5.
Frequent seasoning prevents rusting. If rusting occurs, clean with a steel brush, apply vegetable
shortening and heat as indicated above.
15
A
X8
A
A
A A
A A
A A
3
3
15
Summary of Contents for MB20060321
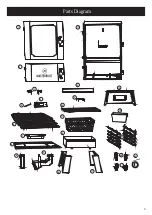
Page 5: ...Parts Diagram 1 2 3 4 5 6 7 8 9 10 11 12 13 14 15 16 17 18 19 20 21 23 3 3 15 22 5...
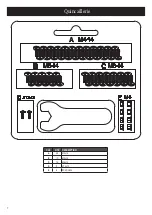
Page 7: ...Hardware KEY QTY DESCRIPTION A 24 M4X14 B 10 M5X14 C 14 M6X14 D 2 ST3X12 E 8 M4 NUT 7...
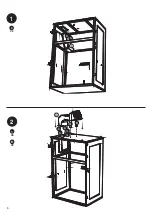
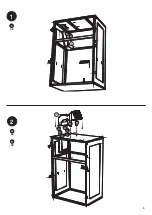
Page 8: ...1 A X2 9 A A 2 A X6 10 A A A A B B A A B X2 8...
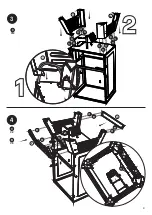
Page 9: ...4 19 12 C X2 B X8 B B B B C B B B B C C B B B B 18 17 3 C X12 C C C C C C C C C C C C 17 9...
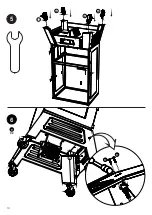
Page 10: ...5 21 22 21 22 6 D X2 4 D D 10...
Page 11: ...7 8 13 14 11...
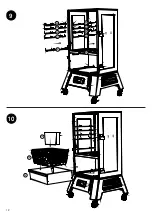
Page 12: ...9 20 20 20 20 20 20 20 20 20 20 10 15 16 15 12...
Page 13: ...11 7 8 12 6 6 6 6 13...
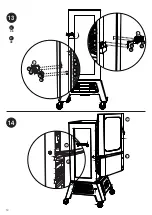
Page 14: ...13 14 A X8 E X8 1 2 3 A E E E E A A A A A A A E E E E 1 2 3 14...
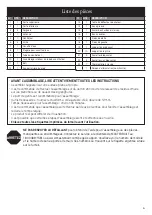
Page 26: ...Sch ma des pi ces 1 2 3 4 5 6 7 8 9 10 11 12 13 14 15 16 17 18 19 20 21 23 3 3 15 22 5...
Page 28: ...Quincaillerie CL QT DESCRIPTION A 24 M4 14 B 10 M5 14 C 14 M6 14 D 2 ST3 12 E 8 CROU M4 7...
Page 29: ...1 A X2 9 A A 2 A X6 10 A A A A B B A A B X2 8...
Page 30: ...4 19 12 C X2 B X8 B B B B C B B B B C C B B B B 18 17 3 C X12 C C C C C C C C C C C C 17 9...
Page 31: ...5 21 22 21 22 6 D X2 4 D D 10...
Page 32: ...7 8 13 14 11...
Page 33: ...9 20 20 20 20 20 20 20 20 20 20 10 15 16 15 12...
Page 34: ...11 7 8 12 6 6 6 6 13...
Page 35: ...13 14 A X8 E X8 1 2 3 A E E E E A A A A A A A E E E E 1 2 3 14...
Page 47: ...Diagrama de partes 1 2 3 4 5 6 7 8 9 10 11 12 13 14 15 16 17 18 19 20 21 23 3 3 15 22 5...
Page 49: ...Accesorios CLAVE CANT DESCRIPCI N A 24 M4X14 B 10 M5X14 C 14 M6X14 D 2 ST3X12 E 8 TUERCA M4 7...
Page 50: ...1 A X2 9 A A 2 A X6 10 A A A A B B A A B X2 8...
Page 51: ...4 19 12 C X2 B X8 B B B B C B B B B C C B B B B 18 17 3 C X12 C C C C C C C C C C C C 17 9...
Page 52: ...5 21 22 21 22 6 D X2 4 D D 10...
Page 53: ...7 8 13 14 11...
Page 54: ...9 20 20 20 20 20 20 20 20 20 20 10 15 16 15 12...
Page 55: ...11 7 8 12 6 6 6 6 13...
Page 56: ...13 14 A X8 E X8 1 2 3 A E E E E A A A A A A A E E E E 1 2 3 14...
Page 63: ......

