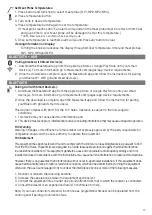
Power ON/Off Controller:
1. Press button to power controller ON.
2. Press and hold button to power controller OFF.
SHUTDOWN
ADDING SMOKE/FLAVOR
1. Remove food from smoker.
2. Close both smoker doors.
3. Set the unit to 400°F.
4. Leave the unit running, and allow the charcoal to burn out completely.
5. Once the charcoal has burned out, allow the unit to cool before cleaning and storing.
To add wood smoke flavor, mix wood chunks into your charcoal basket with the charcoal before your cook
begins. Or if cooking at temperatures with the charcoal partition, load wood chunks into the center of the
partition. As the charcoal burns through the basket, your wood chunks will smoke for a great added flavor.
Do not add more than 1.5 lbs. of wood chunks to the smoker at any time.
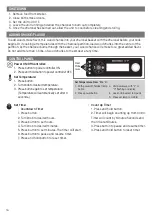
CONTROL PANEL
Meat
Probe
Jacks
Set Temperature:
1. Press button.
2. Turn knob to desired temperature.
3. Press button again to set temperature
(Temperature will automatically set after 3
seconds.)
Set Time:
• Countdown Timer
1. Press button.
2. Turn knob to desired hours.
3. Press button to set hours.
4. Turn knob to desired minutes.
5. Press button to set minutes. The timer will start.
6. Press button to pause and resume timer.
7. Press and hold button to reset timer.
Set Temperature From ºF to ºC :
1. With power off, hold set temp
button
2. Press power button
3. Unit powers up with “F” or
“C” flashing on display
4. Use knob to select temp unit
5. Press set temp to confirm
• Count Up Timer
1. Press and hold button.
2. Timer will begin counting up from 00:00.
Timer will count by Minutes:Seconds and
then Hours:Minutes.
3. Press button to pause and resume timer.
4. Press and hold button to reset timer.
16
Summary of Contents for MB20060321
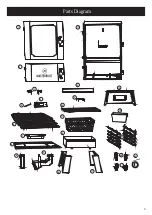
Page 5: ...Parts Diagram 1 2 3 4 5 6 7 8 9 10 11 12 13 14 15 16 17 18 19 20 21 23 3 3 15 22 5...
Page 7: ...Hardware KEY QTY DESCRIPTION A 24 M4X14 B 10 M5X14 C 14 M6X14 D 2 ST3X12 E 8 M4 NUT 7...
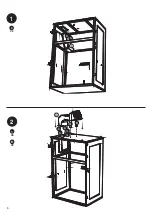
Page 8: ...1 A X2 9 A A 2 A X6 10 A A A A B B A A B X2 8...
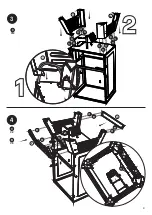
Page 9: ...4 19 12 C X2 B X8 B B B B C B B B B C C B B B B 18 17 3 C X12 C C C C C C C C C C C C 17 9...
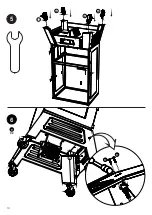
Page 10: ...5 21 22 21 22 6 D X2 4 D D 10...
Page 11: ...7 8 13 14 11...
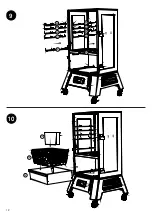
Page 12: ...9 20 20 20 20 20 20 20 20 20 20 10 15 16 15 12...
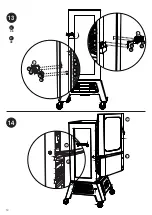
Page 13: ...11 7 8 12 6 6 6 6 13...
Page 14: ...13 14 A X8 E X8 1 2 3 A E E E E A A A A A A A E E E E 1 2 3 14...
Page 26: ...Sch ma des pi ces 1 2 3 4 5 6 7 8 9 10 11 12 13 14 15 16 17 18 19 20 21 23 3 3 15 22 5...
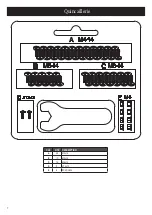
Page 28: ...Quincaillerie CL QT DESCRIPTION A 24 M4 14 B 10 M5 14 C 14 M6 14 D 2 ST3 12 E 8 CROU M4 7...
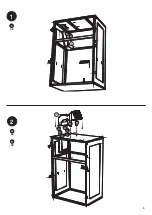
Page 29: ...1 A X2 9 A A 2 A X6 10 A A A A B B A A B X2 8...
Page 30: ...4 19 12 C X2 B X8 B B B B C B B B B C C B B B B 18 17 3 C X12 C C C C C C C C C C C C 17 9...
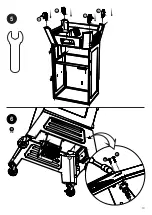
Page 31: ...5 21 22 21 22 6 D X2 4 D D 10...
Page 32: ...7 8 13 14 11...
Page 33: ...9 20 20 20 20 20 20 20 20 20 20 10 15 16 15 12...
Page 34: ...11 7 8 12 6 6 6 6 13...
Page 35: ...13 14 A X8 E X8 1 2 3 A E E E E A A A A A A A E E E E 1 2 3 14...
Page 47: ...Diagrama de partes 1 2 3 4 5 6 7 8 9 10 11 12 13 14 15 16 17 18 19 20 21 23 3 3 15 22 5...
Page 49: ...Accesorios CLAVE CANT DESCRIPCI N A 24 M4X14 B 10 M5X14 C 14 M6X14 D 2 ST3X12 E 8 TUERCA M4 7...
Page 50: ...1 A X2 9 A A 2 A X6 10 A A A A B B A A B X2 8...
Page 51: ...4 19 12 C X2 B X8 B B B B C B B B B C C B B B B 18 17 3 C X12 C C C C C C C C C C C C 17 9...
Page 52: ...5 21 22 21 22 6 D X2 4 D D 10...
Page 53: ...7 8 13 14 11...
Page 54: ...9 20 20 20 20 20 20 20 20 20 20 10 15 16 15 12...
Page 55: ...11 7 8 12 6 6 6 6 13...
Page 56: ...13 14 A X8 E X8 1 2 3 A E E E E A A A A A A A E E E E 1 2 3 14...
Page 63: ......

