70
4.4.
The steps below describe the very first time you set up the system. Mini-RX, Mini-TX
beacons and modem required.
Mini-RX and Mini-TX have different HW and SW from HW v4.9. Use Mini-RX SW for
Mini-RX beacons, Mini-TX SW for Mini-TX beacons
, HW v4.9’s SW for HW v4.9
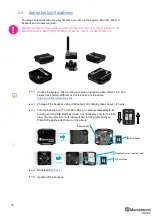
Unpack the system. Take a look at a similar unpacking video of HW v4.9. The
videos have certain differences but the basic are the same:
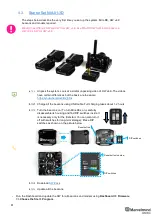
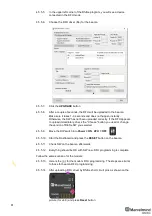
Charge all the beacons using USB cable. Full charging takes about 1-2 hours
Turn the beacons on (To turn Mini-RXs on, carefully disassemble its
housing and find DIP switches inside. It is necessary only for the first
start. You can also turn it off with switches for long-term storage):
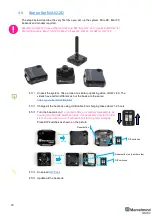
Place DIP switches as shown on the picture
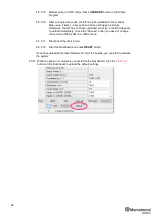
Update all the beacons:
DIP switches
Disassemble
Carefully
Reset button
DIP switches
Reset button (on the other side)
Disassemble
Carefully
Summary of Contents for Mini-RX
Page 1: ...Marvelmind Indoor Navigation System Operating manual v2020_12_14 www marvelmind com ...
Page 16: ...16 HW v4 9 beacon with Mini TX size comparison Beacon Industrial RX Beacon Industrial Super ...
Page 30: ...30 Figure 6 Two external microphone connection ...
Page 34: ...34 Figure 9 One external microphone soldering Figure 10 Two external microphones soldering ...
Page 60: ...60 Help video https www youtube com watch v NHUnCtJIYXc ...
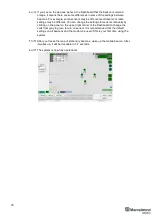
Page 69: ...69 The system is now fully operational ...
Page 97: ...97 The system is now fully operational ...
Page 106: ...106 The system is now fully operational ...
Page 115: ...115 The system is now fully operational ...
Page 136: ...136 Advanced settings TBD Enabling will allow direction along with location TBD TBD TBD ...
Page 171: ...171 Floor 5 is enabled Floor 4 is enabled ...
Page 175: ...175 Z X ...
Page 190: ...190 Choose color and press OK Color applied Now background matches floorplan ...
Page 196: ...196 7 18 IMU axis positioning Super Beacon IMU axis positions HW v4 9 IMU axis positions ...
Page 197: ...197 Mini TX IMU axis positions Mini RX beacon IMU axis positions ...
Page 201: ...201 Real time player turned on ...
Page 204: ...204 8 1 Super beacon external interface pinout top view ...
Page 205: ...205 8 2 Beacon HW v4 9 external interface 4x4 pinout top view ...
Page 206: ...206 8 3 Modem HW v4 9 external interface pinout top view ...
Page 240: ...240 Right mouse button on it Set movement path Shift Left mouse click to add point ...
Page 250: ...250 Contacts For additional support please send your questions to info marvelmind com ...


