background image

Controller set-up

15


G I V I N G   N A M E S   T O   B A N K S

The 10 banks available are factory-set with the names BANK1 - BANK10. You
can give the banks new names using up to 7 characters as follows:

1 Press and hold EDIT for more than 3 seconds to enter edit mode. 

2 Select edit show by pressing the SHOW button. The first bank appears on the display

by default (you can select a different bank by scrolling through the list of banks with
the < and > buttons).

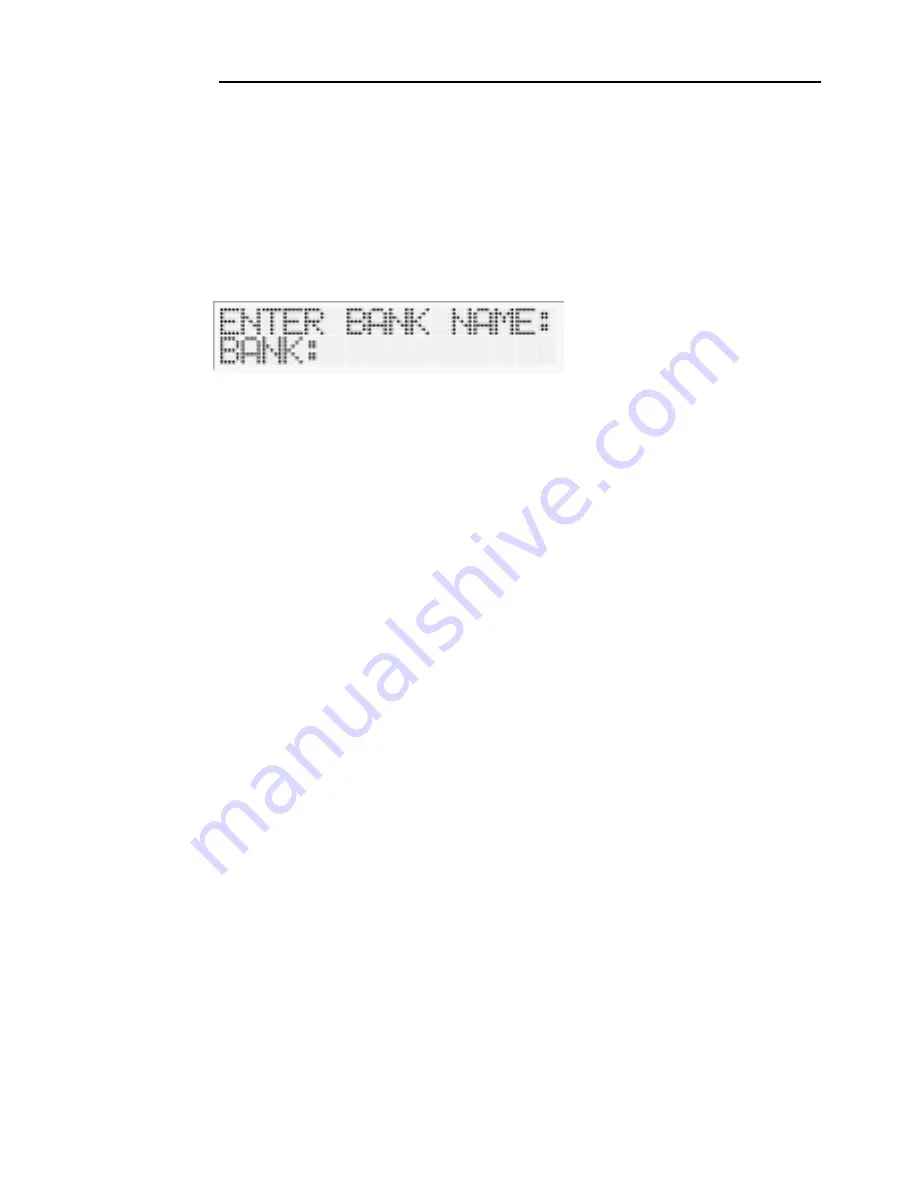
3 Press ENTER. The Freekie deletes the existing bank name and waits for you to enter

a new one. The display shows ENTER BANK NAME: BANK:_ 

4 Select the first character of the new bank name by scrolling with the < and > buttons.

5 Press  ADD to save a character and move on to the next, or press DEL to delete a

character you have entered.

6 Repeat steps 4 and 5 until you have added the new name. You can use up to 7 letters

or digits.

7 Press ENTER once to save the new bank name

Important

Only press ENTER once. If you press ENTER twice, the Freekie 
will delete the name you have entered and wait for you to enter 
a new name, and you will have to repeat steps 4-7.

8 Go to the next bank that you want to rename by pressing the > button. 

9 Repeat steps 3 to 7 until all banks have been renamed. 

10 When you have finished, press EDIT to exit.

R e s t o r i n g   b a n k   n a m e s

If you have deleted a bank name by accident, you may end up with a bank that still
contains shows but does not have a name. In this case, the Freekie will not display
any bank name information. To solve this problem and restore bank names, follow
the procedure for naming banks outlined above.

Summary of Contents for Freekie

Page 1: ...Freekie user manual...

Page 2: ...ssional A S Denmark All rights reserved No part of this manual may be reproduced in any form or by any means without permission in writing from Martin Professional A S Denmark Printed in Denmark P N 3...

Page 3: ...mming shows 16 Programming a show 16 Playback 18 Running a show 18 Execution using programmed scene times 18 Music trigger execution 18 MIDI triggering 18 Manual control of individual fixtures during...

Page 4: ......

Page 5: ...For audio controlled shows there is the choice of either external signal input or the Freekie s own internal microphone FEAT URES Controls up to 12 fixtures or fixture groups each with 12 channels 10...

Page 6: ...ure the device is properly grounded Do not operate the device with the cover removed Immediately repair or replace damaged power cords There are no user serviceable parts inside refer all service to a...

Page 7: ...1 amp can be used CONNECTING THE SERIAL LINK About serials links The Freekie sends instructions through a serial data link The link goes from the controller s output to the input of the first lightin...

Page 8: ...re provided on the Freekie 3 Never use a Y connector to split the link If you need to split the serial link into branches use a dedicated splitter amplifier such as the Martin 4 Channel Opto Isolated...

Page 9: ...the same DMX address The Freekie can control the first 12 channels of each fixture or group and can activate smoke and strobe fixtures The Freekie assigns 12 channels to each fixture regardless of ho...

Page 10: ...10 DMX address setting 5 49 6 61 7 73 8 85 9 97 10 109 11 121 12 133 Strobe 145 Freekie fixture ID DMX address DIP switch setting...

Page 11: ...l fixtures may use the same address They will receive the same instructions and behave identically Make a note of the fixtures and the fixture ID that they have been assigned to You will need this to...

Page 12: ...t up and any other fixture of the same type using the numbered buttons 1 12 You can select a range of fixtures by pressing and holding the first and last fixture buttons 5 Press ENTER 6 Specify the pa...

Page 13: ...to leave fixture set up mode STROBE SET UP The Freekie can control one or more strobe devices that have a DMX control address of 145 During a show you can activate strobe effects using the STROBE butt...

Page 14: ...or haze using the appropriate faders representing channels 1 12 and then press ENTER 6 Press EDIT to leave fixture set up mode FOLLOW SPOT SET UP The Freekie can use an individual fixture as a follow...

Page 15: ...ter and move on to the next or press DEL to delete a character you have entered 6 Repeat steps 4 and 5 until you have added the new name You can use up to 7 letters or digits 7 Press ENTER once to sav...

Page 16: ...using any one of the numbered buttons 1 12 6 The display shows 7 Press FIXTURE 8 Use the number buttons to select one or multiple fixtures You can select a range of fixtures by pressing and holding t...

Page 17: ...ram the other effects such as color and gobo usage as the macros are not transparent the look of the previous scene is not carried over The macro is not used during the fade but starts during the wait...

Page 18: ...c trigger execution to the beat of the music or MIDI show execution Execution using programmed scene times Shows will run using their programmed scene times when the FADE TIME PITCH fader is in the mi...

Page 19: ...n the first bank Keys 13 24 are used to activate corresponding shows in the second bank Keys 25 36 are used to activate corresponding shows in the third bank From software v 1 2 the bank does not need...

Page 20: ...n page 12 Press BLACKOUT to activate blackout mode Press it again to reset the fixtures to the current scene Blackout does not affect the follow spot fixture if this has been activated see Follow spot...

Page 21: ...page 14 Activate smoke effects by pressing the SMOKE button and holding it as long as required While the SMOKE button is being held the faders can be used to control the first 12 channels of the smok...

Page 22: ...ating the PIN code lock To deactivate the PIN code lock 1 Simultaneously press and hold the SPOT and FINE buttons for 5 seconds 2 Enter the PIN code factory set as 221174 Use the fixture buttons to se...

Page 23: ...pond respond errati cally or continuously reset Bad data link connection Check data link connec tions cables and correct accordingly DMX signal polarity reversed Swap pins 2 and 3 See section 2 DMX si...

Page 24: ...ach containing up to 12 shows Scene capacity per show 10 D M X C A P A C I T Y DMX signal input output DMX512 DMX signal output 168 Channel DMX connector XLR 5 PIN x2 3 PIN x2 T R I G G E R S O U R C...

Reviews: