6
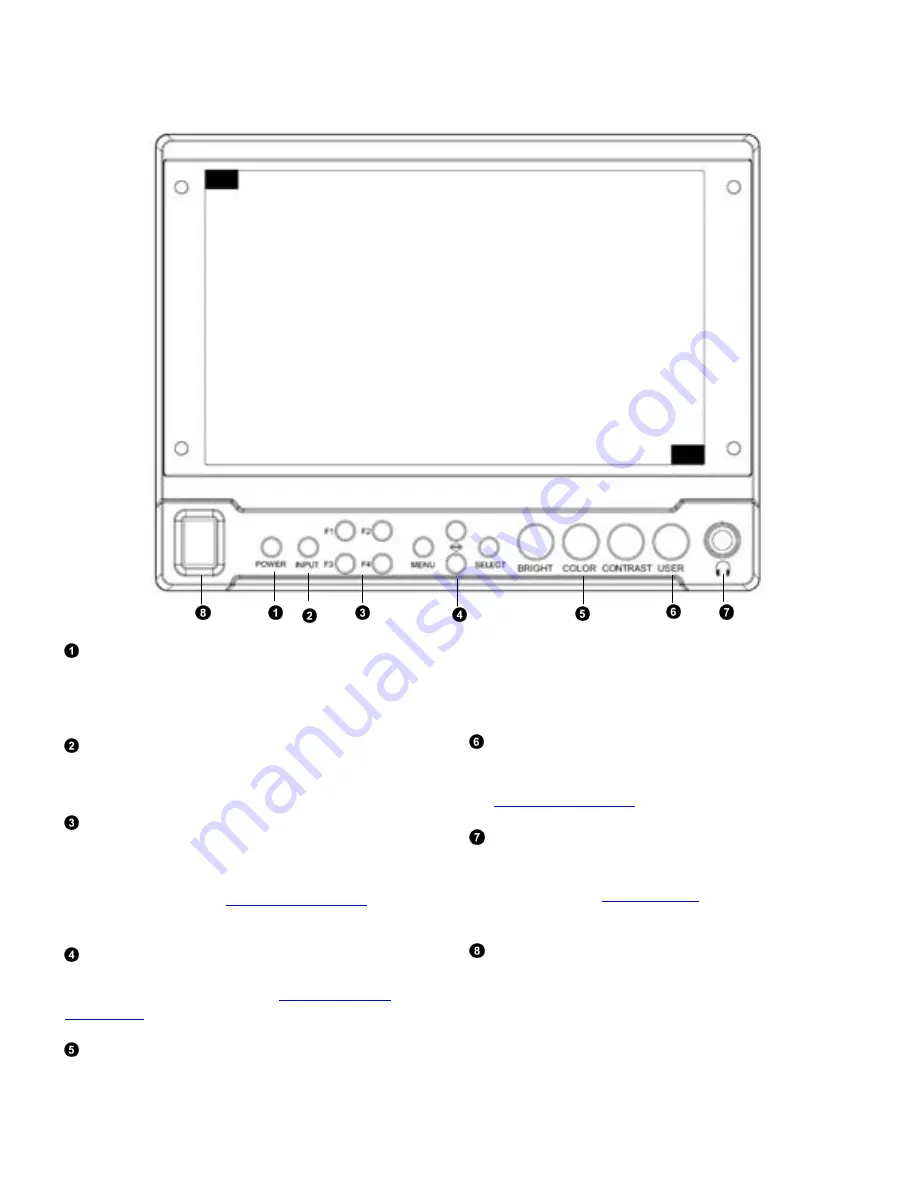
Top and Front Panel Features
Power Button
Turn the display ON or OFF by pressing the power button. In
the ON state, the LED on the power button will dim. In the
OFF state, the LED will on the button will be at full power.
Input Select Button
Use the Input select button to switch between the on-board
HDMI input or (if available) the module Input.
User-Definable Function Buttons
Four user-definable function buttons can be used for direct
access to various settings. Functions are assigned using the on-
screen menu or by highlighting a function and pressing one of
the function buttons. See
for
information on changing Functions.
Menu Navigation Buttons
Use the Menu, ↑, ↓, and Select buttons to display and
navigate the on-screen menu. See
for details on using the Menu.
Image Adjustment Knobs
Use the image adjustment knobs to adjust color saturation,
brightness and contrast of the image. The status of each image
adjustment parameter is shown on the bottom left of the
screen, with values ranging from 0 to 100. Pressing a knob
once displays the current value. Pressing a knob twice resets
the value to the default setting.
User Control Knob
The USER control knob can be customized to control multiple
functions. Change the function of this knob in the MENU. See
the
for more information.
Stereo Headphone Jack
The 1/8” Headphone jack on monitor’s side takes two
channels of embedded HDMI or SDI audio and provides an
audio signal. See the
for information on
working with audio capabilities.
Power Switch
This power switch controls power to the monitor from the DC
Power Connector or the custom Battery Adaptor. The monitor
will always attempt to draw power from the DC connector first
if both the DC Power Connector and a Battery are installed
simultaneously.


