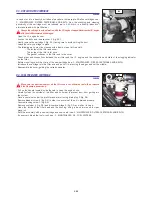
C3 - COMPRESSOR BELT TENSION (OPTION AIR CONDITIONING)
CHECK - ADJUST
- Open the I.C. engine bonnet.
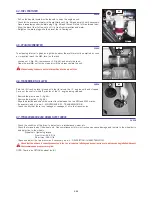
- Unscrew the fastening screws 1 (fig. C3/1).
- Lay down the protective guard 2 (fig. C3/1).
- Check the belt for signs of wear and cracks and change if necessary (see: 3 -
MAINTENANCE: FILTERS CARTRIDGES AND BELTS).
- Check the belt tension between the pulleys of the crankshaft and of the compressor.
- Under a normal pressure exerted with the thumb (10 ft/lb), the tension should be
approximately 3/8 in.
- Carry out adjustments if necessary.
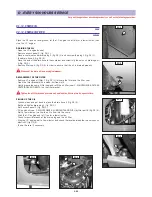
- Untighten screws 3 (fig. C3/2) by two to three thread turns.
- Swivel the compressor assembly so as to obtain the belt tension required.
- Retighten screws 3 (fig. C3/2).
- Put the protective guard back 2 (fig. C3/1).
If the compressor belt has to be changed, check the tension again after the first 20 hours of
operation.
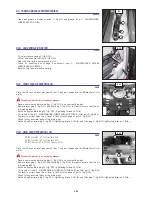
C4 - ANGLE GEAR BOX OIL LEVEL
CHECK
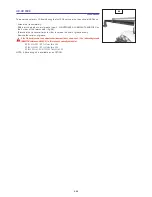
Park the lift truck on level ground with the jib raised and the I.C. engine stopped.
- Remove level plug 1 (fig. C4).
- Wipe the dipstick and check the correct level between the MINI and MAXI marks.
- If necessary, add oil (see: 3 - MAINTENANCE: E5 - ANGLE GEAR BOX OIL).
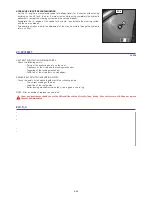
C5 - PARKING BRAKE
CHECK - ADJUST
Place the lift truck on a slope less than 15 % with the rated load in the transport position.
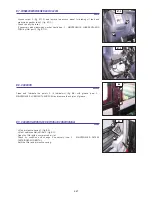
- Check the tightening adjustment by locking the parking brake in position A (fig. C5).
- The adjustment is correct when the lift truck is held stationary on a slope.
- Carry out adjustments if necessary.
- Press and release the brake pedal, then release the parking brake, putting it in position
B (fig. C5).
- Progressively tighten the end piece of the lever 1 (fig. C5) and recheck braking.
- Repeat the operation until the correct braking adjustment is obtained.
C3/2
C4
3
1
3
C3/1
1
1
2
1
1
A
B
C5
1
3 - 21
Summary of Contents for MT 732
Page 2: ......
Page 4: ......
Page 5: ...ROUGH TERRAIN FORKLIFT TRUCK GENERAL SAFETY STANDARDS I...
Page 22: ......
Page 23: ...1 1 1 1 OPERATING OPERATING AND SAFETY AND SAFETY INSTRUCTIONS INSTRUCTIONS...
Page 24: ...1 2...
Page 44: ...1 22...
Page 45: ...2 1 2 DESCRIPTION 2 DESCRIPTION...
Page 46: ...2 2...
Page 55: ...2 11...
Page 86: ...2 42...
Page 87: ...3 1 3 MAINTENANCE 3 MAINTENANCE...
Page 88: ...3 2...
Page 99: ...3 13...
Page 109: ...3 23...
Page 115: ...3 29...
Page 121: ...3 35...
Page 123: ...3 37...
Page 129: ...4 1 4 4 PICKING UP PICKING UP THE THE ATTACHMENTS ATTACHMENTS...
Page 130: ...4 2...
Page 132: ...4 4...
Page 138: ...4 10...


