Manhattan SKYLINE 1000 Instruction Manual Download Page 11


To tune satellites individually or to add more satellites after multi satellite search, follow below steps. 
 

INSTALL MENU: CHANNEL SEARCH


1. Search Index: 

You do not need to set anything here. The reference can be left as 1. 

2. Antenna:

 Select antenna reference as configured previously. If you are using different LNB type, then select that 

reference. Press VOL up / down to change reference number. 

3. Satellite: 

Press VOL up / down to change satellite name.  

4. Search Mode: 

Select  search type  for the satellite you wish to search . See  types indicated on page 9. Press VOL up / 

down to change type. 

5. TP Data: 

Select a predefined TP. Press OK to display sub menu then press VOL up / down to change TP. Finally press 

OK on the selected TP. This TP will then be entered on the main channel search page. 

6. Positioner: 

If you are using a DiSEqC  antenna positioner then select one of the options from below. Press VOL up / 

down to change and press OK for sub menu. If you only have a fixed antenna installation then select ‘None’ and proceed 
with step 7 below. 
 

A)  Using DiSEqC 1.2 menu to manually move the antenna until you find the correct position and signal. When 

in this menu, select ‘MOVE’ then press VOL up / down to move the antenna until you find the correct 
position at the point when signal bar turns green and is at maximum. Then select STORE and press OK. 
This will store the satellite position. 

 
B)  Using DiSEqC 1.3 menu to automatically move the antenna to the correct position. When in this menu 

select ‘USALS’ and press OK. The antenna will automatically move to the correct position. After the 
antenna has stopped moving ,the signal bar will turn green indicating presence of signal. Then select 
STORE and press OK. 


7. START: 

After above configuration move down to START and press OK to commence search. The screen will  change as 

above indicating TV and Radio channels  whilst downloading. When download is completed it will store the channels 
automatically. 


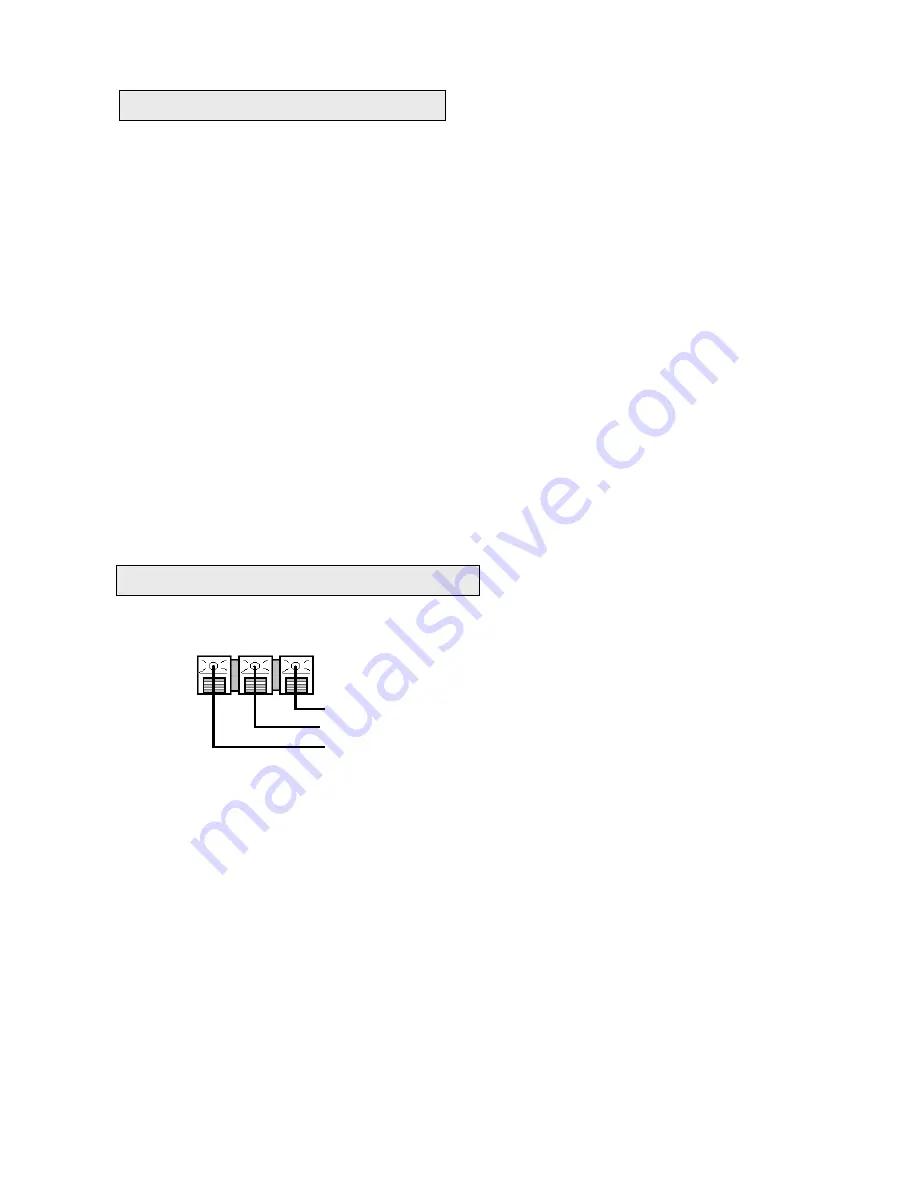
For pre-positioned or fixed antenna installation follow below steps. Connect the appropriate leads to the output terminals 

R12

) at the back of the receiver as below.


INSTALL MENU: ANTENNA SETTINGS 

1. Antenna: 

Press VOL up / down and select  reference 1 

    LNB Type: 

Press VOL up / down and select ‘ Wide’. After selecting press OK to configure LO settings if different.  

    LNB Power: 

Press VOL up / down and select ‘14V Skew On’ . This will switch your LNB to lower band. 


STORE: 

Press OK  to store the settings. 


2. Antenna: 

Press VOL up / down and select  reference 2 

    LNB Type: 

Press VOL up / down and select ‘ Wide’. After selecting press OK to configure LO settings if different.  

    LNB Power: 

Press VOL up / down and select ‘18V Skew On’ . This will switch your LNB to higher band. 


STORE: 

Press OK  to store the settings. 

    22KHz Tone: 

When using other than Universal LNB, press VOL up / down to select tone status. 

INSTALL MENU: CHANNEL SEARCH


3. Antenna: 

Press VOL up / down and select  reference 1 

4. Satellite: 

Press VOL up / down and select satellite name. 

5. Search Mode: 

Press VOL up / down and select the type of search. 

6. TP Data: 

Press OK and select a lower band TP. Press OK on selected TP. 

7. LNB Skew: 

Press VOL up / down to adjust skew until you see maximum signal (green) on the signal bar. 

8. START: 

Press OK to start search. This will tune all channels relating to the skew polarity in lower band. 

9. 

When above is finished, repeat steps 3 to 8 by selecting ‘Antenna 2 and selecting a TP from higher band. This will tune all  

channels relating to the skew polarity in the higher band.     


Pulse output to polarizer

Ground connection to polarizer 

+5V input to polarizer 

PULSE   GND     +5V

Using a mechanical polarizer for your LNB

Channel search : Individual satellite


11

Summary of Contents for SKYLINE 1000

Page 1: ...SKYLINE 1000 Digital Satellite Receiver Instruction Manual English www manhattan receivers com ...

Page 2: ...ITE OR CHANNEL IN VIEWING MODE 12 VIEWING TELETEXT 12 TO DISPLAY SUBTITLES 13 TO SELECT DIFFERENT BROADCAST AUDIO 13 TO ACTIVATE SLEEP TIMER 13 INFORMATION CHANNEL BANNER VOLUME CONTROL AND MUTE 13 ELECTRONIC PROGRAM GUIDE EPG 14 INSTALLING FAVORITE CHANNELS 14 SELECTING FAVORITE CHANNELS 15 VCR TIMER SETTINGS 15 TO RESET YOUR RECEIVER TO DEFAULT SETTINGS 15 SYSTEM INFORMATION Software 16 PARENTAL...

Page 3: ...D quality audio with a touch of a button Before you install and operate the receiver please read the following safety notice SAFETY NOTICE DANGER HIGH VOLTAGE RISK OF ELECTRIC SHOCK Do not open the top cover Lethal high voltages are present inside the receiver Always unplug the receiver from the mains outlet before connecting or disconnecting anything Never expose the receiver to water moisture ex...

Page 4: ...een message for antenna movement using DiSEqC positioner Supports Universal Single Single S Wide Band LNB applications 22 different favourite groups 11 TV 11 Radio with ability to categorise re categorise each group Signal strength and signal quality indication bars with percentage indication Last viewed channel remembered after power down Last Channel recall facility Real time display on channel ...

Page 5: ...a to this connector R5 TV OUT UHF Modulator Output Connect your TV or VCR to this connector R6 TV SCART Connect your TV via a SCART cable to this connector R7 VCR SCART Connect your VCR via a SCART cable to this connector R8 VIDEO Composite video output for connecting to an AV monitor etc R9 0 12V Switched 12V DC output for use with LNB switches R10 AUDIO LEFT RIGHT Audio outputs for connecting to...

Page 6: ...e press this button to display channel list In menu mode this button is used in conjunction with the menu functions to change or enter the programming parameters F7 CH UP In programming mode this button will move the cursor highlighted upwards to facilitate selection In normal operation mode it is used to step up channels sequentially F8 CH DOWN In programming mode this button will move the cursor...

Page 7: ...lectronic program guide EPG NORM To page down the channel list PROG To change a parameter or to page down a list PROG To exit programming mode NORM To increase sound PROG To change a parameter NORM To decrease sound PROG To change a parameter NORM To page up the channel list PROG To change a parameter or to page up a list NORM To move up a channel PROG To move up a line in menu To enter the progra...

Page 8: ...TV SETTINGS Now select the TV Standard for your TV Example PAL I for United Kingdom Press VOL up down to select 3 After above settings if you experience picture interference e g from your VCR change the UHF Channel 64 to a different one and store the settings Then retune your TV to the new channel SYSTEM MENU OSD SETUP Language Press VOL up down to change the language for the menus Color Press VOL...

Page 9: ...ter selecting press OK to configure LO settings if different from above LNB Power Press VOL up down to select the power output to your LNB 22KHz Tone When using other than Universal LNB press VOL up down to select tone status DiSEqC If you are using more than one LNB for fixed installation using a DiSEqC switch press VOL up down to configure the ports on the switch See below example 12V If you wan...

Page 10: ...s VOL up down to change the number 2 Antenna If you are using more than one LNB select antenna reference as configured previously If you are using one LNB then this may remain as 1 Press VOL up down to change number or to switch from Off 4 Search Mode Select search type for each satellite you wish to do See below for types Press VOL up down to change type Auto All To search automatically all TP s ...

Page 11: ...configuration move down to START and press OK to commence search The screen will change as above indicating TV and Radio channels whilst downloading When download is completed it will store the channels automatically For pre positioned or fixed antenna installation follow below steps Connect the appropriate leads to the output terminals R12 at the back of the receiver as below INSTALL MENU ANTENNA...

Page 12: ... CH up down to scroll through the list individually or press PAGE up down to change the page Press OK on desired channel on the chosen satellite In both cases above if you select a channel from another satellite the antenna will automatically move to that satellite TO RECALL THE LAST CHANNEL VIEWED Press RECALL once on your remote If you press again it will go back to previous channel Viewing Tele...

Page 13: ...er for maximum 2 hours Press this button repeatedly to increment time After the set time has lapsed the receiver will automatically switch to standby INFORMATION By pressing INFO button once on your remote the below channel banner will be displayed for 5 seconds If you press the INFO button twice then this will be displayed together with channel data which will appear above the channel banner CHAN...

Page 14: ...annels and press OK Press VOL up down to select Add Delete or Rename 1 TO ADD CHANNELS Press OK on ADD and the cursor will move to channel list Press CH up down and select the channel Press OK on all the channels you wish to add The channel will be added on the right under the favorite heading Press ESC when finished and move to STORE Press OK to store To change the heading press FAV button repeat...

Page 15: ...nd enter the time it is to switch off STORE Press OK to store above settings Repeat the process for rest of the event numbers if you have more than one event to program NOTE If you are setting two or more events within the same day which are switching on one after the other then there should be minimum one minute difference between the off time of first event and on time of second event See below ...

Page 16: ...in ADVANCE INSTALLATION Once the default password 0000 has been changed then it cannot be used again However if you forget your password then you can apply the MASTER PASSWORD which is given on page 20 ADVANCE INSTALLATION This section describes the use of the EDIT menu which includes Channel Satellite and TP edit functions Follow below steps To edit channels EDIT MENU CHANNEL EDIT In EDIT menu se...

Page 17: ...TE TP EDIT NOTE If you delete a satellite then to restore it you have to reinstall the receiver using Master Reset function In EDIT menu select Satellite TP Edit and press OK Press CH down once 1 TO ADD A SATELLITE Press OK on Add and the menu will change as below Follow instructions as indicated After pressing ESC the new satellite name will be entered at the bottom of the list After adding press...

Page 18: ...he menu will change as below Follow instructions as indicated After pressing ESC the new TP name will be entered After naming press ESC and select STORE and press OK ADD or RENAME a TP Press CH up down to move up and down the lines Press VOL up down to move within the line Press OK on the letter to enter After naming press ESC 4 TO SORT TP LIST Press OK on Sort The TP s you have added will be sort...

Page 19: ...start counting up When transfer is finished it will indicate END 5 when finished the slave receiver will indicate a channel number eg 0002 or NOCH Upgrading the software of your receiver You can upgrade the software of your receiver when this is available When a software is upgraded it will be available on our website www manhattan receivers com If you do not have access to internet then consult y...

Page 20: ...r is on but no picture or sound or any menus Receiver is on but no picture or sound Interference on picture using UHF output Bad picture with blocking or frozen Receiver is not responding to remote control You have lost or forgotten your password Technical Specifications TUNER Input Connector F type IEC 169 24 Female Frequency Range 950MHz to 2150MHz Input Impedance 75 Ohm Signal Level 25 to 65 dB...

Page 21: ...Max 25W Protection Separate Internal Fuse PHYSICAL DIMENSIONS Size W X H X D 340 X 66 X 285 mm Weight 2 1 Kg Eurosat and Manhattan are registered trademarks of Eurosat Distribution Ltd Eurosat reserves the right to alter product specifications without prior notice This is the master password for your receiver Cut this section out and keep it in a safe place It will be useful later if you forget or...

Page 22: ...dex 1 Antenna 1 Satellite Amos 1 4 0W Search Mode Auto All TP Data TP5 MCM LNB Skew 45 Positioner DiSEqC 1 3 START Signal 75 Quality 80 CHANNEL SEARCH Search Index 1 Antenna 1 Satellite Amos Search Mode Au TP Data TP5 M LNB Skew Positioner N START Signal 7 Quality 80 1 1 4 0W to All CM 45 one 5 TP5 MCM Freq 10792 Pol Vert S R 27500 FEC Auto Vid P 1234 Aud P 0118 PCR P 0224 STORE Quality 80 CHANNEL...

Page 23: ... Cyfra add 002 Tps STORE Freq 11766 Pol Vert SR 27500 FEC 3 4 SATELLITE TP EDIT Hotbird 1 5 TP EDIT TP 001 Cyfra add Freg 002 Tps 12345 Add or Rename SATELLITE TP EDIT Satellite Satellite 001 Amos 1 AddSatellite 002 Astra 2 STORE SATELLITE TP EDIT Satellite Satellite 001 Amos 1 AddSatellite 002 Astra 2 STORE Add or Rename 12345 EDIT 1 Channel Edit 2 Satellite TP Edit RESERVED FOR MODELS WITH EMBED...

Reviews: