Tuffnote 10
User Guide
16
M&A Technology Inc. Toll Free: 800-225-1452 www.macomp.com
C
C
h
h
a
a
p
p
t
t
e
e
r
r
2
2
System Setup
2
2
.
.
1
1
.
.
E
E
x
x
p
p
l
l
o
o
r
r
i
i
n
n
g
g
Y
Y
o
o
u
u
r
r
T
T
u
u
f
f
f
f
n
n
o
o
t
t
e
e
1
1
0
0
Before starting to set up the Tuffnote 10, take familiar with the locations and purposes of controls, drives,
connectors and ports, which are illustrated in the figures below. When placed upright on the desktop, the front panel
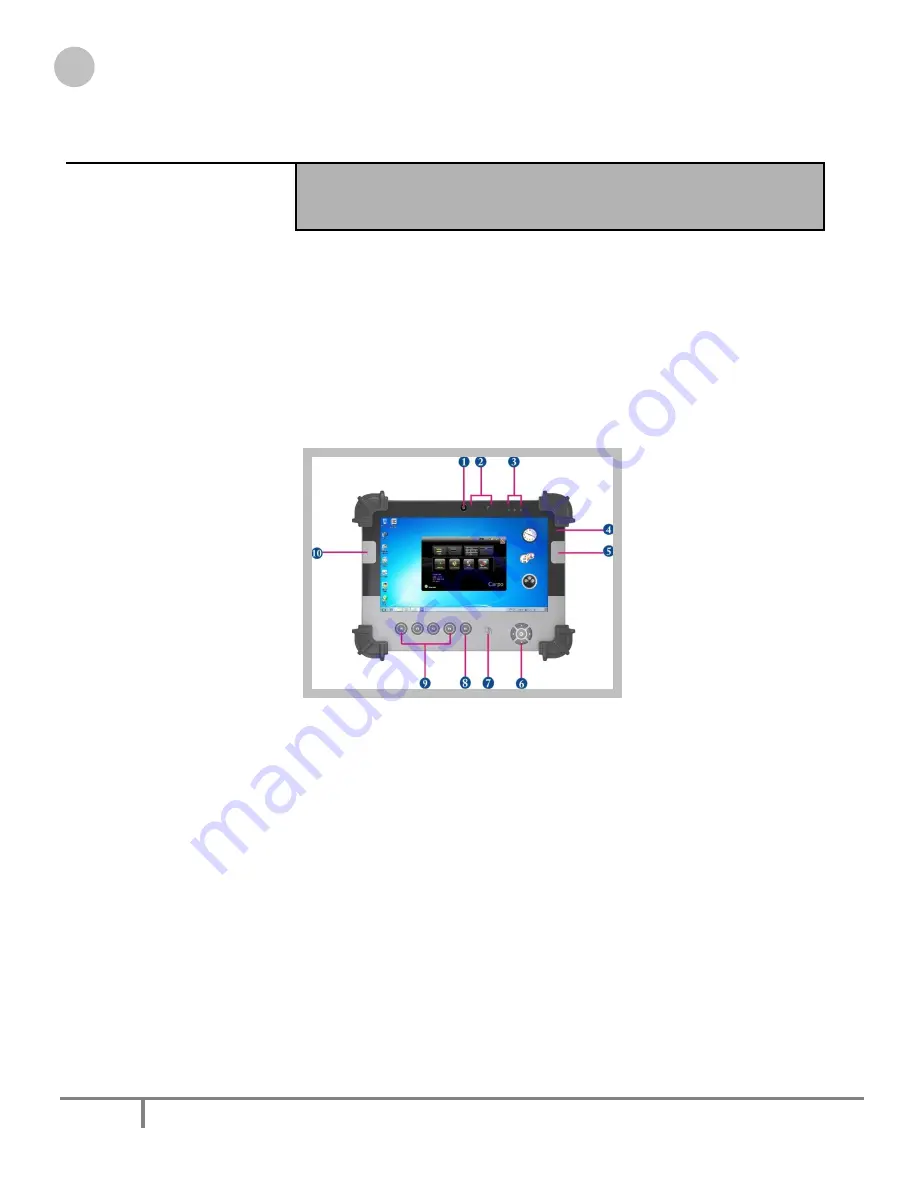
of the Tuffnote 10 appears as shown in Figure 2.1.
2.1.1. The front side of the Tuffnote 10
The front side of the Tuffnote 10 is equipped the I/O as described below.
1.
Camera/1.3 Mega-pixel
2.
Digital Microphone
3.
LED Power/Storage/Wi-Fi
4.
Light Sensor
5.
Barcode Button
6. Navigation Buttons
7. RFID
8. User Interface Button
9. Program Function Buttons
10. Barcode Button
Camera/1.3 Mega-pixel
The built-in camera can be used as a communication device for allowing you to capture images, record videos,
and have video chats. It is 1.3M pixels and transmitting instant image through network for conference.
Digital Microphone
The built-in microphone receives sounds and voices when used with the built-in camera.
LED Power/Storage/Wi-Fi
Keeps you informed of your system’s current power status, Storage operating status, and Wi-Fi accessing
status.


