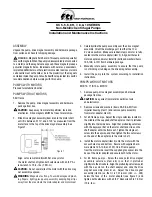
background image

10 ENGLISH

Full speed mode

1

2

►    

1.

 Button   

2.

 Lamp

When full speed mode is turned on, the tool speed becomes 

fastest even if you do not pull the switch trigger fully. When 

full speed mode is turned off, the tool speed increases as 

you increase the pressure on the switch trigger.

To turn on full speed mode, press and hold the button  . To 

turn off full speed mode, press and hold the button 

 again.

The lamp turns on while full speed mode is on.

NOTE:

 Full speed mode continues even after switch-

ing the impact force mode/auto stop mode.

Electronic function

Electric brake

This tool is equipped with an electric brake. If the tool consis-

tently fails to quickly cease to function after the switch trigger 

is released, have the tool serviced at a Makita service center.

ASSEMBLY

CAUTION:


Always be sure that the tool is 

switched off and the battery cartridge is removed 

before carrying out any work on the tool.

Selecting correct impact socket

Always use the correct size impact socket for bolts and nuts. 

An incorrect size impact socket will result in inaccurate and 

inconsistent fastening torque and/or damage to the bolt or nut.

Installing or removing impact socket

Optional accessory

CAUTION:


Make sure that the impact socket 

and the mounting portion are not damaged before 

installing the impact socket.

CAUTION:


After inserting the impact socket, 

make sure that it is firmly secured. If it comes out, 

do not use it.

NOTE:

 The way of impact socket installation varies 

depending on the type of the square drive on the tool.

Tool with the ring spring

Model GWT07

For impact socket without O-ring and pin

1

2

3

►    

1.

 Impact socket 

2.

 Square drive 

3.

 Ring spring

Push the impact socket onto the square drive until it 

locks into place.

To remove the impact socket, simply pull it off.

For impact socket with O-ring and pin

1

2

3

►    

1.

 Impact socket 

2.

 O-ring 

3.

 Pin

Move the O-ring out of the groove in the impact socket 

and remove the pin from the impact socket. Fit the 

impact socket onto the square drive so that the hole in 

the impact socket is aligned with the hole in the square 

drive.  

Insert the pin through the hole in the impact socket and 

square drive. Then return the O-ring to the original posi-

tion in the impact socket groove to retain the pin.
To remove the impact socket, follow the installation 

procedures in reverse.

Summary of Contents for GWT08

Page 1: ...INSTRUCTION MANUAL MANUAL DE INSTRUCCIONES Cordless Impact Wrench Llave de Impacto Inal mbrica GWT07 GWT08 IMPORTANT Read Before Using IMPORTANTE Lea antes de usar...

Page 2: ...er battery cartridges and chargers may cause injury and or fire SAFETY WARNINGS General power tool safety warnings WARNING Read all safety warnings instruc tions illustrations and specifications provi...

Page 3: ...ropriate safety protective equipment by the tool operators and by other persons in the immediate working area Power tool use and care 1 Do not force the power tool Use the correct power tool for your...

Page 4: ...cables water pipes gas pipes etc that could cause a hazard if damaged by use of the tool SAVE THESE INSTRUCTIONS WARNING DO NOT let comfort or familiarity with product gained from repeated use replace...

Page 5: ...service life 3 Charge the battery cartridge with room tem perature at 10 C 40 C 50 F 104 F Let a hot battery cartridge cool down before charging it 4 When not using the battery cartridge remove it fro...

Page 6: ...the conditions of use and the ambient temperature the indication may differ slightly from the actual capacity NOTE The first far left indicator lamp will blink when the battery protection system works...

Page 7: ...o wipe the dirt off the lens of the lamp Be careful not to scratch the lens of lamp or it may lower the illumination NOTE While pulling the switch trigger the lamp status cannot be changed NOTE For ap...

Page 8: ...d speed Tightening when the force and the speed are desired 3 Hard 2 700 min 1 min Tightening with less force and speed than Max mode easier to control than Max mode Tightening when the force and the...

Page 9: ...l to be driven Make a test driving before using this mode Clockwise Preventing overtightening of bolts Counterclockwise Loosening bolts Bolt mode 1 Clockwise The tool stops automatically as soon as it...

Page 10: ...and inconsistent fastening torque and or damage to the bolt or nut Installing or removing impact socket Optional accessory CAUTION Make sure that the impact socket and the mounting portion are not da...

Page 11: ...pull the socket off the square drive Installing hook CAUTION When installing the hook always secure it with the screw firmly If not the hook may come off from the tool and result in the personal injur...

Page 12: ...ccording to the diame ter of bolt Even though the diameters of bolts are the same the proper fastening torque will differ according to the torque coefficient the class of bolt and the bolt length 4 Th...

Page 13: ...he most current warranty terms applicable to this product If annexed warranty sheet is not available refer to the warranty details set forth at below website for your respective country United States...

Page 14: ...enumerados arriba podr an no estar disponibles depen diendo de su rea de residencia ADVERTENCIA Use nicamente los cartuchos de bater a y los cargadores indicados arriba El uso de cualquier otro cartuc...

Page 15: ...sici n de apagado antes de conectar a la alimentaci n el ctrica y o de colocar el cartucho de bater a as como al levantar o cargar la herramienta Cargar las herramientas el ctricas con su dedo en el i...

Page 16: ...dr an oca sionar una situaci n inesperada provocando un incendio explosi n o riesgo de lesiones 6 No exponga la herramienta ni la bater a al fuego ni a una temperatura excesiva La expo sici n al fuego...

Page 17: ...e terceros o agentes de transporte se deben tomar en cuenta los requisitos especiales relativos al empaque y el etiquetado Para efectuar los preparativos del art culo que se va a enviar se requiere co...

Page 18: ...cho de bater a con la ranura en la carcasa y desl cela hasta su lugar Ins rtelo por completo hasta que se fije en su lugar con un peque o clic Si puede ver el indicador rojo como se muestra en la ilus...

Page 19: ...namiento del interruptor 1 1 Gatillo interruptor PRECAUCI N Antes de insertar el cartucho de bater a en la herramienta compruebe siem pre y cerci rese de que el gatillo interruptor se acciona debidame...

Page 20: ...de no rayar la lente de la l mpara ya que la iluminaci n podr a disminuir NOTA Mientras se jala el gatillo interruptor el estado de la l mpara no puede cambiarse NOTA Aproximadamente 10 segundos desp...

Page 21: ...n la fuerza y la velocidad 3 duro 2 700 gpm Apretar con menos fuerza y velocidad que el modo m x es m s f cil controlar que en el modo m x Apriete cuando se desean la fuerza y la velocidad 2 medio 1 9...

Page 22: ...que se va a atornillar Realice una prueba de atornillado antes de usar este modo En el sentido de las maneci llas del reloj Evitar el apriete excesivo de los pernos En el sentido contrario a las mane...

Page 23: ...trico Si de manera consistente la herramienta no cesa de funcionar r pida mente despu s de soltar el gatillo interruptor lleve la herramienta a un centro de servicio Makita para que le den mantenimien...

Page 24: ...y ret relo Para herramienta con el pasador de retenci n de ajuste firme Accesorio opcional 1 2 3 4 3 4 1 Dado de impacto 2 Orificio 3 Adaptador cua drado 4 Pasador de retenci n Para instalar el dado a...

Page 25: ...na torsi n de apriete excesiva puede da ar el perno tuerca o el dado de impacto Antes de comenzar su trabajo realice siempre una operaci n de prueba para determinar el tiempo de apriete apro piado par...

Page 26: ...lesiones personales Utilice los accesorios o aditamentos solamente para su fin establecido Si necesita cualquier ayuda para m s detalles en relaci n con estos accesorios pregunte a su centro de servic...

Page 27: ...27...

Page 28: ...ados por el lijado aserrado esmerilado taladrado y otras actividades de la construcci n contienen sustancias qu micas reconocidas por el Estado de California como causantes de c ncer defectos de nacim...

Reviews: