9
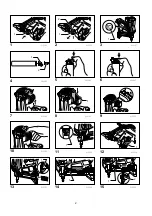
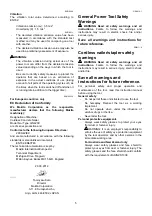
Indication lamp
Color of the indication lamp means the followings.
Blinking green:
Normal status
Blinking red:
Need to recharge the battery cartridge
Lighting-up-red:
Recharge the battery cartridge.
Nailing cannot be performed due to no remaining
battery capacity.
Blinking orange after blinking green and red
alternately:
Fault detection is running. Remove and
reinsert the battery cartridge to reset. If fault detection is
running again, it is malfunction condition. Ask your local
Makita service center to repair it.
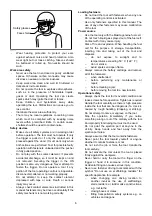
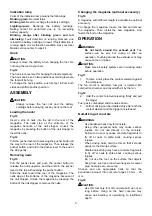
Hook
CAUTION:
Always remove the battery when hanging the tool. Do
not hang the tool to your belt.
Fig.12
The hook is convenient for hanging the tool temporarily.
The hook can be set in two positions according to where
the tool will be hung.
To change the hook position, push its feet in from both
sides and shift to another position.
ASSEMBLY
CAUTION:
•
Always remove the fuel cell and the battery
cartridge before carrying out any work on the tool.
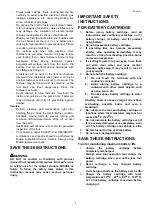
Loading the nailer
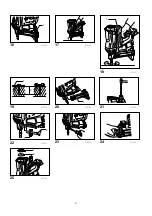
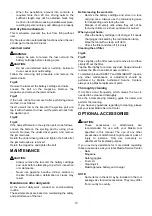
Fig.13
Insert a strip of nails into the slit in the rear of the
magazine. The nails stop at the entrance of the
magazine because of the nail stopper. Unlock the
magazine by pressing the button of the nail stopper to
insert the nails.
Fig.14
Pull the pusher lever with pressing the pusher button all
the way to the rear of the magazine. Then release the
pusher button, and return the pusher lever to the end of
the strip gently.
Removing nails
Fig.15
Pull the pusher lever and push the pusher button to
release the nail supporter, and then return the pusher
lever to the top with pushing the pusher button.
Slide the nails toward the rear of the magazine. The
nails stop at the entrance of the magazine because of
the nail stopper. Unlock the magazine by pressing the
button of the nail stopper to remove the nails.
Changing the magazine (optional accessory)
Fig.16
A magazine with different length is available as optional
accessory.
To change the magazine, loosen the bolt and remove
the magazine. Then install the new magazine. And
fasten the bolt on the magazine.
OPERATION
WARNING:
•
Do not touch around the exhaust vent.
The
surface will be very hot during or after an
operation. Touching around the exhaust vent may
cause burns or injuries.
CAUTION:
•
Make sure all safety systems are in working order
before operation.
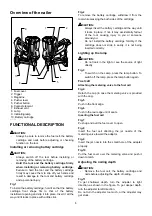
Fig.17
1.
To drive a nail, place the contact element against
the workpiece.
The fan motor is activated, fuel gas is injected into
combustion chamber and mixed with air by the fan.
Fig.18
2.
Hold the contact element pressing firmly and pull
the trigger.
Fuel gas is combusted and the nail is driven.
3.
Further driving can be initiated only after both the
contact element and the trigger are released.
Nail-driving of concrete
WARNING:
•
Use hardened nails only for concrete.
Using other purposed nails may cause serious
injuries. Do not nail directly on the concrete.
Failure to do so may cause concrete fragments to
fly off or nails to strike back, causing serious
injuries.
•
When driving nails, hold the tool so that it stands
upright to the driving surface.
Slanted nail-driving may cause concrete fragments
to fly off or nails to strike back, causing serious
injuries.
•
Do not use the tool on the surface that objects
hang from, such as area where hangers for sewer
pipe, dust pipe etc. are set up
Choose and use appropriate nails so that the
penetration amount into concrete ranges 15 mm - 20
mm.
Fig.19
CAUTION:
•
Use this tool only for soft concrete built up not so
long before. Using on the hard concrete may
cause nail bending or nail-driving to insufficient
depth.
Summary of Contents for GN420CLSE
Page 69: ...69 ...
Page 70: ...70 ...
Page 71: ...71 ...
Page 72: ...72 Makita Corporation Anjo Aichi Japan www makita com 885157 979 ...

