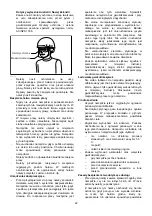
8
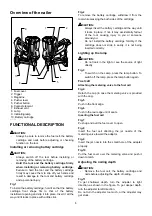
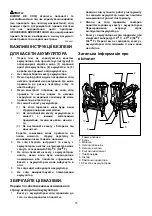
Overview of the nailer
1
2
3
4
5
6
7
8
9
10
013150
FUNCTIONAL DESCRIPTION
CAUTION:
•
Always be sure to remove the fuel cell, the battery
cartridge and nails before adjusting or checking
function on the tool.
Installing or removing battery cartridge
CAUTION:
•
Always switch off the tool before installing or
removing of the battery cartridge.
•
Hold the tool and the battery cartridge firmly
when installing or removing battery cartridge.
Failure to hold the tool and the battery cartridge
firmly may cause them to slip off your hands and
result in damage to the tool and battery cartridge
and a personal injury.
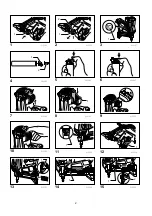
Fig.1
To install the battery cartridge, hold it so that the battery
cartridge front shape fits to that of the battery
installment opening and slip it into place. Insert it all the
way until it locks in place with a little click.
Fig.2
To remove the battery cartridge, withdraw it from the
tool while pressing the both sides of the cartridge.
CAUTION:
•
Always insert the battery cartridge all the way until
it locks in place. If not, it may accidentally fall out
of the tool, causing injury to you or someone
around you.
•
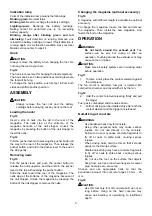
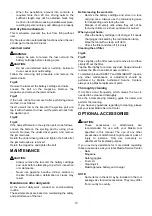
Do not install the battery cartridge forcibly. If the
cartridge does not slide in easily, it is not being
inserted correctly.
Lighting up the lamp
CAUTION:
•
Do not look in the light or see the source of light
directly.
Fig.3
•
To switch on the Lamp, press the lamp button. To
switch off the lamp, press the lamp button again.
Fuel cell
Attaching the metering valve to the fuel cell
Fig.4
Detach the cap (in case the metering valve is provided
with the cap).
Fig.5
Push in the front edge.
Fig.6
Push in the rear edge until it seats.
Inserting the fuel cell
Fig.7
Push up and pull the fuel cover to open.
Fig.8
Insert the fuel cell directing the jet nozzle of the
metering valve toward the adaptor.
Fig.9
Insert the jet nozzle into the small hole of the adapter
properly.
Fig.10
Put the fuel cover over the metering valve and push it
down to latch.
Adjusting the nailing depth
CAUTION:
•
Remove the fuel cell, the battery cartridge and
nails before adjusting the depth of nailing.
Fig.11
To get shallower depth, turn the adjuster to right
direction as shown in the figure. To get deeper depth,
turn the adjuster to left direction.
Do not turn the adjuster too much, or the adjuster may
get stuck.
1. Fuel cover
2. Trigger
3. Magazine
4. Pusher lever
5. Pusher button
6. Contact element
7. Exhaust vent
8. Lamp
9. Indicating lamp
10. Battery cartridge
Summary of Contents for GN420CLSE
Page 69: ...69 ...
Page 70: ...70 ...
Page 71: ...71 ...
Page 72: ...72 Makita Corporation Anjo Aichi Japan www makita com 885157 979 ...

