17 ENGLISH
For depressed center wheel, flap
disc, wire wheel brush / abrasive cut-
off wheel, diamond wheel
1.
While pushing the lock lever, mount the wheel
guard with the protrusions on the wheel guard aligned
with the notches on the bearing box.
►
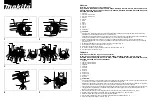
Fig.7:
1.
Lock lever
2.
Notch
3.
Protrusion
2.
While pushing the lock lever toward A, hold down
the portions B of the wheel guard as shown in the
figure.
►
Fig.8:
1.
Wheel guard
2.
Hole
NOTE:
Push down the wheel guard straight.
Otherwise, you cannot secure the wheel guard.
3.
While pushing the lock lever toward A, rotate the
wheel guard toward C, and then, change the angle of
the wheel guard according to the work so that the oper-
ator can be protected. Align the lock lever with one of
the holes in the wheel guard, and then release the lock
lever to lock the wheel guard.
►
Fig.9:
1.
Wheel guard
2.
Hole
To remove wheel guard, follow the installation proce-
dure in reverse.
Installing depressed center wheel or
flap disc
Optional accessory
WARNING:
When using a depressed center
wheel or a flap disc, the wheel guard must be
fitted on the tool so that the closed side of the
guard always points toward the operator.
►
Fig.10:
1.
Depressed center wheel
2.
Wheel guard
Installing abrasive cut-off / diamond
wheel
Optional accessory
WARNING:
When using an abrasive cut-off
/ diamond wheel, be sure to use only the special
wheel guard designed for use with cut-off wheels.
WARNING:
NEVER use cut-off wheel for side
grinding.
►
Fig.11:
1.
Abrasive cut-off wheel / diamond wheel
2.
Wheel guard for abrasive cut-off wheel /
diamond wheel
Clip-on cutting wheel guard
attachment
Optional accessory
NOTE:
For cutting-off operations, a clip-on cutting
wheel guard attachment can be used with the wheel
guard (for grinding wheel).
Not available in some countries.
►
Fig.12
Installing wire cup brush
Optional accessory
CAUTION:
Do not use wire cup brush that is
damaged, or which is out of balance.
Use of dam-
aged brush could increase potential for injury from
contact with broken brush wires.
►
Fig.13:
1.
Wire cup brush
Installing wire wheel brush
Optional accessory
CAUTION:
Do not use wire wheel brush that
is damaged, or which is out of balance.
Use of
damaged wire wheel brush could increase potential
for injury from contact with broken wires.
CAUTION:
ALWAYS use guard with wire
wheel brushes, assuring diameter of wheel fits
inside guard.
Wheel can shatter during use and
guard helps to reduce chances of personal injury.
►
Fig.14:
1.
Wire wheel brush
2.
Wheel guard
Installing or removing X-LOCK
wheel
WARNING:
Never actuate the release lever of
the X-LOCK holder during operation. Make sure
that the X-LOCK wheel has stopped completely
when removing it.
Otherwise, the X-LOCK wheel
comes off from the tool and may cause serious injury.
CAUTION:
Use only original X-LOCK wheels
with the X-LOCK logo.
This tool is dedicated to
X-LOCK.
The maximum clamping gauge of 1.6 mm can only be
guaranteed with original X-LOCK wheels.
Use of any other wheels may lead to insecure clamp
-
ing, and cause the clamp tool to come loose.
CAUTION:
Do not touch the X-LOCK wheel
immediately after operation.
It may be extremely
hot and could burn your skin.
CAUTION:
Make sure that the X-LOCK wheel
and holder of the tool are not deformed and are
free from dust or foreign matters.
CAUTION:
Do not put your finger near the
holder while installing or removing the X-LOCK
wheel.
It may pinch your finger.
CAUTION:
Do not put your finger near the
release lever while installing the X-LOCK wheel.
It
may pinch your finger.
NOTE:
No additional parts such as inner flanges
or lock nuts are required to install or remove the
X-LOCK wheels.
Summary of Contents for GA041G
Page 2: ...2 2 3 1 1 Fig 1 1 2 Fig 2 1 Fig 3 1 Fig 4 1 Fig 5 Fig 6 ...
Page 3: ...3 3 2 1 Fig 7 2 B 1 A B Fig 8 2 1 A C C Fig 9 1 2 Fig 10 1 2 Fig 11 ...
Page 4: ...4 Fig 12 1 Fig 13 1 2 Fig 14 1 2 A B Fig 15 2 4 3 1 Fig 16 1 2 Fig 17 1 A B Fig 18 ...
Page 5: ...5 Fig 19 1 2 Fig 20 15 Fig 21 Fig 22 Fig 23 Fig 24 Fig 25 Fig 26 ...
Page 6: ...6 1 Fig 27 1 4 2 3 Fig 28 2 3 1 Fig 29 1 Fig 30 1 1 2 2 Fig 31 Fig 32 ...
Page 7: ...7 1 Fig 33 1 2 Fig 34 1 Fig 35 1 Fig 36 1 1 2 2 Fig 37 1 2 Fig 38 ...


