9 ENGLISH
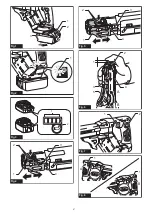
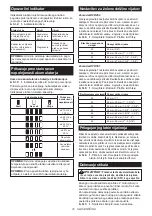
Alert indicator
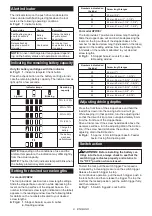
The indicator lamp on the push drive mode selector
raises an alert with flashing red lights when the tool
works in the following operating conditions.
►
Fig.2:
1.
Indicator lamp
Lamp status
Causes
Remedies
Fast flashing (approx.
one-third second
intervals)
Battery
getting low
Charge the battery
at your earliest
opportunity.
Delayed flashing
(approx. a second
intervals)
Overheated
Let the tool cool
down before turning
it on again.
NOTE:
An over-discharge alert may appear depend
-
ing on the battery status and operational conditions.
Indicating the remaining battery capacity
Only for battery cartridges with the indicator
►
Fig.3:
1.
Indicator lamps
2.
Check button
Press the check button on the battery cartridge to indi
-
cate the remaining battery capacity. The indicator lamps
light up for a few seconds.
Indicator lamps
Remaining
capacity
Lighted
Off
Blinking
75% to 100%
50% to 75%
25% to 50%
0% to 25%
Charge the
battery.
The battery
may have
malfunctioned.
NOTE:
Depending on the conditions of use and the
ambient temperature, the indication may differ slightly
from the actual capacity.
NOTE:
The first (far left) indicator lamp will blink when
the battery protection system works.
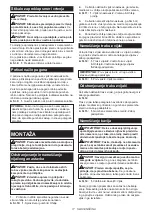
Setting for desired screw lengths
For model DFR452
The tool provides 4 positive-lock screw length settings.
Slide the stopper base out and in while depressing the
levers on the top surface of the stopper base so the
number for desired screw length (indicated on the label)
appears in the reading window. See the following table
for details on the numbers allocated to your desired
screw lengths.
►
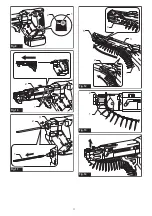
Fig.4:
1.
Stopper base
2.
Levers
3.
Label
4.
Reading window
Numbers indicated on
the label
Screw length ranges
20
20 mm (3/4″)
25
25 mm - 28 mm (1″ - 1-1/8″)
32
28 mm - 35 mm (1-1/8″ - 1-3/8″)
41
35 mm - 41 mm (1-3/8″ - 1-5/8″)
For model DFR551
The tool provides 7 positive-lock screw length settings.
Slide the stopper base out and in while depressing the
levers on the top surface of the stopper base so the
number for desired screw length (indicated on the label)
appears in the reading window. See the following table
for details on the numbers allocated to your desired
screw lengths.
►
Fig.5:
1.
Stopper base
2.
Levers
3.
Label
4.
Reading window
Numbers indicated on
the label
Screw length ranges
25
25 mm (1″)
30
25 mm - 30 mm (1″ - 1-3/16″)
35
30 mm - 35 mm (1-3/16″ - 1-3/8″)
40
35 mm - 40 mm (1-3/8″ - 1-9/16″)
45
40 mm - 45 mm (1-9/16″ - 1-3/4″)
50
45 mm - 50 mm (1-3/4″ - 2″)
55
50 mm - 55 mm (2″ - 2-3/16″)
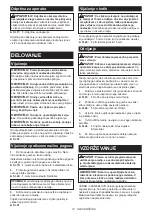
Adjusting driving depths
Press the front face of the stopper base and hold the
feeder box down into the casing as far as it will go.
While keeping it in that position, turn the adjusting dial
so that the driver bit tip comes out approximately 6 mm
from the front face of the stopper base.
Drive a trial screw. If the screw head stands above the
workpiece surface, turn the adjusting dial in the A direc
-
tion; if the screw head sits below the surface, turn the
adjusting dial in the B direction.
►
Fig.6:
1.
Approx. 6 mm
2.
Stopper base
3.
Feeder
box
4.
Casing
5.
Adjusting dial
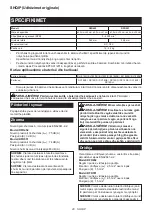
Switch action
WARNING:
Before installing the battery car
-
tridge into the tool, always check to see that the
switch trigger actuates properly and returns to
the "OFF" position when released.
To start the tool, pull the switch trigger. Tool speed is
increased by increasing pressure on the switch trigger.
Release the switch trigger to stop.
For continuous operation, pull the switch trigger, push in
the lock button and then release the trigger. To stop the
tool from the locked position, pull the switch trigger fully,
and then release it.
►
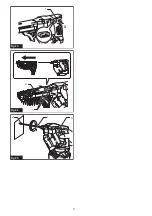
Fig.7:
1.
Switch trigger
2.
Lock button

