4
Intended use
This guide rail adaptor is intended for use of various
Makita electric saws in conjunction with Makita or Festool
guide rail.
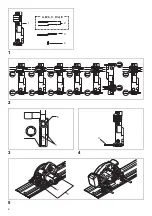
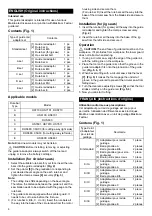
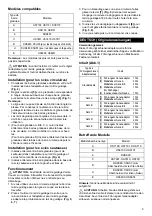
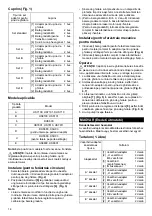
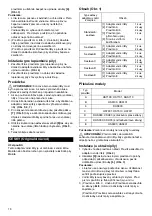
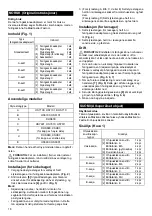
Contents (Fig. 1)
Applicable models
Note:
Brand new models may not be listed.
CAUTION:
Before installing, removing or adjusting
the guide rail adaptor, always switch off the tool and
unplug or remove the battery cartridge.
Installation (for circular saws)
1. Select the suitable rule bars for your tool. Insert the rule
bars into the guide rail adaptor.
(Fig. 2)
2. Set the pointer
[5]
to the graduation corresponding to
your desired bevel angle on the each rule bar and
tighten the clamp screws
[6]
securely.
(Fig. 3)
Note:
• The cutting line shifts depending on the bevel angle.
Therefore, the distance between the guide rail and the
saw blade needs to be adjusted with the gauge on the
rule bars.
• The guide rails are equipped with a splinter guard. It
needs to be cut to size before the first use.
3. (For rule bar A, B/b, C, d, or E) Insert the rule bars all
the way into the base of the circular saw from the motor
housing side and secure them.
(For rule bar D) Insert the rule bars all the way into the
base of the circular saw from the blade side and secure
them.
Installation (for jig saws)
1. Insert the rule bar (for jig saw) all the way into the guide
rail adaptor and tighten the clamp screw securely.
(Fig. 4)
2. Insert the rule bar all the way into the base of the jig
saw from the left side and secure it.
Operation
CAUTION:
The end face of guide rail must be on the
workpiece. If it protrudes from workpiece, the lower guard
does not retract when starting.
1. If using a circular saw, align the edge of the guide rail
with the cutting line on the workpiece.
2. Place the tool on the guide rail so that the groove in the
guide rail adaptor fits onto the protrusion of the guide
rail.
(Fig. 5, 6, 7)
3. When bevel cutting with a circular saw, slide the lever
[7]
.
(Fig. 5)
It makes the foot engage the undercut
groove in the guide rail to prevent the circular saw from
falling down.
4. Turn the clearance adjusting screws
[8]
so that the tool
slides smoothly on the guide rail.
(Fig. 5, 6)
5. Now you can start cutting.
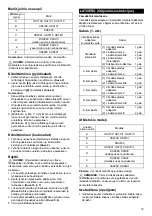
Utilisation conforme aux prescriptions
Cet adaptateur pour rail de guidage est conçu pour
permettre l’utilisation de différentes scies électriques
Makita en association avec un rail de guidage Makita ou
Festool.
Contenu (Fig. 1)
ENGLISH (Original instructions)
Type of guide rail
adaptor set
Contents
Standard set
[1] Guide rail adaptor
[2] Rule bar A
Rule bar B/b
[3] Rule bar (for jig saw)
[4] Hex socket bolt
1 pc.
2 pcs.
2 pcs.
1 pc.
1 pc.
A set
[1] Guide rail adaptor
[2] Rule bar A
1 pc.
2 pcs.
B set
[1] Guide rail adaptor
[2] Rule bar B/b
1 pc.
2 pcs.
C set
[1] Guide rail adaptor
[2] Rule bar C
1 pc.
2 pcs.
D set
[1] Guide rail adaptor
[2] Rule bar D/d
1 pc.
2 pcs.
E set
[1] Guide rail adaptor
[2] Rule bar E
1 pc.
2 pcs.
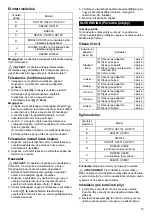
Rule bar
Type
Model
A
HS7100, HS7101, DHS710
B
HS6100, HS6101
b
DHS630
C
HS7601, HS7610, HS7611
D
DHS680, XSH03 (for cutting away right side)
d
DHS680, XSH03 (for cutting away left side)
E
HS6600, HS6601
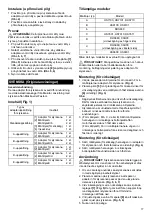
FRANÇAIS (Instructions d’origine)
Type de kit
d’adaptateur
pour rail de
guidage
Sommaire
Kit standard
[1] Adaptateur pour rail de
guidage
[2] Barre graduée A
Barre graduée B/b
[3] Barre graduée (pour scie
sauteuse)
[4] Boulon à six pans creux
1 pièce
2 pièces
2 pièces
1 pièce
1 pièce
Kit A
[1] Adaptateur pour rail de
guidage
[2] Barre graduée A
1 pièce
2 pièces
Kit B
[1] Adaptateur pour rail de
guidage
[2] Barre graduée B/b
1 pièce
2 pièces
Kit C
[1] Adaptateur pour rail de
guidage
[2] Barre graduée C
1 pièce
2 pièces
Kit D
[1] Adaptateur pour rail de
guidage
[2] Barre graduée D/d
1 pièce
2 pièces
Kit E
[1] Adaptateur pour rail de
guidage
[2] Barre graduée E
1 pièce
2 pièces
Summary of Contents for 196953-0
Page 2: ...2 1 2 3 4 5 3 4 1 2 A B b C D d E 5 6 3 7 8 ...
Page 3: ...3 6 7 4 ...

