Operating Instructions
34
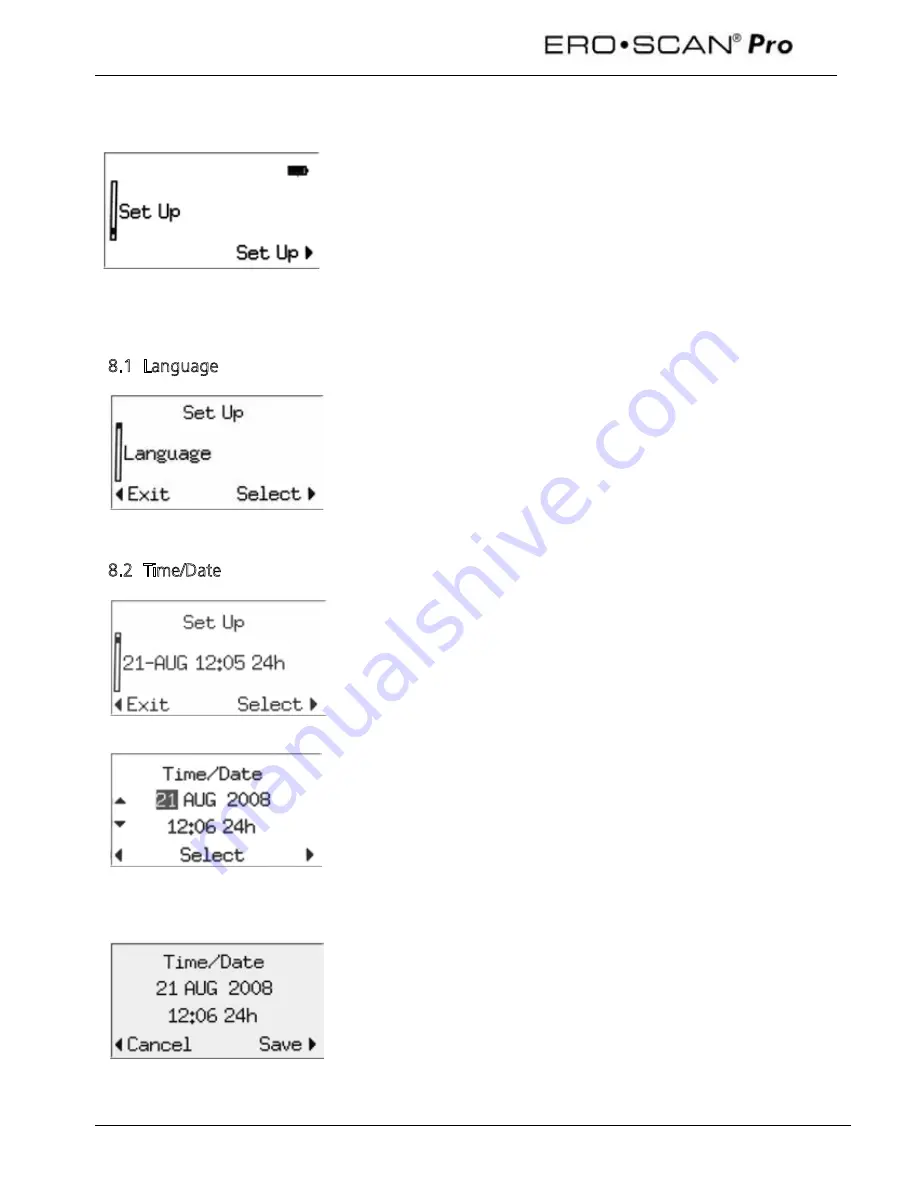
8 Set Up
To enter the
Set Up
menu, scroll down the main menu to
Set Up
and
select by pressing the right
arrow button.
Scroll through the set up menu options using the up
and down
arrow buttons on the control panel. To change the settings, select
item to be changed by pressing the right
arrow button.
Note: the current setting for each option is displayed after the colon.
8.1 Language
To change the language, select
Language
from the
Set Up
menu.
Scroll through the language options using the up
and down
arrow buttons on the control panel. To change the settings, select
another language and press the right
arrow. The languages available
will vary by instrument.
8.2 Time/Date
To set the instrument time and date, from the set up menu select the
item showing the current date and time settings. Use the right
arrow button to enter the
Time/Date
menu.
Use the left
and right
arrow buttons to select a portion of the time
or date. The selected portion of the date will appear highlighted. Use
the up
and down
arrow buttons to change the selected portion
of the Time/Date.
The time can be showing using a 12 hour (am & pm) or 24 hour
clock. To use the 12 hour clock, select
am
or
pm
in the last portion of
the time. For the 24 hour clock, select
24h
in the last portion of the
time.
When the time and date are set as desired, press the right
arrow
button until
Save
appears in the bottom right corner of the display
of the display. Press the right
arrow to
save
the time/date.
Summary of Contents for Ero Scan Pro
Page 74: ...1162 0802 Rev E 05 12...


