


Adjustments
18
Adjustments
Parking stand on the
snowblower
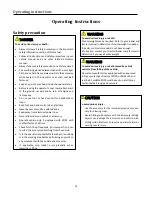
DANGER
To avoid serious injury or death :
Proceed to the assembly/adjustment on the accessory
after it has been properly attached to the vehicle and
secured with solid support. Never work around /under
equipment supported by hydraulics. Hydraulics can drop
equipment instantly if controls are actuated or if
hydraulic lines burst even when power to hydraulics is
shut off.
Lower the parking stand:
IMPORTANT
: when in operation or when the
snowblower shaft is installed on the tractor, the parking
stand must always be raised.
Lower the parking stand allows easy hooking and
unhooking of the snowblower.
A.
Raise the snowblower
2” from the ground.
B.
Stop the vehicle, see the procedure for stopping the
vehicle in the operation section.
C.
Remove the lock pin (item 1) then lower the parking
stand (item 2) and reinstall the lock pin at the
indicated place.
D.
Lower the snowblower to the ground.
Raising the parking stand:
IMPORTANT
: when in operation or when the
snowblower shaft is installed on the tractor, the parking
stand must always be raised.
E.
Raise the snowblower
2” from the ground.
F.
Stop the vehicle, see the procedure for stopping the
vehicle in the operation section.
G.
Remove the lock pin (item 1) then raise the parking
stand (item 2) and reinstall the lock pin at the
indicated place.
H.
Lower the snowblower to the ground.
Chute deflector
Adjust the angle of the deflector according to the
distance at which the snow is to be projected and to
prevent damage to the property. To change the deflector
angle, loosen both knobs (item 1), adjust the knobs to
the appropriate angle, and tighten both knobs firmly or
use the optional electric deflector assembly.
Summary of Contents for BER3PTSB48R
Page 28: ...Parts breakdown 26 Part list and parts breakdown Principal accessory BER3PTSB48R BER3PTSB48R...
Page 29: ...Parts breakdown 27 BER3PTSB48R BER3PTSB48R...
Page 30: ...Parts breakdown 28 BER3PTSB56R BER3PTSB56R...
Page 31: ...Parts breakdown 29 BER3PTSB56R BER3PTSB56R...
Page 32: ...Parts breakdown 30...
Page 33: ...Parts breakdown 31...
Page 34: ...Parts breakdown 32...
Page 35: ...Parts breakdown 33...
Page 36: ...Parts breakdown 34...
Page 37: ...Parts breakdown 35...
Page 38: ...Parts breakdown 36...
Page 39: ...Parts breakdown 37...
Page 40: ...Parts breakdown 38...
Page 41: ...Parts breakdown 39...


