Please enjoy your Magnuson Super Charged performance responsibly.
Use only premium gasoline fuel, 91 octane or better.
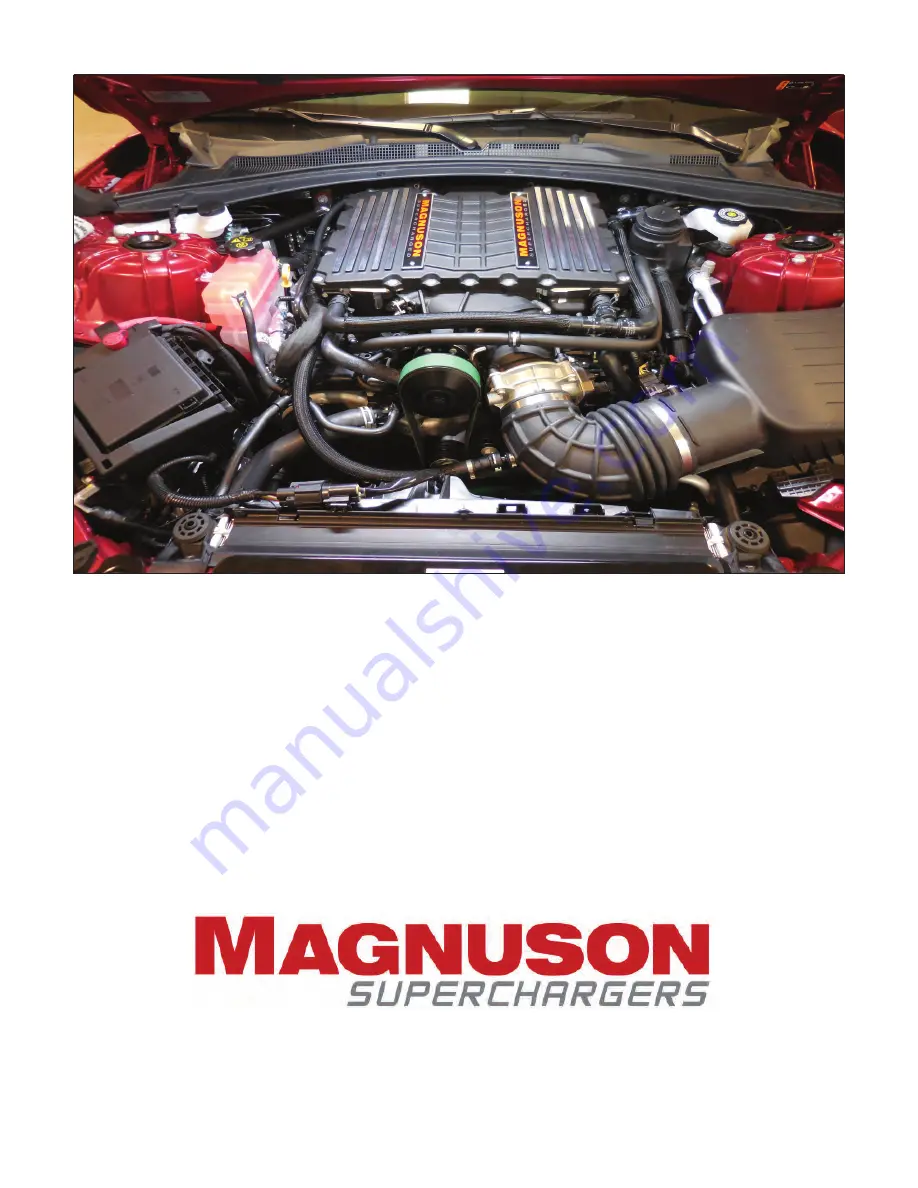
Page 1: ... corrosion Use only the vehicle manufacturer recommended coolant for your engine in the intercooler system as well 89 89 60 052 Rev F PREMIUM GASOLINE FUEL REQUIRED PREMIUM GASOLINE FUEL REQUIRED Step by step instructions for installing the best in supercharger systems Installation Instructions for 2016 2020 LT1 Chevrolet Camaro Magnum DI Supercharger System ...
Page 2: ...tallation on high mileage or damaged engines is not recommended and may result in engine failure for which we are not responsible Magnuson Superchargers is not responsible for the engine or consequential damages Magnuson Superchargers kits are designed for use on stock vehicles To that end the alteration or Magnuson Superchargers kits are designed for use on stock vehicles To that end the alterati...
Page 3: ... Electrical Connection 54 Section 12 CAC Installation 65 Section 13 Final Assembly and Testing 72 NOTE This instruction manual follows the process we used to complete this installation on our test vehicle This does not imply there aren t alternate approaches Tools Required Metric wrench set 3 8 and drive metric socket set with 22mm and 24mm Standard Deep 3 8 and drive Foot pound and inch pound tor...
Page 4: ...itional element of customization necessary for you to supply an additional element of customization for your vehicle custom calibration and to work at your own for your vehicle custom calibration and to work at your own direction and expense with a local service facility to address your direction and expense with a local service facility to address your unique combination of hardware and make cali...
Page 5: ...tion in the driver seat of the vehicle 1 If your kit has a provided handheld tuner If your kit has a provided handheld tuner follow the instructions in the provided follow the instructions in the provided pamphlet to install your tune pamphlet to install your tune Your handheld Your handheld tuner may not match the one shown tuner may not match the one shown 2 Your Intercooler system is sensitive ...
Page 6: ...e negative battery terminal Cap or cover the terminal to protect against accidental contact with the battery post 6 Place a rag over the latch area so the trunk does not accidently get locked 7 Follow the instructions in your owner s manual for vehicle lifting and front wheel removal Only the front wheels will need to be removed 2016 2020 LT1 Chevrolet Camaro 9 17 6 www magnusonsuperchargers com ...
Page 7: ...Use a 7mm wrench to remove the 8 bolts shown with red arrows Use a 10 mm wrench to remove the 6 bolts shown with yellow arrows Remove the plastic rivet at the green arrow location To remove the rivet pull the center part out first followed by the outer section Once the rivet has been removed the center cover will be loose 10 At this point the center cover can be removed from the underside of the v...
Page 8: ... center area down to clear the two metal tabs on the fender lip Be careful not to tear the liner as you remove it Once you have cleared the two tabs on the fender lip you should be able to pull the wheel well liner out Repeat the last three steps to remove the left side wheel well liner 15 Use a T15 bit to remove the 6 bolts shown with yellow arrows Remove the two push rivets in the two red arrow ...
Page 9: ...n with yellow arrows 18 Remove the plastic bracket from the last step by pushing it slightly forward and pulling down then disengage the hook that is shown with an arrow 19 Use a 7mm wrench to remove the 4 bolts around the back of the headlight that are shown here with arrows 2016 2020 LT1 Chevrolet Camaro 9 17 9 www magnusonsuperchargers com ...
Page 10: ...er and fascia near the seam on both sides as shown in the photo This will help to protect your paint while you remove the front fascia 23 Have someone help you with the removal of the front fascia Pull gently around the interface between the fender and the fascia to release the connections holding it in place Then pull the fascia forward 2016 2020 LT1 Chevrolet Camaro 9 17 10 www magnusonsuperchar...
Page 11: ...ove the panel covering the latch mechanism that is shown 26 Use a pencil to mark around the flange of the two bolt heads securing the hood latch assembly After marking the bolt locations use a 15 mm wrench to remove the two bolts shown with arrows 27 Remove the electrical connection that connects to the hood latch It is held in place by a clip and is located under the cross support behind the loca...
Page 12: ...rab the ball end of the actuator cable for the hood latch Pull the ball out of it socket to remove the cable from the latch assembly 31 Remove the radiator reservoir cap to help the fluid to drain faster in the next step Make sure your vehicle has cooled down before Make sure your vehicle has cooled down before proceeding proceeding Section 3 Coolant Drainage and Airbox Removal 2016 2020 LT1 Chevr...
Page 13: ...cap This will take about 15 20 minutes 33 Remove the hose that is being held in this photo by first disconnecting it from the clip shown with a green arrow and then disconnecting the two ends shown with yellow arrows 34 Disconnect the air hose going to the air inlet duct located at the front of the engine 35 Use an 8mm nut driver to remove the two hose clamps from the air inlet duct and remove the...
Page 14: ... shown with the arrow 38 Pull up at the area of the airbox shown with an arrow This will release the airbox so you can pull it up and out of the engine bay 39 If any of the rubber connectors remain on the airbox they should be removed and installed into their original location on the fender well shown here with arrows 2016 2020 LT1 Chevrolet Camaro 9 17 14 www magnusonsuperchargers com ...
Page 15: ...wn by first squeezing the two sides shown with arrows and then pulling it apart 42 Remove the two bolts that hold the resonator bracket in place using a T50 torx driver 43 Remove the resonator assembly shown Section 4 Electrical and Hose Line Disconnect 2016 2020 LT1 Chevrolet Camaro 9 17 15 www magnusonsuperchargers com ...
Page 16: ... resonator hose behind the brace 46 Open the two retainer clamps shown with the yellow arrows 47 Pull up at the side closer to the middle of the engine on the Camaro beauty covers shown with arrows to remove them 2016 2020 LT1 Chevrolet Camaro 9 17 16 www magnusonsuperchargers com ...
Page 17: ...ting studs shown with arrows Remove the bracket from the engine These are also the locations where the Camaro beauty covers were attached Now remove the manifold cover 51 Remove the EVAP line that is being held in this photo at the arrow locations 48 Unplug the Manifold Absolute Pressure MAP connection shown 2016 2020 LT1 Chevrolet Camaro 9 17 17 www magnusonsuperchargers com ...
Page 18: ...tion 54 Disconnect the PCV connection shown with an arrow There is a white release button that must be pressed first prior to removal Many of the future hoses that need to be removed will have this same release button 55 Press the release buttons on the hose connections and disconnect them from the two locations on the oil separator shown with arrows 2016 2020 LT1 Chevrolet Camaro 9 17 18 www magn...
Page 19: ... pack cover 57 After you have removed the cover make sure After you have removed the cover make sure to re install the oil filler cap to re install the oil filler cap 58 Use a T30 Torx driver to remove the two bolts holding the right side coil cover Once you have the coil cover loose you will be able to access the connection for the hose line shown with an arrow Remove this hose 59 Open the gas fi...
Page 20: ...while you push down on the hose This will release the connection Be careful while releasing the connection because fuel will be released Properly dispose of any fuel soaked rags after fuel line is removed 62 Place a cap on the fuel inlet line shown with a red arrow and a plug on the hose shown with a yellow arrow once the fuel line has been disconnected 63 Follow the same procedure to remove the f...
Page 21: ...tton on the PCV valve hose and disconnect it 67 Vacuum out any debris that is near the manifold valley Ensure that nothing gets Ensure that nothing gets inside the intake runners Inspect the intake inside the intake runners Inspect the intake runners for any debris runners for any debris R Remove the foam insulation shown 2016 2020 LT1 Chevrolet Camaro 9 17 21 www magnusonsuperchargers com ...
Page 22: ... your work environment or allow any debris to fall into the environment or allow any debris to fall into the exposed ports engine damage CAN occur exposed ports engine damage CAN occur 69 Use a 10 mm socket wrench to remove the fuel line bracket 70 Remove the steel security clip from the fuel line shown with the yellow arrow Also remove the plastic tether shown with the red arrow 71 Once again use...
Page 23: ...location shown highlighted in green Ensure Ensure that you slide the hose under hardline shown that you slide the hose under hardline shown with the red arrow with the red arrow 75 Ensure that you hear a click which indicates Ensure that you hear a click which indicates that the connection is secure Pull at the that the connection is secure Pull at the connection to verify it is secure connection ...
Page 24: ...ocated near the PCV valve that was just removed Make sure the bolt is properly centered in the plug area and press inwards as you rotate the bolt clockwise with a ratchet wrench Continue to tighten until you get three threads or about 1 4 of engagement from the bolt into the plug 79 Use a heat gun to heat up the area around the plug Heat for about 45 seconds This will soften the Loctite and allow ...
Page 25: ... particles have been cleaned out use denatured alcohol or acetone to clean out the bore thoroughly 83 Gather the following provided threaded plug Apply the provided Lubriplate grease to the Apply the provided Lubriplate grease to the O ring of this plug that will be installed where O ring of this plug that will be installed where the PCV valve was the PCV valve was 2016 2020 LT1 Chevrolet Camaro 9...
Page 26: ...ube shown 86 Install the supplied air tube in the end of the bore that the plug was removed from and lightly tap it in place until it bottoms out The area where the air tube steps down to the smaller diameter should be flush with the outer edge of the bore 87 Use a 15 mm socket and a ratchet wrench or breaker bar to attach at the tensioner shown with the arrow Turn the tensioner clockwise to relie...
Page 27: ... A C pulley and A C pulley 89 Cover pulleys with rags as shown to protect them from getting any fluid deposits It s VERY IMPORTANT to not get coolant on your It s VERY IMPORTANT to not get coolant on your engine pulleys The smallest amount can cause engine pulleys The smallest amount can cause Belt squeaking Belt squeaking 90 Disconnect the hose mounting clamps from the fan shroud at the three loc...
Page 28: ...the fan shroud 94 Mark the orientation of the radiator hose so it will get re installed properly later Remove the two spring clamps holding the upper radiator hose Then remove the upper radiator hose 95 Plug both connection points for the hose that was removed in the last step with rags 2016 2020 LT1 Chevrolet Camaro 9 17 28 www magnusonsuperchargers com ...
Page 29: ... line that will be disconnected First pull back the black plastic cover Then remove the spring clip using a pick or small screwdriver The next step shows a photo of the spring clip 98 Here is the spring clip that was removed in the last step 99 Once the spring clip is removed from the hose you can pull the hose out Carefully clean the port out with a clean towel and plug the port to prevent any de...
Page 30: ...ation of the fan shroud mount located under the radiator spigot on the right side of the engine bay 102 Remove the three lower fan shroud mounting bolts using a 7 mm socket wrench 103 Disconnect the transmission cooler line from the clip shown with the yellow arrow 2016 2020 LT1 Chevrolet Camaro 9 17 30 www magnusonsuperchargers com ...
Page 31: ...d of the crank pulley using a 24 mm impact socket and an air impact gun There is an auxiliary cooling line shown with an arrow that should also be disconnected to allow for more clearance The line can be cable tied out of the way after it is disconnected Section 7 Crank Pulley Replacement and Idler Installation 107 You may have to heat the bolt with a heat gun or torch to soften the locking chemic...
Page 32: ...he seal for any damage 110 Gather the provided pulley and the new bolt Apply motor oil to the inner bore and the Apply motor oil to the inner bore and the outer seal surface of the pulley shown with outer seal surface of the pulley shown with arrows arrows 111 Apply motor oil to the crank seal 2016 2020 LT1 Chevrolet Camaro 9 17 32 www magnusonsuperchargers com ...
Page 33: ... torque the First torque the provided bolt to 111 ft lbs Then loosen the provided bolt to 111 ft lbs Then loosen the bolt 360 degrees Now torque the bolt to 59 bolt 360 degrees Now torque the bolt to 59 ft lbs Then tighten an additional 125 using a ft lbs Then tighten an additional 125 using a torque angle meter torque angle meter 115 Gather all the provided tensioner hardware and brackets Apply L...
Page 34: ...be re used be re used 118 Install the two 100 mm long bolts with 15 mm heads in the locations shown with red arrows and the two 55 mm long bolts with 12 mm heads in the locations shown with yellow arrows 119 Torque the bolts with 15 mm heads to 25 Torque the bolts with 15 mm heads to 25 ft lbs and the two bolts with 12 mm heads to ft lbs and the two bolts with 12 mm heads to 18 ft lbs 18 ft lbs 20...
Page 35: ...x40mm bolts at all the arrow locations and tighten them using a 12 mm socket wrench Torque these Torque these three bolts to 18 ft lbs three bolts to 18 ft lbs 122 Place the provided larger ribbed pulley in the red arrow location using the provided bolt The other smaller ribbed pulley goes in the yellow arrow location The smooth idler pulley goes in the green arrow location Torque all Torque all t...
Page 36: ...stalling it in its original location Install the OEM spring clip to secure the transmission cooling line Slide the plastic ring cover over the spring clip once the connection has been properly secured 126 Use a 24 mm socket and ratchet wrench to rotate the crank pulley clockwise as you have someone locate the air conditioning belt in place Slip the belt fully around the crank pulley and pull push ...
Page 37: ...de of the engine by first pulling back on the red locking tab and then the connection can be pulled off shown with a green arrow Then unplug the spark plug wire shown with a red arrow Finally remove the two bolts shown with yellow arrows using a 10 mm socket wrench Repeat this process to remove the 4 right side coil packs Section 8 Coil Pack Removal and Stud Installation 131 Once you have removed a...
Page 38: ...easily pull this gasket out 133 Apply masking tape to all the inlets of the valve covers prior to cutting 134 Tape the bottom surface as well 135 Gather the supplied wedges for trimming your valve covers These may be another color 2016 2020 LT1 Chevrolet Camaro 9 17 38 www magnusonsuperchargers com ...
Page 39: ...ence as shown here 138 Cut each of the top coil pack mounts flush with the valve cover You will have to stop the saw to reposition the wedges for each cut 139 Once you have cut the upper coil pack mounts flush you will need to remove any sharp edges Also thoroughly clean all the debris from the covers once you have removed the sharp edges 2016 2020 LT1 Chevrolet Camaro 9 17 39 www magnusonsupercha...
Page 40: ... them on the heads Re install the gaskets on both valve covers 141 Gather the following bracket nuts and spacers You will need one set per side 142 Install the spacers on the studs as shown 143 Install the coil covers with the supplied lower mount as shown using the provided nuts 2016 2020 LT1 Chevrolet Camaro 9 17 40 www magnusonsuperchargers com ...
Page 41: ...the wires out of the way as shown here 146 Remove the 19 M6x30mm bolts around the perimeter of the lid and remove the lid Also remove the four screws holding the Magnuson Supercharger Emblems to gain access the 4 bolt locations that will be fitted with M6x30mm bolts later Section 9 Supercharger Preparation and Installation 147 Remove the 3 bolts holding the coolant manifold assembly at the front o...
Page 42: ... arrow locations shown the dashed arrow shows the bolt that is hidden from view and torque to torque to 106in lbs 106in lbs 150 Remove the blue tape from the intake ports Wipe down the intake port outer sealing surfaces with a rag coated with Tri flow Pull the coil harnesses to the sides to make clearance for supercharger installation Ensure that there are no tools or other items left in the valle...
Page 43: ...h time Then make a final pass at 106 in lbs time Then make a final pass at 106 in lbs following the torque sequence at the back of following the torque sequence at the back of this book this book E Ensure that the supercharger pulley nsure that the supercharger pulley still spins freely after full torque is applied still spins freely after full torque is applied 153 Place rags on top of the superc...
Page 44: ...y highlighted in green to the OEM connector shown with the arrow here 159 Route the longer wire from the last step to the opposite side of the engine routing it under the throttle body adapter as shown with the green dashed line The shorter wire will run in the opposite direction towards the fuse box Both of these connections will be plugged in later 2016 2020 LT1 Chevrolet Camaro 9 17 44 www magn...
Page 45: ...connector and install it over the connection shown on the provided MAF breakout IAT harness 162 Plug in the provided breakout harness to the OEM MAF connection 163 Route the breakout IAT connection under the supercharger inlet and plug it in where shown The wire has been highlighted in green for clarity 2016 2020 LT1 Chevrolet Camaro 9 17 45 www magnusonsuperchargers com ...
Page 46: ...n arrow should face away from the barb on the valley should face away from the barb on the valley cover It is extremely important to orient the cover It is extremely important to orient the PCV valve properly to avoid engine damage PCV valve properly to avoid engine damage Use a provided black spring clamp to secure this connection 166 Connect the provided PCV hose line from the last step to the 9...
Page 47: ... only temporarily remove the rivet shown with green arrow 169 Remove the two plastic rivets shown with arrows holding the left side air deflector 170 Remove the one plastic rivet hidden behind the deflector tab and located on top of the bumper impact bar 171 Remove the deflector that just had the plastic rivets removed 2016 2020 LT1 Chevrolet Camaro 9 17 47 www magnusonsuperchargers com ...
Page 48: ...tic rivet shown with the yellow arrow 174 Remove the rubber cover shown 175 Remove the three plastic rivets shown with the arrows One is hidden behind the pump shown with a dashed arrow The rivets shown with the red arrows may be easier to remove from the back side which is shown in the next step 2016 2020 LT1 Chevrolet Camaro 9 17 48 www magnusonsuperchargers com ...
Page 49: ...ws Once these last two rivets have been removed slide the panel down to get it past the vacuum pump 178 Pull out on the lower part of the panel and away to clear the two metal tabs shown with green arrows Now slide the panel down to get it past the vacuum pump 179 Remove the plastic rivet shown with an arrow The brake air duct should now pivot out of the way 2016 2020 LT1 Chevrolet Camaro 9 17 49 ...
Page 50: ...move the two plastic rivets shown with arrows 182 Remove the wire harness retainer clip from the stud that holds the horns in place Remove the stud bolt securing the horns Use a 10 mm deep socket 183 Unplug the horn electrical connection shown 2016 2020 LT1 Chevrolet Camaro 9 17 50 www magnusonsuperchargers com ...
Page 51: ...radiator In the next step you will see a photo of the back side of this panel after drilling 186 Here you can see the location for the hole in the last step Clean the edges of the hole and then remove the protective cardboard 187 Gather the following provided items The Low Temperature Radiator LTR two upper support brackets and 6 pop rivets are shown 2016 2020 LT1 Chevrolet Camaro 9 17 51 www magn...
Page 52: ... out panel 190 Attach the lower bracket for the LTR in the locations shown Install the rubber bushings into the lower brackets The studs of the brackets should slip into the two adjacent holes The rubber bushings will mount to the bottom studs of the LTR Repeat this process on the opposite side of the LTR You will need to lightly trim some plastic near the right side bracket for clearance 191 Loos...
Page 53: ...ghten the lower bracket nuts and torque the upper bolts lower bracket nuts and torque the upper bolts to 106 in lbs to 106 in lbs 194 Cut the retaining clip from for the electrical wire that runs over the bumper crash bar near the horn assembly 195 Cut the other electrical wire retainer located near the left and right angle brace on the bumper crash bar 2016 2020 LT1 Chevrolet Camaro 9 17 53 www m...
Page 54: ...t on the wire near the stud location for the horn Make sure it is oriented as shown 198 Replace the OEM horn bracket with the provided horn bracket shown 199 Install the horn assembly in the original location with the orientation shown Make sure the gaps match shown with red arrows Torque the bolt stud to 106 in lbs Torque the bolt stud to 106 in lbs 2016 2020 LT1 Chevrolet Camaro 9 17 54 www magn...
Page 55: ...sed to hold a bracket in the following step Use a 15 mm swivel socket or open end wrench to get into the tight area Section 11 Intercooler Pump Plumbing and Electrical Connection 203 Install the provided bracket as seen here using the two OEM bolts that were removed in the previous step The bracket is normally black but has been highlighted in green for clarity 2016 2020 LT1 Chevrolet Camaro 9 17 ...
Page 56: ... that was installed on the left fender well with the inlet for the pump facing up and the discharge facing forward 206 Use a 10 mm socket to remove the left and right upper radiator supports shown to allow clearance for the hose assembly in the next step 207 Apply a thin layer of Lubriplate grease to both sides of the provided hose assembly shown This will provide the connection between the lower ...
Page 57: ...to the discharge of the intercooler pump The hardline should sit just below the two bolts shown with arrows 210 Connect the hose assembly end with the 90 fitting to the lower LTR connection and secure with a provided spring clamp shown with an arrow 211 Connect the hose assembly end to the intercooler pump discharge using a provided spring clamp First place the opened clamp over the hose then slip...
Page 58: ... the provided 3 x 20 hose to the intercooler pump inlet with a spring clamp shown with a yellow arrow and secure in place with a provided double wrap cable tie shown with a green arrow Place the supplied 1 piece of slit hose shown with a red arrow over the A C hardline to allow the tie wrap to grip it 214 Install the other end of the hose shown in the last step to the reservoir at the yellow arrow...
Page 59: ...ith the provided M6 x 25 mm bolt shown with the green washer in this image 218 Apply a light coat of Lubriplate grease to the O ring on the EVAP solenoid 219 Install the EVAP solenoid in the location Install the EVAP solenoid in the location shown and torque to 106 in lbs shown and torque to 106 in lbs Also plug in the electrical connection to the EVAP solenoid 2016 2020 LT1 Chevrolet Camaro 9 17 ...
Page 60: ...nnects to the EVAP solenoid 223 Remove the terminal cover on the back of the fuse box There are two clips on either side of this cover that must be disengaged prior to removal 222 Install the provided brake booster hose shown from the connection near the left fender well to the rear port on the supercharger inlet 2016 2020 LT1 Chevrolet Camaro 9 17 60 www magnusonsuperchargers com ...
Page 61: ...l be loaded onto the front stud just loosened behind the fuse box in the last step This bracket goes between the fuse box and fender rail 227 Here the front slot of the bracket from the last step is being installed shown with the green arrow behind the box at the front mounting stud The slot towards the back will drop straight down into the rear stud location on the fuse box shown with the yellow ...
Page 62: ... Fuse Holder Fuse Holder Trigger Trigger 230 Route the intercooler pump terminal shown with an arrow under the fender rail The wire has been partially highlighted in green for visual clarity 231 Mount the relay under the fender rail and to the stud on the bracket that was installed behind the fuse box using the mounting hole shown here with an arrow and a provided nut 2016 2020 LT1 Chevrolet Camar...
Page 63: ...pposite side of the bracket mounted behind the fuse box Remove the cover to allow installation of the provided 15 amp fuse 234 Here is a photo of the 15 amp fuse installed Replace the fuse cover and mount the fuse cover to the stud location shown with an arrow 235 Tighten the fuse cover in place with a provided nut 2016 2020 LT1 Chevrolet Camaro 9 17 63 www magnusonsuperchargers com ...
Page 64: ... the fuse box until it reaches the location shown with an arrow 238 Connect the trigger wire to the EVAP wire connector that was installed earlier at the front of the supercharger 239 Secure the wire connection made in the last step to the hose shown with a cable tie Trim off the excess cable tie once it has been secured 2016 2020 LT1 Chevrolet Camaro 9 17 64 www magnusonsuperchargers com ...
Page 65: ... of the OEM terminal and tighten the OEM nut 242 Route the power wire for the intercooler pump as shown by the green highlighted area Secure in place using two provided cable ties shown with arrows in this image 243 Route the power wire for the intercooler pump under the steel tube shown and cable tie it to that same tube in the two locations shown with arrows 2016 2020 LT1 Chevrolet Camaro 9 17 6...
Page 66: ... the six M5x16mm socket head bolts and six M5x12mm button head bolts that were removed from the coolant manifolds and the charge air coolers and re install these items in the locations shown in the next steps 247 Reinstall the charge air coolers 2 each Ensure that the port holes match with holes in the housing Secure with the six M5x12mm button head bolts from the last step in the locations where ...
Page 67: ...he pulley and inlet This will connect at the lower charge air cooler spigot and the Y connector on the other side 248 Gather the coolant manifolds shown that were removed earlier Relube all the O rings Relube all the O rings with the provided Lubriplate grease prior to with the provided Lubriplate grease prior to reinstalling the coolant manifolds reinstalling the coolant manifolds 251 Use hose cl...
Page 68: ...e a worm gear clamp to secure the hose at the red arrow location at the back of the reservoir 254 Install the hose end for the lower charge air cooler connections at the upper hardline going to the front Low Temperature Radiator and secure with a provided spring clamp 255 Apply Loctite 242 Apply Loctite 242 to the 19 M6x20mm bolts that were removed from the lid and 4 more M6x30mm bolts that were p...
Page 69: ...ncorporate an Adel hose clamp The four M6x30mm bolts are for the center lid locations 257 Place a provided M6 washer in the corner lid location shown 258 Install the provided Adel clamp around the fuel line 259 Install the last provided M6x20mm bolt in the corner lid location through the Adel clamp and washer that were just installed 2016 2020 LT1 Chevrolet Camaro 9 17 69 www magnusonsuperchargers...
Page 70: ...he two provided Magnuson Supercharged badges is optional Be aware that these badges will be difficult to remove once the adhesive has been applied Install the badges using the provided bolts 263 Use a belt tensioning wrench or other suitable socket and wrench to provide slack in the belt to install it according to the routing diagram given at the back of this manual Rotate the supercharger tensioner...
Page 71: ... plug in the electrical connection to the throttle body 266 Ensure that the air filter is clean before installation Install the OEM airbox and filter along with the provided rubber air duct Use the two provided hose clamps to tighten the air duct in place 267 Plug in the MAF sensor connector 2016 2020 LT1 Chevrolet Camaro 9 17 71 www magnusonsuperchargers com ...
Page 72: ...ded vent hose to the arrow location The opposite end will be connected in the next step 270 Connect the opposite end of the hose from the last step to the rubber air duct 271 Re connect the OEM vent hose at the left valve cover 2016 2020 LT1 Chevrolet Camaro 9 17 72 www magnusonsuperchargers com ...
Page 73: ...ighlighted in green 274 Install the Adel clamp at the location shown to secure the OEM vent hose using a provided Adel Clamp and M6x8mm bolt Section 13 Final Assembly and Testing 275 Re install the hood latch ensuring the alignment marks line up Torque to 18 ft lbs Torque to 18 ft lbs 2016 2020 LT1 Chevrolet Camaro 9 17 73 www magnusonsuperchargers com ...
Page 74: ...rom the last step back into its original location 278 Secure the ground wires in their original locations 279 Trim the upper plastic rivet shown down by 25 for clearance and then reinstall the panel shown Also re install the left brake duct at this time using the three plastic rivets that were removed 2016 2020 LT1 Chevrolet Camaro 9 17 74 www magnusonsuperchargers com ...
Page 75: ...onds Fill reservoir full again and continue this process until fluid is circulating At this time check your intercooler system and fuel system for leaks After you have filled your intercooler system and verified the connections are leak free reinstall headlights fascia and grill following steps shown in Section 2 in reverse order 283 Reinstall wheels and torque to manufacture s specifications This...
Page 76: ...normal Check bleed the charge air cooler reservoir as needed After the initial test drive gradually work the vehicle to wide open throttle runs listen for any engine detonation pinging If engine detonation is present let up on the throttle immediately Most detonation causes are low octane gasoline still in the tank Affix the Premium Fuel Only decal on the inside of the fuel fill door If you have que...
Page 77: ...Supercharger Belt Routing Diagram Appendix 2016 2020 LT1 Chevrolet Camaro 9 17 77 www magnusonsuperchargers com ...
Page 78: ...Torque Specifications Supercharger to Cylinder Heads 106in lbs 2016 2020 LT1 Chevrolet Camaro 9 17 78 www magnusonsuperchargers com ...
Page 79: ...Lid to Supercharger Housing 106in lbs Torque Specifications 2016 2020 LT1 Chevrolet Camaro 9 17 79 www magnusonsuperchargers com ...
Page 80: ...Please enjoy your Magnuson Super Charged performance responsibly Use only premium gasoline fuel 91 octane or better Use only premium gasoline fuel 91 octane or better ...